Mold Kit Test: A Safe DIY Mold Detection Guide for Homes
Learn how to use a mold kit test safely, interpret results, and decide when to seek professional help. Mold Removal Lab explains kit reliability and next steps for home health.

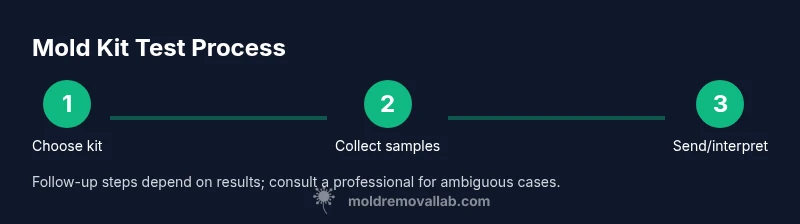
You can screen for potential mold in your home using a mold kit test. This guide explains how to choose a kit, collect samples safely, interpret results, and decide when to act or call a pro. Key steps: pick a kit with clear instructions, collect samples from suspect areas, compare with controls, and follow up with professional testing if needed.
What is a mold kit test?
A mold kit test is a consumer-friendly option to screen for potential mold in your home. The kit typically includes sampling materials (swabs, tapes, or petri dishes), a collection protocol, and a means to analyze results (either at home or via a mail-in lab). According to Mold Removal Lab, a mold kit test can help identify likely problem areas, but it is not a definitive diagnosis; results depend on sampling quality, kit design, and lab interpretation. The Mold Removal Lab team emphasizes that kit results should prompt further investigation by a qualified professional when elevated or ambiguous.
DIY mold kit tests are most helpful as an initial screening tool to flag areas that deserve closer inspection. They should be interpreted in the context of other evidence, including visible growth, musty odors, and indoor humidity levels. When used correctly, these tests can guide next steps and help homeowners focus remediation efforts where they matter most.
How to choose the right kit
Choosing the right mold kit test starts with understanding your goals and budget. Look for kits that offer clear, step-by-step instructions, documented sample collection methods, and explicit guidance on where to send samples or how to incubate them. Kits often use swabs for surface sampling or petri dishes for culturing potential colonies. The diversity of kits means some are better suited for quick screening, while others are designed for more thorough analyses. Based on Mold Removal Lab research, kit performance varies by sample type and environment, so treat results as directional signals rather than final proof. Consider whether you need donor controls, weatherproof packaging for shipping, and access to a customer support line for questions. Also verify that the kit includes pre-labeled containers and enough materials for multiple samples from different rooms or materials (drywall, carpet, bathroom grout).
Beyond cost and convenience, ensure the kit aligns with any local regulations about sampling and lab processing. Reading customer reviews and the manufacturer’s FAQ can reveal how easy the kit is to use and how results are reported. If you have known water damage or ongoing moisture issues, pair a DIY kit with targeted moisture control strategies to maximize the usefulness of your results.
Safety and preparation before testing
Before starting a mold kit test, set up a clean, well-lit workspace away from dust-prone areas. Put on disposable gloves, a mask with at least an N95 rating if you’re sampling visible mold, and eye protection. Ventilate the area if possible, but avoid cross-contamination by keeping other parts of the home separate from the testing area. Remove pets and cover furniture to minimize disruption. Do not eat or touch face coverings during sampling, and wash hands thoroughly after handling samples. Store samples in their provided containers according to the kit’s instructions and label them clearly with location and date. If there is ongoing moisture or visible growth, address those moisture sources first to prevent skewed results in later testing. According to Mold Removal Lab, proper hygiene and containment are essential to avoid false positives or contamination that could mislead decisions about remediation.
Step-by-step sampling process
Effective sampling hinges on consistency and cleanliness. Begin by selecting representative areas that have shown signs of moisture, staining, or odors. Use the kit’s supplied tools to collect samples exactly as described in the instructions. Keep samples away from direct sunlight and extreme temperatures until you’ve sealed and labeled them. If using swabs, sweep the surface with even pressure to collect material; if using a petri dish, avoid touching the inner surface and place it in a controlled environment as directed. Place all samples in the provided containers, seal tightly, and log the exact location, date, and any observations. Finally, ship or submit samples to the lab per the kit’s guidelines and record the tracking number if available. This approach minimizes contamination and improves the reliability of your results.
Interpreting results from a mold kit test
Interpreting mold kit results requires careful reading of the report and understanding what the sample represents. A positive result on a surface sample indicates mold activity in that area, but not necessarily airborne mold levels throughout the home. Look for patterns across multiple samples: repeated positives in the same zone suggest a localized mold issue; a single positive with many negatives could be due to contamination or sampling variability. Compare results against the kit’s controls and reference materials provided with the kit. If the report indicates a subtypes of mold, note that many DIY kits do not reliably identify species. In all cases, treat any positive finding as a prompt for corrective action, including moisture control and, if needed, professional testing to confirm the scope and species involved.
Common limitations of mold kit tests
DIY mold kit tests have limitations that homeowners should understand. Sampling might miss hidden mold behind walls or inside HVAC ducts, leading to false negatives. Culturing methods may not detect non-viable mold spores, and some kits cannot distinguish between harmless environmental molds and hazardous species. Printed results sometimes lack context about indoor air quality, exposure duration, or concentration levels. Environmental factors like humidity, temperature, and surface type can skew outcomes. Therefore, use kit results as a screening tool rather than a final diagnosis. If there are persistent symptoms or visible mold growth, escalate to a professional assessment.
When to act: turning results into a remediation plan
If a mold kit test yields positive findings in multiple areas or in critical zones such as bathrooms, kitchens, basements, or near HVAC intakes, begin remediation planning. Address moisture sources (leaks, condensation, improper ventilation) and improve airflow with exhaust fans or dehumidifiers. Collect a second kit sample only after moisture issues have been resolved to avoid misleading follow-up results. For larger or more complex issues, or if you have health concerns or a compromised indoor environment (elderly, children, or immunocompromised individuals), consult a licensed mold remediation professional. The goal is to reduce moisture, clean affected materials, and prevent recurrence while ensuring indoor air quality is safe.
DIY actions to improve indoor air quality after testing
Independent from mold kit test results, you can take practical steps to improve indoor air quality. Reduce humidity to below 50% with dehumidifiers and well-functioning ventilation. Increase airflow by opening windows when feasible and using air purifiers with true HEPA filters in problematic rooms. Regularly clean suspected areas with mold-friendly cleaners and promptly repair water leaks. Maintain a routine inspection schedule for signs of moisture and ongoing humidity in high-risk areas such as basements and bathrooms. Integrating these habits helps prevent mold growth and supports healthier indoor air, regardless of kit outcomes.
Next steps after testing: turning data into action
After receiving kit results, plan a follow-up strategy. If results are ambiguous or show potential mold growth, consider a professional testing service to corroborate findings and outline a remediation plan. If humidity or water damage is ongoing, fix the root cause and re-test to verify that the problem has been resolved. Document all steps, including moisture repairs, cleaning methods, and second-round testing. By combining DIY screening with professional guidance, you can responsibly reduce mold risks and protect occupant health.
What to do with your results: a practical action plan
Use your mold kit test results to create a prioritized action list. Start with moisture control, then contain affected areas, clean or replace contaminated materials, and schedule a professional assessment if necessary. Keep a log of dates, locations, observations, and sample IDs. Share the results with your primary care provider if household members have health concerns, and consider air-quality testing if advised by professionals. The aim is to reduce moisture, prevent re-growth, and maintain healthy indoor conditions over time.
Tools & Materials
- DIY mold test kit(Includes sampling swabs, containers, and instructions)
- Disposable gloves(Non-latex recommended; change between samples)
- Sealable sample bags or vials(Pre-labeled if possible; ensure secure seal)
- Alcohol wipes or disinfectant(For surface prep if advised by kit)
- Permanent marker and notebook(Label samples with location and date)
- Face mask(Optional if spores are apparent; N95 recommended in some cases)
Steps
Estimated time: 30-60 minutes (sampling) + 3-7 days for lab results
- 1
Gather materials and prepare space
Lay out all kit components on a clean surface and ensure you have gloves and labeling materials. Close doors to the testing area to limit cross-contamination and minimize airflow that could carry particles to other rooms.
Tip: Label containers before sampling to avoid mix-ups. - 2
Dress for safety and set up controls
Wear gloves and a mask if recommended by the kit. Prepare negative control areas (rooms you believe are mold-free) to compare results later.
Tip: Use a dedicated area for testing to avoid sample mix-ups. - 3
Collect the samples
Follow the kit instructions precisely for each sample location. Use the provided swabs or plates, apply consistent pressure, and avoid touching the inner surfaces.
Tip: Collect multiple samples from different zones for comparison. - 4
Label and seal the samples
Immediately label each container with location, date, and any observations. Seal containers securely to prevent leakage or contamination.
Tip: Double-check labels to prevent mix-ups during shipping. - 5
Submit or store samples
Submit samples to the lab per the kit’s guidelines or store them as directed until shipping. Keep a record of tracking information if you mail them.
Tip: Ship promptly if required to preserve sample integrity. - 6
Wait for results
Await the laboratory report or kit interpretation. Some kits provide at-home readouts, others mail the samples to a lab for analysis.
Tip: Avoid opening containers during the wait to prevent contamination. - 7
Interpret and act on results
Review the report in the kit’s format. If mold is detected, plan moisture control and, if needed, contact a professional for remediation.
Tip: Treat results as a guide, not a guarantee; confirm with a pro if in doubt.
FAQ
Are mold kit tests reliable for detecting mold?
DIY mold kit tests can indicate mold presence but are not definitive; results depend on sampling quality and lab interpretation. Use them as screening tools to guide next steps rather than final proof.
DIY mold kit tests can indicate mold presence but aren't definitive; treat results as a screening tool and consider professional testing for confirmation.
Can I trust a negative result from a mold kit test?
A negative result may occur if mold wasn’t sampled or if there is hidden mold. Sampling errors can lead to false negatives, so contextual evidence matters.
A negative result can be unreliable if hidden mold is present or sampling missed affected areas; consider a professional assessment if moisture issues persist.
What should I do if a kit shows positive mold results?
Follow the kit instructions, consider repeating samples for confirmation, and contact a professional for a formal assessment and remediation plan.
If positive, follow the instructions, re-check with additional samples, and call a pro for a full assessment and remediation plan.
How long does it take to get results from a mold kit test?
Turnaround times vary by provider; expect several days to a week for mail-in labs, longer if shipping delays occur.
Most results come back in a few days to a week, depending on the lab and shipping.
Are DIY kits safe to use around children?
Yes, with proper precautions. Wear gloves, keep samples away from children, and dispose of materials according to instructions.
Yes, just follow safety steps, keep kids away during sampling, and dispose of materials properly.
What is the difference between a DIY mold kit and a professional mold inspection?
DIY kits screen quickly and identify potential problem areas, while professionals use advanced tools, air sampling, and lab analysis for a comprehensive assessment.
DIY kits are screening tools; professionals provide a full assessment with lab analysis and remediation plans.
Watch Video
The Essentials
- Use kit results to highlight areas for further inspection
- Moisture control is the root fix for most mold problems
- Interpret results with kit guides; confirm concerns with a professional
- Maintain proper safety and containment during sampling
- Mold kit tests are screening tools, not definitive diagnoses