DIY Mold Test Kits: A Practical Home Guide
Discover how to use diy mold test kits to screen for mold at home. This guide explains kit types, sampling steps, interpreting results, and when to call a professional for health and safety — with practical tips for homeowners.

DIY mold test kits provide an at-home screen for mold by analyzing air or surface samples. They offer quick guidance, but are not a substitute for professional testing when health concerns are present. According to Mold Removal Lab Team, these kits are best used as an initial step to flag potential issues before deeper inspection.
What are diy mold test kits?
Diy mold test kits are consumer supplies designed to collect samples for lab analysis, either from the air or from surfaces. They are a practical first step for homeowners and renters who want to know if mold is present and where it might be growing. The kits typically include collection devices, instructions, and a pre-paid route to a certified lab. According to Mold Removal Lab Team, these kits are most effective when used to screen suspicious areas rather than to diagnose health conditions. They are not a substitute for professional inspections when you’re dealing with ongoing moisture problems, hidden growth, or health symptoms. For many households, a kit offers a quick, low-cost indicator that triggers a deeper investigation if results are positive. In 2026, Mold Removal Lab analysis shows that the quality of home testing can vary widely by brand and by how carefully the sample is collected and labeled. Overall, these kits empower homeowners to take an initial look before committing to more costly or invasive options.
How DIY mold test kits work
Most kits operate by collecting a sample (air, surface, or bulk) and sending it to a lab for analysis. The result is a report that indicates whether mold spores or DNA were detected above a baseline threshold. The process is designed to be user-friendly: you follow the included steps, seal samples, and mail them to the lab or upload data via an app depending on the kit. Labs then compare your samples to reference data and return a report that lists detected species or broad categories. The key takeaway is that these reports provide a presence/absence signal and sometimes a concentration estimate, but they do not replace professional interpretation in terms of health risk. The Mold Removal Lab team emphasizes that environmental conditions, sampling locations, and indoor humidity all influence results, so safer conclusions come from integrating lab data with moisture control actions.
Types of DIY mold test kits
There are several formats that cater to different needs:
- Air sampling kits use a small device to capture airborne spores over a short period. They can indicate current air quality but may miss localized growth behind walls.
- Surface sampling kits use swabs or tapes to collect material from visible surfaces, such as walls or fixtures. These are useful when you see staining, odors, or suspicious patches.
- Bulk sample kits collect a larger piece of material (like a chunk of drywall or insulation) for lab analysis. Bulk samples can sometimes reveal species that surface swabs miss.
Each type has trade-offs in sensitivity, cost, and turnaround time. The best choice depends on your symptoms, moisture history, and what you’re trying to identify. The key is to follow the kit’s exact instructions and to compare results against consistent sampling conditions.
Choosing the right kit for your situation
Selecting a kit should hinge on how you plan to act on the results. For quick screening, a surface swab kit paired with a mail-in lab option is usually sufficient. If you’re investigating a moisture-prone area like a basement, an air-sampling kit may offer more context about ongoing airborne exposures. Look for clear collection methods, easy-to-follow labeling, and a lab that provides readable, actionable reports. Pay attention to the kit’s lab accreditation and whether the results include confidence levels or mentions of detection limits. Remember that no at-home test is a substitute for a professional assessment when health symptoms are present or when you suspect widespread hidden growth.
Interpreting the laboratory report
Lab reports from diy mold test kits typically indicate whether mold was detected and may list species or categories, along with concentration estimates. Interpreting these numbers requires understanding detection limits and the context of your home’s moisture profile. A positive result does not automatically imply a dangerous health risk; it flags an area for moisture control and inspection. Conversely, a negative result does not guarantee a mold-free environment if sampling was limited. Always correlate results with visual cues, odors, humidity readings, and any health symptoms among occupants. The Mold Removal Lab Team recommends treating any positive signal as a prompt to address humidity, leak sources, and ventilation.
Common pitfalls and limitations of DIY kits
DIY mold test kits offer a convenient first step, but they have limitations. Sampling errors, improper sealing, delayed mailing, or testing during transient humidity can skew results. Some kits report broad categories rather than species, which can limit treatment decisions. Additionally, weather and seasonal factors influence mold spore presence, so results may vary by time of day or season. For most homeowners, DIY kits are best used as a trigger for further investigation, not as the final word on indoor air quality. Knowing their limits helps you plan a safer remediation path.
Safety and health considerations
Mold spores can affect allergic individuals and those with asthma or compromised immunity. When sampling, always wear gloves and a mask if there’s visible mold or a strong odor. Keep the testing area well-ventilated but avoid creating drafts that could spread spores. After sampling, wash hands thoroughly and dispose of contaminated materials according to kit instructions. If any mold growth is extensive, or if you experience persistent symptoms, contact a licensed professional promptly. Remember that moisture control—fixing leaks, reducing humidity, and improving ventilation—often has a bigger impact on health than the choice of testing kit alone.
When to call a professional
If the test results indicate significant mold presence, if growth is behind walls, or if you have health concerns, a professional mold inspection is warranted. Pro remediation teams can assess structural damage, identify hidden moisture sources, and provide comprehensive cleanup with proper containment. In many cases, a DIY test is the first step that leads to a more thorough, professional evaluation. For persistent moisture problems or if you’re renting and the landlord is unresponsive, Mold Removal Lab recommends pursuing guidance from local health or housing authorities and documenting moisture events.
Real-world scenarios and homeowner tips
Homeowners often find success by pairing a diy mold test kit with proactive moisture management. For example, in a damp basement, a kit can confirm mold presence after fixing a leak and improving ventilation. In kitchens and bathrooms, surface swabs can help verify if cleaning and ventilation improvements reduced growth. The key tips are to test in multiple, representative locations, label samples clearly, and act quickly on positive results by addressing underlying moisture. By combining screening with moisture control, you can reduce the risk of mold-related health issues and property damage.
Tools & Materials
- DIY mold test kit (air, surface, or bulk)(Choose a kit with clear lab submission options and explicit sampling instructions.)
- Nitrile gloves(Protect your hands when collecting samples.)
- Face mask (N95 preferred)(Minimize inhalation of mold spores during sampling.)
- Alcohol wipes or disinfectant(Sanitize sampling surface before collection.)
- Sealable sample bags or tubes(Ensure proper labeling and containment.)
- Clean notebook and pen(Record sample locations and times.)
- Return mailer or digital data submission access(Follow kit instructions for lab submission.)
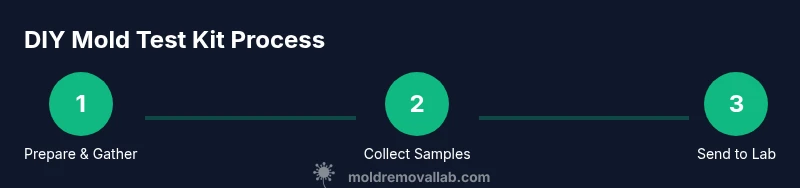
Steps
Estimated time: 30-60 minutes
- 1
Gather all kit materials
Lay out the kit, gloves, wipes, tape or swabs, and labeling supplies in a clean area dedicated to sampling.
Tip: Check you have the correct return label and lab submission form before you start. - 2
Prepare the sampling area
Clear the area and wipe surfaces with disinfectant. Allow surfaces to dry completely before sampling.
Tip: Avoid high-traffic areas during sampling to prevent contamination. - 3
Collect air sample according to kit
Follow the kit’s breathing or pump mechanism to capture a representative air sample for the required duration.
Tip: Do not disturb the area while sampling; keep doors and windows steady. - 4
Collect surface or bulk sample
Use the provided swab, tape, or tool to sample a defined area; avoid touching the sampling end after collection.
Tip: Label the location and surface clearly on the sample container. - 5
Label each sample clearly
Assign a unique identifier and write the location, date, and time on the label.
Tip: Keep a simple map or note of where each sample came from for later comparison. - 6
Seal and prepare for transport
Seal containers and place them in the return package as directed by the kit.
Tip: Double-check seals to prevent leaks during transit. - 7
Submit samples to the lab
Send the package using the provided label or upload associated data if required by the kit.
Tip: Track shipment if a tracking option is available to confirm delivery.
FAQ
Are diy mold test kits accurate for all mold types?
DIY kits provide a screening signal and may not identify all mold species present. Results depend on sampling method, location, and lab analysis. For health concerns or hidden growth, professional testing is recommended.
DIY kits screen for mold but may not detect every species. For health concerns or hidden growth, you should seek professional testing.
How long does it take to get results?
Most mail-in labs return results within several days to a couple of weeks, depending on the lab workload and shipping times. Some kits provide faster digital reports, but accuracy still depends on proper sampling.
Results usually come in within days to a couple of weeks, depending on the lab and shipping.
Can I use a DIY kit in a basement or bathroom?
Yes, but basements tend to have higher moisture; bathrooms are common hotspots. Ensure the area is representative and not just the most obvious spot. Multiple samples across the space provide better context.
Yes, but sample across multiple spots to get a better picture of exposure.
What should I do if the test is positive?
Address moisture sources (leaks, humidity), improve ventilation, and consider a professional assessment for remediation. Keep documentation of findings and actions taken.
If positive, fix moisture, improve ventilation, and consider pro remediation.
Are renters allowed to use these kits?
Most kits are renter-friendly, but check with your landlord and local regulations. Use the results to inform responsible occupancy decisions and moisture control practices.
Renters can use them, but check lease terms and local rules.
Do results confirm health risks?
No, lab results indicate mold presence or absence, not direct health risk. Health risk depends on exposure duration, sensitivity, and underlying conditions.
Results show presence, not direct health risk alone; consider symptoms and exposure.
Watch Video
The Essentials
- DIY mold test kits screen but do not diagnose health risks.
- Choose kit type based on area and goals, then follow instructions exactly.
- Positive results warrant moisture control and professional follow-up.
- Maintain rigorous labeling and sample handling to avoid contamination.
- Use results as a trigger for deeper inspection, not a final verdict.