How to Tell If There Is Mold in Your House: A Practical Guide
Learn practical signs, moisture links, and when to test or call a pro. A step-by-step homeowner guide from Mold Removal Lab to assess mold risk safely.

If you’re wondering how to tell if there is mold in your house, start with the basics: look for musty odors, visible growth, and moisture or water damage. Do a careful visual survey, check humidity levels, and note any leaks or condensation. If signs appear, isolate the area and decide whether to test or call a professional for remediation.
What mold is and why it matters
If you're wondering how to tell if there is mold in your house, start with understanding what mold is and why it matters for health and structural integrity. Mold refers to a group of fungi that thrive in damp, moist spaces and reproduce via spores that travel through the air. Exposure can irritate the eyes, skin, and lungs, and certain species produce mycotoxins. For homeowners, mold is not only a cosmetic nuisance; it signals hidden moisture problems that can lead to wood rot, staining, and degraded indoor air quality. By recognizing the most common signs and knowing when to test or call a pro, you can protect your home and family. This section introduces the core signs you'll use to decide whether to investigate further and how to approach remediation safely, following guidance from Mold Removal Lab. %MoldRemovalLab%Signposting: health, moisture, and structural indicators are intertwined, so your plan should address both the mold itself and its moisture source.
Quick environmental clues: musty odors and visible growth
Mold often reveals itself through a musty, earthy odor that you notice more strongly in damp areas like basements, bathrooms, or laundry rooms. Visible growth can appear as dark, green, black, or white patches on ceilings, walls, or around windows. Water stains, bubbling wallpaper, peeling paint, and damp upholstery can accompany mold growth. Remember that odor alone is not definitive—mold behind walls or under flooring can exist without obvious surface growth. A systematic inspection should combine scent cues with physical signs.
In many homes, mold grows where moisture lingers after a leak or ongoing condensation. If you repeatedly see foggy windows, damp closets, or damp air in particular rooms, these are red flags that require closer scrutiny. Only a handful of common mold species cause acute health reactions, but several can trigger allergies, asthma symptoms, or skin irritation. According to Mold Removal Lab analysis, moisture problems are a leading predictor of mold risk, so addressing humidity is a critical first step.
Common places mold hides in homes
Mold does not only appear in obvious places. It often hides in areas with persistent moisture or water intrusion. Common spots include bathrooms with poor ventilation, basements and crawl spaces, kitchens around sinks and dishwashers, under sinks where leaks occur, behind drywall near plumbing, around windows with condensation, and along HVAC ducts where damp air can promote growth. Don’t overlook attic corners where roof leaks may unfold slowly, or laundry rooms where humid air meets cooler walls. Regular checks in these zones can catch problems early before more serious damage develops.
How moisture and humidity drive mold growth
Mold requires moisture to thrive, so controlling humidity is a foundational prevention strategy. Relative humidity levels above 50-60% create favorable conditions for many common indoor molds, but some species can grow at lower levels if moisture is present for extended periods. Sources of moisture include leaks, roof damage, plumbing failures, high indoor humidity from cooking and showering, and poor ventilation. Air circulation helps humidity dissipate, while dehumidification reduces the overall moisture load. If you notice frequent condensation on windows or damp walls after rain, these signals point to moisture management needs before mold becomes established.
Do-it-yourself checks: safe inspection approach
A careful DIY inspection can identify potential mold issues without specialized equipment. Begin with safety: wear an N95 respirator, gloves, and eye protection. Photograph any suspicious patches and note exact locations. Check for visible water damage, staining, and musty odor. Use a moisture meter or hygrometer to record humidity in affected rooms, aiming to keep indoor RH below 50-60% where possible. Inspect behind appliances, under sinks, and in crawl spaces, paying special attention to areas with prior leaks or poor ventilation. Always ensure you have adequate light and a clear exit path if you encounter moldy areas requiring careful handling.
When to test for mold and how tests work
If DIY checks raise concerns, you may consider mold testing to determine species and concentration. There are several test types: surface swab tests, air samples, and bulk samples. Surface swabs identify apparent growth, while air tests measure spores in the air. Keep in mind that many factors influence results, including recent cleaning, ventilation, and the presence of pets or occupants. Home test kits vary in quality, and professional labs provide more reliable interpretations. Regardless of the method, testing should complement, not replace, remediation planning and moisture control.
Professional remediation: criteria and expectations
Professional remediation is typically recommended when mold covers a large area (often beyond 10 square feet) or when moisture sources are extensive, hidden, or hard to reach. A licensed mold remediation contractor will assess moisture sources, contain the area to prevent spore spread, remove infested material, clean surfaces, and verify completion with post-remediation testing. Expect documentation of findings, a clear remediation plan, and guidance on moisture control to prevent recurrence. The Mold Removal Lab team recommends consulting with a certified professional for significant mold issues, especially in areas with electrical or structural damage.
Authority sources and additional reading
For trusted, science-based guidance on mold in homes, consult primary federal sources:
- EPA: Mold and your home — https://www.epa.gov/mold/mold-your-home
- CDC: Mold and dampness in indoor spaces — https://www.cdc.gov/mold/default.htm
These resources cover health risks, moisture management, and recommended steps for prevention and remediation. Always prioritize moisture control; without addressing the moisture source, mold is likely to return after cleanup. Mold Removal Lab emphasizes that a proactive, safety-first approach protects both occupants and building materials.
Tools & Materials
- MOISTURE METER (pinless preferred)(Check RH in rooms with moisture issues; aim for <60% RH.)
- FLASHLIGHT(Use to illuminate dark corners behind furniture and under sinks.)
- N95 RESPIRATOR OR P100 MASK(Protects against inhaling spores during inspection.)
- GLOVES(Disposable or washable gloves; avoid skin exposure to moldy materials.)
- PROTECTIVE GOGGLES(Eye protection against splashes or debris.)
- DISPOSABLE PLASTIC BAGS(For containing samples or contaminated materials if cleaning.)
- NOTES + CAMERA OR PHONE(Document locations and conditions for reference.)
- CLEANING SUPPLIES (mild detergent)(For surface cleaning after removal of minor growth in a contained area.)
- HUMIDITY GAUGE OR SMART HOME SENSOR(Supplemental data to monitor long-term moisture control.)
Steps
Estimated time: 2-6 hours for initial DIY assessment; remediation times vary by scope
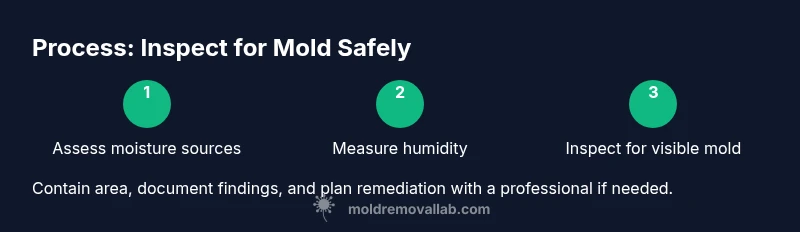
- 1
Prepare safety gear and plan
Put on PPE (N95 mask, gloves, goggles). Clear a safe workspace and map out rooms to inspect. Decide whether to proceed with DIY steps or schedule a professional assessment for higher-risk areas.
Tip: Do not disturb moldy materials in a way that could release spores into the air. - 2
Check for visible moisture sources
Inspect for leaks, water stains, and condensation on ceilings, walls, and around plumbing. Repair leaks or isolate the area if you suspect ongoing moisture.
Tip: Address leaks before cleaning to prevent recurrent mold growth. - 3
Measure humidity and monitor humidity trends
Use a moisture meter to record RH in suspect rooms. Record readings at different times of day to identify moisture cycles.
Tip: Keep RH under 50-60% when possible to reduce mold risk. - 4
Search for visible mold growth
Look for patches of discoloration, fuzzy textures, or swelling on walls, ceilings, and hidden areas (behind furniture, under sinks). Photograph for reference.
Tip: If growth is behind walls or under insulation, professional remediation is often required. - 5
Decide on testing or remediation plan
If you find suspected mold but area is small and reachable, you may start with careful cleaning after containment. For larger areas or unknown species, plan professional testing and remediation.
Tip: Never mix cleaning methods (bleach with ammonia) — this is hazardous. - 6
Engage professionals when in doubt
If there is extensive growth, persistent moisture, or you have health concerns, contact a licensed mold remediation specialist. Request a written assessment and a moisture-control plan.
Tip: Get multiple quotes and verify licenses and insurance.
FAQ
What are the most common signs of mold in a home?
Look for musty odors, visible patches, discoloration, water stains, and peeling paint. Mold behind walls can occur without surface signs, so consider moisture problems as the root. Always assess health symptoms and moisture sources together.
Common signs include musty smells, visible patches, and water damage. If in doubt, check moisture and consider professional guidance.
Can I tell if mold is dangerous just by looking at it?
Visual signs alone cannot determine toxicity. Some dangerous species are hard to identify without testing. If you have health concerns or extensive growth, consult a professional for testing and remediation.
You can’t be sure toxicity from appearance alone. Get a professional assessment for uncertain cases.
Should I test for mold myself or hire a pro?
For small, obvious growth in accessible areas, DIY testing may be considered, but health and safety come first. For large areas, hidden growth, or health concerns, hire a licensed mold inspector or remediation specialist to perform validated tests and provide a remediation plan.
For big or hidden mold, hire a pro. DIY tests can help, but professional results are more reliable.
Is mold exposure dangerous for pets?
Pets are also at risk from mold exposure, especially respiratory irritation. If your pet shows coughing, wheezing, or lethargy and you suspect mold, relocate them and seek veterinary and environmental guidance.
Pets can suffer similar mold-related symptoms; move them away from affected areas and get a professional assessment.
What should I expect during professional remediation?
A remediation professional will contain the area, remove affected materials, clean surfaces, and address moisture sources. They should provide a written plan, clear timelines, and post-remediation testing to confirm success.
Expect containment, removal of affected materials, moisture control, and post-remediation testing.
How long does it take to fix mold problems?
Timing depends on the extent of growth and moisture. Small issues can be resolved in days, while larger problems may take weeks, particularly if structural work is needed.
It varies from days to weeks depending on scope and moisture control.
Can I prevent mold from returning after cleanup?
Yes. Fix leaks, improve ventilation, manage humidity, and monitor cooldown and condensation. Regularly inspect problem areas and address moisture quickly to prevent recurrence.
Preventing mold is about moisture control and ongoing monitoring.
Watch Video
The Essentials
- Spot moisture early to prevent mold growth.
- Differentiate between visible signs and hidden mold behind walls.
- Use humidity control to reduce mold risk long-term.
- DIY checks are useful for small issues; large infestations require pros.
- Always address moisture sources before cleanup.