How to Test for Black Mold: A Practical Home Guide
Learn how to test for black mold safely and effectively. Compare DIY kits vs professional testing, interpret lab results, and plan remediation to protect your home.

To test for black mold, begin with a visual and odor-based inspection of damp areas (basements, bathrooms, kitchens), then use a certified mold test kit or hire a licensed inspector to collect air and surface samples. Send samples to an accredited lab for analysis to confirm species and concentration. If safety concerns arise, evacuate and seek professional remediation.
What black mold is and why testing matters
If you're wondering how do you test for black mold, start with a careful visual assessment of damp areas such as basements, bathrooms, and kitchens. Look for spots that appear greenish-black or have fuzzy textures, and note any persistent musty odors. According to Mold Removal Lab, mold presence often correlates with moisture problems, so tracking humidity and water intrusion is essential as part of any test plan. The Mold Removal Lab team found that testing is most reliable when paired with a contemporaneous moisture survey and a documented history of leaks. This is not a casual check; mold can affect indoor air quality and trigger allergic reactions or asthma in sensitive individuals. If you or others in your home experience symptoms, prioritize safety and consider professional testing and remediation. For homeowners, testing is about verification: it confirms whether you have a mold issue, identifies the likely sources of moisture, and informs the best remediation approach.
DIY testing options vs professional testing
Home test kits offer a fast, affordable first look, but they have limitations: many test kits only indicate whether mold spores are present, not which species or its concentration. Surface swabs and bulk samples can show contamination on walls or materials, but results require a lab to interpret. Air sampling can reveal indoor spore counts, yet outdoor background levels must be accounted for. If possible, choose kits that are registered with an accredited lab, and read the instructions carefully to avoid cross-contamination. For definitive results and safe remediation planning, professional inspectors use standardized methods, perform a moisture assessment, and provide a written report with lab-certified results. This dual approach reduces false positives and helps you prioritize repairs.
Understanding lab results and what they mean
Lab reports can look intimidating, but the key parts are the methods, the species or groups detected, and the concentration or presence of viable spores. Not all detected mold requires the same remediation; some species are less hazardous, while others pose higher health risks. The report should include a comparison to outdoor baselines to gauge indoor enrichment. Remember that testing is a snapshot; conditions change with weather and moisture control. If results show a potential hazard, engage a licensed remediator and address moisture sources first.
Practical steps to reduce risk and proceed after testing
Even before you get results, you can take steps to reduce moisture and slow mold growth: fix leaks, improve ventilation, and control humidity with dehumidifiers. When testing, wear an N95 respirator and gloves; avoid disturbing visible growth. After you receive results, plan remediation: isolate affected areas, remove contaminated materials if safe, and ensure proper containment and air filtration during cleanup. Reassess humidity and moisture after remediation to prevent recurrence. The Mold Removal Lab team emphasizes that ongoing maintenance is essential to prevent future mold growth.
Authority sources
For further reading from trusted agencies, consult:
- EPA on Mold and Moisture in Homes: https://www.epa.gov/mold
- CDC on Dampness and Mold: https://www.cdc.gov/mold/dampness.html
- OSHA Mold: https://www.osha.gov/molds
These sources provide guidance on moisture control, health risks, and safe testing practices. Always rely on government- or university-backed resources to supplement your testing plan.
Tools & Materials
- Mold test kit (air and surface sampling)(Choose a kit that includes both air and surface swabs and is tied to an accredited lab.)
- Sterile swabs(Pre-moistened or dry swabs used for surface sampling.)
- N95 respirator(Protects against inhaling spores during sampling.)
- Disposable gloves (nitrile recommended)(Keep contamination away from samples and protect skin.)
- Sealable sample bags(Store each sample securely for transport to the lab.)
- Camera or smartphone for documentation(Optional but helpful for tracking sampling locations.)
- Moisture meter (hygrometer optional)(Useful to document humidity levels near testing sites.)
Steps
Estimated time: 3-5 hours
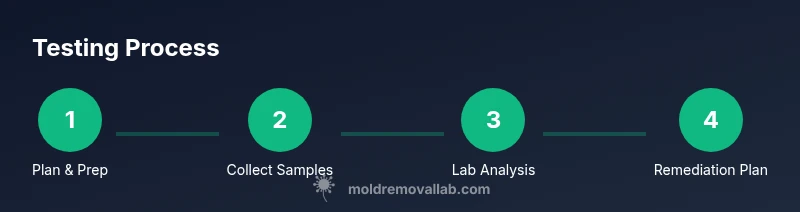
- 1
Plan and prep the testing
Define your testing goals (confirm presence, identify sources, compare kits) and choose the sampling method. Gather all required tools and PPE before starting to minimize disruption and cross-contamination. Create a documented plan with labeled sample IDs and designated areas.
Tip: Label each sample with date, location, and kit ID to avoid mix-ups. - 2
Collect air and surface samples
Follow the kit instructions precisely for both air and surface sampling. Avoid touching sterile ends and keep samples uncontaminated by moving through different rooms without cleaning tools. Record environmental conditions like temperature and humidity if your kit allows.
Tip: Work from clean to dirty areas and change gloves between locations to prevent cross-contamination. - 3
Seal, seal, seal and ship
Place each sample into its designated sealed container or bag. Label the package contents clearly and follow shipping or drop-off requirements so samples remain within the lab's acceptable handling window. Keep a copy of your sampling log.
Tip: Use leak-proof, sealable bags and keep samples away from direct sunlight during transport. - 4
Await lab results and review
Submit samples to an accredited laboratory and await a formal report. Review the methods used, the detected species or groups, and any recommended action. Compare indoor results with outdoor baselines if provided.
Tip: Choose a lab that provides a clear, written report and is accredited to avoid ambiguous conclusions. - 5
Plan remediation and moisture control
If mold is confirmed or suspected, plan remediation with moisture control as the priority. Isolate affected areas, address leaks, and consider professional remediation for extensive contamination. Re-test after remediation to confirm success.
Tip: Address moisture sources first; improper cleanup can lead to reoccurrence.
FAQ
What is black mold and is testing necessary?
Black mold refers to several mold species, including Stachybotrys. Testing is advisable when you have moisture problems, persistent odors, or health symptoms, to confirm contamination and guide remediation.
Black mold covers several species; testing helps confirm contamination and plan cleanup when moisture is present.
Can I test for black mold myself with a kit?
DIY kits can indicate whether mold spores are present, but they often cannot identify the species or provide reliable concentrations. Lab analysis is typically needed for definitive results.
DIY kits can hint at mold, but labs confirm species and levels for proper remediation.
How long does lab analysis take?
Turnaround varies by lab, but most reports are returned within several days to a week. Some tests may take longer if multiple analyses are required.
Lab results usually come back in days to a week, depending on the lab and tests ordered.
What should I do if test results are positive?
Engage a licensed remediation professional and address moisture sources right away. Do not delay cleanup in areas with active growth to protect indoor air quality.
If results are positive, hire a pro and fix moisture sources; act promptly to protect health.
Are there safety risks testing around active mold growth?
Yes. Disturbing mold can release spores into the air. Use PPE, limit access to others, and consider professional testing for large or inaccessible areas.
Disturbing mold can spread spores; wear PPE and consider a professional if large areas are involved.
Watch Video
The Essentials
- Identify moisture sources before testing.
- DIY kits aid screening but require lab confirmation.
- Label and preserve samples to prevent mix-ups.
- Interpret results with professional guidance for remediation.
- Maintain moisture control to prevent recurrence.