zep mold stain & mildew stain remover: Practical guide
Learn how to safely use zep mold stain & mildew stain remover to treat bathroom, basement, and appliance mold stains. This step-by-step guide covers prep, application, safety, and prevention from Mold Removal Lab.

Learn how to use zep mold stain & mildew stain remover to treat indoor mold stains safely and effectively. This quick guide covers prep, application, safety, and post-cleanup care. By following the steps, homeowners and renters can improve stain removal results while protecting indoor air quality.
What is zep mold stain & mildew stain remover?
According to Mold Removal Lab, the zep mold stain & mildew stain remover is a cleaner formulated to remove visible mold and mildew stains from typical indoor surfaces. It is designed for nonporous materials like tile, sealed surfaces, fiberglass, and finished wood, and can help restore the appearance of affected areas when used according to the label. When used correctly, it can lift discoloration caused by mold growth and reduce the risk of recurrent staining. Always test a small, inconspicuous patch first and follow safety instructions to protect yourself and your living space. The Mold Removal Lab team notes that compatibility with the surface is critical to avoid damage or discoloration.
When to use it and safety considerations
Use zep mold stain & mildew stain remover when you have visible stains on nonporous surfaces such as bathroom tiles, enamel, glass, or sealed grout. For porous materials like drywall, wood, or cardboard, take extra caution and test first; some materials may require professional remediation if the mold growth is extensive. Safety considerations include wearing PPE, ensuring good ventilation, and keeping the area away from children and pets. Do not mix with ammonia or other cleaners as this can release harmful gases. Before applying, check the label for surface compatibility and recommended dwell times. The Mold Removal Lab team emphasizes PPE and ventilation as essential.
How to apply it safely and effectively
Begin by preparing the area: clear valuables, cover nearby surfaces, and set up ventilation. Apply a thin, even coat of the remover to the stained area, ensuring full coverage without oversaturation. Allow the product to dwell for the time specified on the label (usually several minutes) to penetrate stains. Then, scrub with a non-abrasive brush or sponge, working in gentle motions to lift pigment without scratching the surface. Finally, wipe away residue with a clean cloth and rinse if the surface permits, then dry thoroughly.
Prep and cleanup steps
Before you start, safety is key: wear gloves and eye protection, and work in a well-ventilated area. Test patch a small spot, then move to larger areas. After treating, rinse tools and discard disposable rags in a sealed bag. Store leftover product in a cool, dry place and out of reach of children. Keep surfaces dry to prevent new mold growth.
Common mistakes and tips
Common mistakes include applying too much cleaner, skipping a patch test, and not drying surfaces thoroughly, which can leave a lingering stain or encourage regrowth. Pro tips: apply to the stain rather than broad areas; work from the edges toward the center; and follow up with a dry, porous surface sealant or mold-preventive paint once the area is fully dry.
Alternatives and complementary products
If zep remover is not available, look for oxidizing cleaners or products labeled for mold and mildew stain removal. For stubborn stains, a second treatment after the first cleans may be necessary. Complementary steps include improving ventilation, reducing humidity, using air purifiers, and cleaning with a gentle detergent prior to stain removal.
Real-world case scenarios
In a small bathroom, a grout line shows visible mildew stain. After patch-testing, homeowners used zep remover on the grout with a 5-minute dwell time, scrubbed with a small brush, rinsed, and dried. In a basement storage area with cardboard boxes, mold stains appeared; drywall was not involved, so a test patch was performed and the product applied carefully with protective gear. Both scenarios show the need for ventilation and thorough drying to prevent recurrence.
Maintenance and prevention after cleanup
To prevent future mold stains, maintain lower humidity levels, fix leaks promptly, and improve air circulation. Regular cleaning with non-bleach cleaners, using exhaust fans, and monitoring damp areas can help. Consider applying a mold-preventive coating or paint to high-risk surfaces once they are completely dry.
Tools & Materials
- Nitrile gloves(Protect hands from cleaner and residue)
- Safety goggles(Shield eyes from splashes)
- Respirator with organic vapor cartridges(For enhanced ventilation in poorly ventilated spaces)
- Plastic spray bottle(Hold cleaner for even application)
- Stiff scrub brush(Break up surface stains without scratching)
- Non-abrasive sponge(Wipe surface without damage)
- Microfiber cloths(Drying and residue removal)
- Sealant or mold-preventive paint (optional)(Use after surface is completely dry to reduce recurrence)
- Rags or disposable wipes(Dispose after use in sealed bag)
- Ventilation source (open window/vent)(Keep air moving during treatment)
Steps
Estimated time: 60-90 minutes per treated area, plus drying time
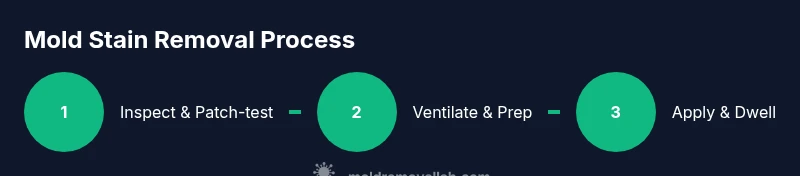
- 1
Inspect and patch-test
Identify the stained areas and test a small hidden patch to confirm surface compatibility with the remover. Check for paint lift or surface damage before proceeding.
Tip: If patch test fails (color change or damage), stop and seek alternative remediation. - 2
Ventilate and prep area
Open windows or use a fan to move air. Remove nearby belongings and cover surfaces to protect from splashes.
Tip: Ventilation reduces inhalation exposure and helps the product work effectively. - 3
Apply remover to stain
Spray or apply a thin, even coat over the stained area; avoid saturating porous materials unless the label permits it.
Tip: Keep an even layer to avoid pooling and ensure consistent dwell time. - 4
Dwell and monitor
Let the product sit for the dwell time specified on the label (usually several minutes). Do not rush this step; dwell time aids stain penetration.
Tip: If stain looks unchanged, do not force a longer dwell; instead proceed to the next step as directed. - 5
Scrub and lift stain
Gently scrub with a stiff brush or sponge in circular motions to lift pigment from the surface.
Tip: Work from the outside edge toward the center to prevent spreading. - 6
Rinse or wipe away residue
Wipe away residue with a clean microfiber cloth; rinse with water only if the surface tolerates moisture.
Tip: Dry thoroughly with a fresh cloth to discourage re-growth. - 7
Assess results
Check if stain is fully removed. If not, consider a repeat treatment or alternative approach after surface dries.
Tip: Do not repeat on damaged surfaces; consult a pro for extensive mold. - 8
Cleanup and disposal
Bag and dispose of used wipes and rags in sealed containers; clean tools with water and dry before storage.
Tip: Store leftover product in a cool, dry place away from children.
FAQ
Is zep mold stain & mildew stain remover safe to use on fabrics?
Fabric safety depends on the fiber and dye; always patch-test a small area first and follow the label. For delicate fabrics, consider spot testing or professional guidance.
Fabric safety depends on the fabric type; patch-test first and follow the label.
Can I use this product on porous surfaces like drywall?
Porous materials may require caution or professional remediation. Patch-test and verify surface compatibility; if mold growth is extensive, consult a pro.
Porous surfaces may need caution; patch-test and know when to call a pro.
Will this remove black mold stains?
Stain removers can help lift visible stains, but removing mold colonies requires addressing moisture and potentially guided remediation. Treat stains and fix moisture sources.
It can lift stains, but addressing moisture is key to full remediation.
Do I need to wear a respirator during treatment?
A respirator with organic vapor cartridges is recommended in poorly ventilated spaces; otherwise ensure good airflow and PPE usage.
Use a respirator in tight spaces and ensure airflow.
How long before I see results after applying the remover?
Results appear after the dwell time and initial scrubbing; some stains may require a second treatment after the area dries.
You’ll see results after dwell time and scrubbing; some cases need a second pass.
What should I do if staining returns after cleaning?
Reassess moisture sources and humidity; repeat treatment if needed and consider sealing high-risk areas after complete drying.
If it reappears, check moisture and repeat treatment if needed.
Watch Video
The Essentials
- Test a patch first to protect surfaces.
- Ventilate well and wear PPE during the process.
- Follow label dwell times for effective staining removal.
- Dry surfaces thoroughly to minimize mold recurrence.