Active Mold Stain Remover: Safe Removal Guide
Learn how to safely remove active mold stains with practical steps, proven cleaners, and prevention tips from Mold Removal Lab to keep your home healthy and mold-free.

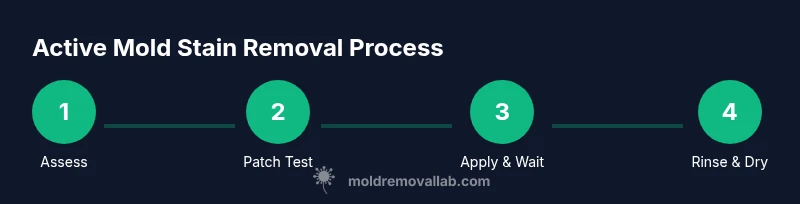
With an active mold stain remover, you can lift visible mold stains from common home surfaces while protecting occupants. This approach prioritizes surface compatibility, patch testing, ventilation, and careful rinsing to prevent regrowth. Follow a surface-aware method to choose the right cleaner, apply it correctly, and finish by drying thoroughly to minimize moisture.
What is an active mold stain remover?
An active mold stain remover is a cleaning product designed to lift and oxidize or dissolve mold stains that are visibly forming on surfaces. The goal is to remove the discoloration without weakening the surface finish. There are several families of cleaners labeled as active mold stain removers, including peroxide-based, chlorine-based (bleach) formulations, oxygen bleach, and enzyme-based products. Each type works best on different substrates and under specific conditions. According to Mold Removal Lab, the safest route is to match the cleaner to the surface and to use it as part of a moisture-control plan. In practice, you’ll see a foam or spray that sits briefly before you wipe away, taking care to rinse away any residue. The technique is not about scrubbing forever; it’s about letting the chemical do the work and then cleaning up moisture afterward.
How active mold stains form and why removal matters
Mold stains appear when moisture lingers on a surface long enough for mold spores to colonize. Common triggers include humidity, condensation, leaks, and poor air circulation. Stains can penetrate porous materials like grout, drywall, and fabric, making removal more challenging. Early intervention matters because staining often accompanies ongoing moisture problems. By choosing an active mold stain remover that suits the surface and by addressing the moisture source, you reduce the likelihood of regrowth. Mold Removal Lab emphasizes that successful stain removal is part science and part moisture management, not just a one-off cleaning pass.
Choosing the right remover for your surface
Surface compatibility is the first test. Ceramic tile and glazed surfaces tolerate harsher cleaners, while painted walls, wood, wallpaper, or fabric require gentler formulations. For porous surfaces, consider products labeled for porous substrates or those with lower dwell times to minimize damage. Always read labels for surface recommendations and safety warnings. Patch tests are essential on hidden areas to confirm colorfastness and material integrity. In practice, you’ll often choose a hydrogen-peroxide-based remover for white ceramic and a mild enzyme-based or oxygen bleach formulation for fabrics or grout. Mold Removal Lab notes that keeping a consistent cleaning plan and minimizing moisture are more important than chasing the strongest chemical.
Patch testing and safety first
Patch testing is your first line of defense against accidental damage. Apply a small amount of the remover to a discreet area, wait the recommended dwell time, and inspect for color change, surface damage, or residual odor. If there is any adverse reaction, stop and switch to a milder product or a different method. Always wear PPE: gloves, eye protection, and a mask in poorly ventilated spaces. Ventilation is crucial to avoid inhaling fumes, especially when using chlorine-based cleaners. After patch testing, plan the full treatment on the visible stain only if the test area remains stable.
Step-by-step use of active mold stain remover on common surfaces
When treating showers and tile grout, spray the remover along the grout lines and allow it to dwell according to the label. For painted walls, use a soft cloth to apply the remover to the stain, avoiding oversaturation. Fabrics require gentler handling—dampen a cloth and test first, then blot the stain rather than rubbing. Always rinse thoroughly with clean water after dwell time to remove residues that could feed mold or cause discoloration. Dry the area completely with a towel or fan to minimize moisture that supports mold growth. For wood surfaces, check manufacturer guidance to avoid bleaching or water damage. The key is to tailor your approach to the substrate while staying aware of moisture levels.
Dealing with tough stains and stubborn mold
Stubborn stains may need repeated treatments or a combination of cleaners. Alternate between cleaners if allowed by the label, but do not mix cleaners in the same space. For grout and porous materials, repeated applications with adequate drying time between passes often yield better results than a single heavy treatment. If stains persist after two or three cycles, re-evaluate moisture control and consider professional evaluation for hidden mold behind walls. Always work in small sections to prevent over-wetting large areas.
Rinsing, drying, and preventing regrowth
Rinsing thoroughly removes chemical residues that can discolor surfaces or irritate skin. After rinsing, dry the area completely using towels and fans or dehumidifiers. Persistent moisture is a top driver of mold recurrence, so address leaks, improve ventilation, and monitor humidity with a hygrometer. Consider sealing susceptible surfaces once cleaned and dried to reduce future absorption of moisture. Regularly inspect problem areas, especially after rainstorms or plumbing work.
When to call a pro and what not to do
If you encounter extensive mold growth over larger areas, if odor persists after cleaning, or if you suspect hidden mold behind walls, professional remediation is advised. Do not DIY structural mold removal without proper mold containment and PPE in severe cases. Avoid using heat to accelerate drying, as it can spread spores. For persistent cases, a pro can perform moisture assessment, containment, and specialized cleaning that goes beyond consumer products.
Authority sources and further reading
For credible guidance, consult official guidelines from public health and safety organizations. The Centers for Disease Control and Prevention (CDC) provides general mold information and health considerations. The Environmental Protection Agency (EPA) offers home mold remediation guidelines and surface-specific advice. The Occupational Safety and Health Administration (OSHA) includes safe handling and exposure precautions for mold-contaminated environments. These sources help homeowners understand context, limits, and safety practices when removing active mold stains. URLs: https://www.cdc.gov/mold/default.htm, https://www.epa.gov/mold, https://www.osha.gov/mold-health-risks
Common mistakes to avoid with active mold stain remover
Common mistakes include mixing different cleaners, using too much product, and skipping patch tests. Another error is rinsing insufficiently, which can leave residues that promote regrowth. Failing to ventilate properly can expose occupants to fumes, particularly with chlorine-based cleaners. Finally, neglecting moisture control after cleaning often leads to renewed mold growth within days. Avoid these pitfalls by following surface-specific guidance and maintaining low humidity levels.
Quick-reference checklist
- Patch test on an inconspicuous area before full application.
- Choose a remover compatible with the surface.
- Wear PPE and ensure proper ventilation during use.
- Apply, dwell, scrub gently if needed, rinse, and dry completely.
- Address moisture sources to prevent future growth.
Tools & Materials
- Disposable nitrile gloves(Protect hands from cleaners and residue)
- Safety goggles(Shield eyes from splashes)
- Respirator or mask (N95 or better)(Avoid inhaling fumes in poorly ventilated spaces)
- Wide-mouth spray bottle(Distributes cleaner evenly)
- Soft-bristled brush(Gently scrubs to lift stains without scratching)
- Microfiber cloths(For wiping and drying surfaces)
- Bucket with warm water(Rinse cloths and rinse surfaces as needed)
- Water for rinsing(Clean running water for final rinse)
- Hydrogen peroxide 3%(Optional for organic stains; test first)
- Bleach, sodium hypochlorite 5-6%(Use with caution; never mix with ammonia or acids)
- Ventilation (fans or open windows)(Keep airflow to minimize fumes and humidity)
Steps
Estimated time: 60-120 minutes
- 1
Prepare the area
Ventilate the space, remove nearby items, and place a drop cloth to catch drips. Put on PPE before you begin. This setup reduces exposure and contains any splashes.
Tip: Lay towels to protect floors and prevent cross-contamination to other rooms. - 2
Patch test the remover
Apply a small amount of the cleaner to a hidden area and wait the recommended time. If color or finish changes, switch to a milder product or a different method.
Tip: Always test on multiple surface types if you are treating mixed materials nearby. - 3
Apply the remover
Spray or apply the remover to the stained area according to the label. Do not saturate porous surfaces; use enough to cover but avoid pooling.
Tip: Work in sections to maintain control and prevent runoff. - 4
Let it dwell
Allow the cleaner to sit for the recommended dwell time. This lets the chemical penetrate the stain and break down the mold residues.
Tip: Do not rush; dwell time is critical for effectiveness. - 5
Scrub gently
Gently scrub with a soft-bristled brush to lift the stain without scratching the surface. Focus on grout lines or textured areas for best results.
Tip: Avoid aggressive scrubbing that can damage surfaces. - 6
Rinse thoroughly
Rinse with clean water to remove all cleaner residues. Use a microfiber cloth to wipe away loosened particles.
Tip: Rinsing is as important as applying the cleaner. - 7
Dry completely and inspect
Dry the area completely using towels or a fan. Inspect for remaining staining or moisture hotspots that could foster regrowth.
Tip: If still stained, consider a second treatment after re-testing moisture. - 8
Prevent future growth
Address moisture sources, improve ventilation, and maintain humidity below 60% when possible. Regular checks help catch issues early.
Tip: Install dehumidifiers in damp areas and fix leaks promptly.
FAQ
What surfaces can I treat with an active mold stain remover?
Most cleaners work on non-porous surfaces like tile and glass. Porous materials such as wood or drywall require gentle formulations and may need professional guidance for severe cases.
Most cleaners work on non-porous surfaces. Porous materials need gentler products and sometimes professional help.
Is it safe to mix active mold stain remover with other cleaners?
No. Mixing cleaners can release hazardous gases. Always use one product at a time and follow label instructions.
Avoid mixing cleaners. Use one product and follow the label for safety.
How long should I wait after applying before checking results?
Refer to the product label for dwell time, typically a few minutes to 15 minutes. If stains persist, a second application after patch testing may be necessary.
Check the label for dwell time; if needed, reapply after testing.
Can stain removal prevent mold from returning?
Stain removal addresses visible evidence, but mold will return if moisture remains. Combine cleaning with moisture control for lasting results.
Cleaning helps, but moisture control is essential to prevent return.
Should I paint over treated areas?
Wait until surfaces are completely dry. Some cleansers may affect paint adhesion; if in doubt, test a small area and consult paint manufacturer guidance.
Wait for dry surfaces before painting; test adhesion first.
When should I call a professional?
If the mold covers a large area, if you smell a strong odor after cleaning, or suspect hidden mold behind walls, seek professional remediation.
Call a pro if the area is large or if odor persists after cleaning.
Watch Video
The Essentials
- Identify surface type before choosing a remover
- Patch test to prevent damage and color loss
- Rinse and dry thoroughly to prevent regrowth
- Control moisture to keep mold at bay