zep mold remover: A Practical Mold Remediation Guide
Learn to safely use zep mold remover for effective mold cleanup. Step-by-step guidance, safety tips, and moisture-control strategies from Mold Removal Lab for homeowners and renters.

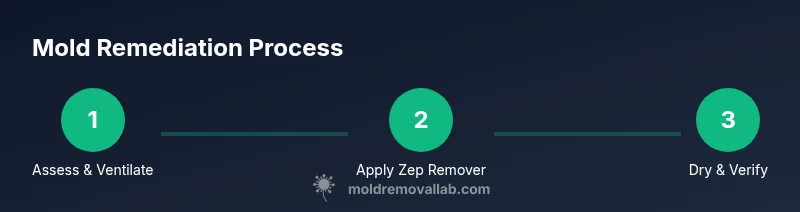
zep mold remover offers a targeted cleaner for non-porous surfaces, paired with moisture control to reduce recurrence. This quick guide shows how to safely inspect mold growth, apply the product, and verify results with light, humidity checks. According to Mold Removal Lab, using the right cleaner, proper ventilation, and PPE reduces risk and prevents recontamination.
What is zep mold remover and when to use it
Zep mold remover is a cleaner designed for non-porous surfaces such as ceramic tile, glass, metal, and sealed countertops. It helps lift visible mold stains and can reduce damp cues that invite regrowth when used as part of a controlled remediation plan. For homeowners and renters, it provides a practical option to start cleaning in kitchens, bathrooms, basements, or laundry areas where moisture and mold tend to thrive. According to Mold Removal Lab, selecting a cleaner labeled for mold removal, coupled with moisture control, yields better initial results than everyday cleaners alone. Always read the product label for surface compatibility and safety warnings before use.
This section lays groundwork for understanding the product, its intended uses, and its limitations. It also frames the expectation that mold remediation is a process that involves cleaning plus moisture management to prevent recurrence. Remember that the term mold remover refers to surface-cleaning products; deeper remediation may require additional steps or professional help for porous materials.
What to expect from zep mold remover
Expect a cleaning action that targets visible growth on non-porous surfaces. It is not a cure-all for all mold problems, especially on porous materials like drywall or wood with deep moisture staining. When used correctly, it can simplify initial cleanup and reduce surface spores, which makes subsequent drying and prevention steps more effective. Mold Removal Lab emphasizes pairing chemical cleaners with moisture control and proper ventilation to minimize exposure and future growth. Always test a small inconspicuous area first to ensure no discoloration or damage occurs.
Why this matters for homeowners
Mold growth is driven by moisture. A cleaner like zep mold remover helps you remove surface colonies so you can focus on moisture reduction—fixing leaks, improving ventilation, and drying the area. This holistic approach is supported by Mold Removal Lab’s guidance: cleaning alone without addressing moisture will likely lead to regrowth. Use the product as part of a broader remediation plan, not as a one-off solution.
What surfaces are appropriate
Non-porous surfaces—such as glazed ceramic, porcelain, metal fixtures, sealed countertops, and glass windows—are typically suitable for zep mold remover. Porous materials (drywall, unfinished wood, fabric) require different treatment, possibly including replacement if damage is severe. Always confirm surface compatibility on the product label and consider testing a small area first to prevent staining or material damage.
Safety considerations and PPE
Before starting any mold-cleaning project, gear up with the basics: nitrile gloves, eye protection, and a properly fitting respirator or N95 mask. Work in a well-ventilated space and keep children and pets away during treatment. According to Mold Removal Lab, using PPE and controlling the work environment reduces exposure and helps maintain a safer cleanup process.
Final notes on effectiveness
Chemical cleaners reduce surface mold and ease cleanup, but they are most effective when combined with moisture control, thorough drying, and ongoing prevention. Document the areas treated and monitor humidity levels after remediation to gauge ongoing risk. The Mold Removal Lab team highlights that sustained prevention is the key to long-term success, not just the immediate cleanup.
Transition to the next steps
Now that you have a basic understanding of zep mold remover and safety measures, proceed to the preparation and step-by-step application. The following sections provide a structured approach to cleaning, drying, and preventing mold recurrence with practical, do-it-yourself guidance.
Quick pivot to the practical steps
If you’re ready to move from theory to practice, review the tools and materials you’ll need, then follow the step-by-step process and safety tips. A thorough approach helps ensure you remove surface mold effectively while reducing the likelihood of regrowth.
Acknowledge when to call a pro
Some mold issues extend beyond what consumer cleaners can safely handle, especially if you encounter extensive growth, musty odors, or suspect hidden moisture behind walls, contact a licensed professional for assessment and remediation. Mold Removal Lab endorses seeking professional remediation for significant or recurring mold.
Summary for this block
This block explains what zep mold remover is, when it’s appropriate, safety considerations, and how it fits into a moisture-control–driven remediation plan. The key takeaway is that product use alone isn’t enough—addressing moisture and drying thoroughly is essential.
Tools & Materials
- zep mold remover(Follow label directions; ensure area is well-ventilated)
- nitrile gloves(At least 4 mil thickness)
- safety goggles(Protect eyes from splashes)
- respirator or N95 mask(Use when ventilation is limited)
- spray bottle (if refilling)(For targeted application in tight spaces)
- non-abrasive scrub pad(Use gentle scrubbing to lift surface mold)
- soft cloths or towels(For wiping and drying)
- trash bags(Seal contaminated materials)
- dehumidifier or fan(Promote fast drying)
- moisture meter(Optional for post-cleaning checks)
Steps
Estimated time: 60-120 minutes
- 1
Prepare the area
Clear the space and remove nearby items that could be damaged by moisture or splashes. Place a drop cloth and seal off the area with plastic sheeting to contain dust and spores. This containment minimizes cross-contamination and makes cleanup easier.
Tip: Set up a dedicated waste bag and a separate cleaning zone to avoid mixing clean with dirty items. - 2
Put on PPE
Don nitrile gloves, eye protection, and a respirator or N95 mask. PPE reduces exposure to mold spores and the cleaning agents. Verify a secure fit before starting the cleaning process.
Tip: Double-check seal on the respirator and ensure goggles shield eyes not just face. - 3
Ventilate the area
Open exterior ventilation where possible and run a fan to push air outdoors. Keep doors to other rooms closed to maintain containment. Proper ventilation lowers inhalation risk during cleaning.
Tip: Do not use a fan that blows air from contaminated zones into living spaces. - 4
Apply zep mold remover
Spray the product according to the label onto the affected non-porous surface. Do not oversaturate; allow the cleaner to sit for the recommended contact time to help break down mold.
Tip: Work in small sections to maintain effectiveness and prevent rapid drying that reduces contact time. - 5
Scrub and lift mold
Gently scrub with a non-abrasive pad to lift surface mold. Wipe away residues with a clean cloth, moving from outer edges inward to avoid spreading spores.
Tip: Use circular motions and avoid aggressive scrubbing that could damage the surface. - 6
Rinse or wipe and dry
If the product label requires rinsing, wipe the area with a damp cloth and dry thoroughly. If no rinse is required, simply wipe away residue and ensure the surface is dry.
Tip: Drying is critical—moisture left behind invites regrowth. - 7
Check for dryness
Use a moisture meter or simply feel the surface to confirm it is dry to the touch. If damp, repeat cleaning steps or extend drying time with a dehumidifier.
Tip: Target humidity below 50% where possible for additional safety. - 8
Dispose of contaminated materials
Seal used wipes, towels, and disposable PPE in a bag before discarding. Wash hands and any reusable tools with soap and water after cleanup.
Tip: Bag contaminated items securely and place them in a trash can outside the living space. - 9
Monitor and prevent
Document areas cleaned and set a schedule to check humidity and leaks. Consider ongoing preventive steps like fixing leaks and improving ventilation to curb future mold growth.
Tip: Keep a simple log to track humidity, leaks, and cleaning dates.
FAQ
Is zep mold remover safe for porous surfaces?
zep mold remover is generally intended for non-porous surfaces. Porous materials like drywall or unfinished wood may require alternative methods or professional remediation. Always check the label for surface compatibility and consider replacement if damage is extensive.
zep mold remover works best on non-porous surfaces; for porous materials you may need different methods or professional help.
Should I call a professional for black mold?
Black mold can indicate moisture problems and potential health risks. If you see extensive growth, strong musty odors, or suspect hidden moisture behind walls, contact a licensed professional for assessment and remediation.
Extensive black mold should be checked by a pro; don’t rely on DIY fixes alone.
Can I use zep mold remover on wood?
zep mold remover is best suited for non-porous surfaces. On painted or sealed wood it may be used if the label allows; unfinished wood or porous wood may need different treatment or replacement if damaged.
Use it on non-porous wood finishes only, and follow the label for porous wood.
How long does the surface stay dry after treatment?
Drying time depends on room conditions and airflow. In most cases, surfaces should feel dry within hours after cleaning if you actively dry the space; use a dehumidifier if humidity remains high.
Drying is variable; use airflow and dehumidification to speed it up.
What PPE is required when using zep mold remover?
At minimum, wear nitrile gloves, eye protection, and a respirator or mask if ventilation is limited. Ensure proper fit and avoid touching face during cleanup.
Wear gloves, eye protection, and a mask; keep it well ventilated.
What if mold keeps coming back after cleaning?
Recurring mold usually signals ongoing moisture problems. Reassess for leaks, humidity sources, and ventilation. If problems persist, consult a mold remediation professional.
If mold returns, moisture control is the likely culprit; consider pro help if unresolved.
Watch Video
The Essentials
- Ventilate and contain the cleanup space.
- Wear PPE and follow label directions.
- Address moisture to prevent recurrence.
- Dry surfaces thoroughly after cleaning.
- Consider professional help for large or persistent mold.