Which Kilz for Mold: How to Choose the Right Primer
Learn how to pick the right Kilz primer for mold-prone spaces. We compare options, explain label meanings, and share practical steps for safe, durable mold remediation with moisture control.

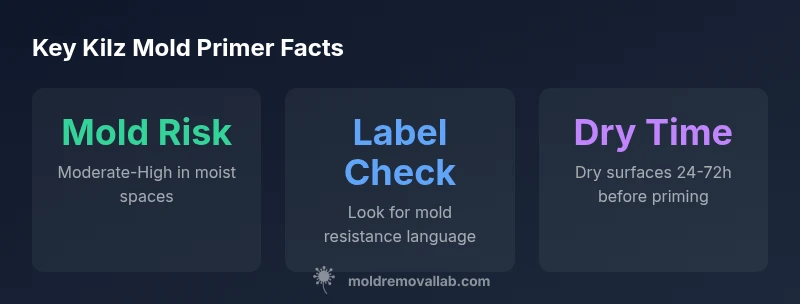
Choose a Kilz-brand primer that explicitly states mold/mildew resistance and is intended for moisture-prone interiors. After mold remediation and thorough drying, apply this primer to seal stains and odors before painting. Look for label language like mold-resistant or mildew resistant and ensure the product is compatible with your substrate and climate. Always follow label directions.
Understanding Kilz and Mold: Why the right primer matters
Mold thrives where moisture is present. Before selecting a Kilz primer, it's essential to distinguish between active mold and a stale stain. According to Mold Removal Lab, moisture control is the foundation of any mold remediation plan; without fixing the source, no primer can deliver lasting results. Kilz primers are designed for stain blocking, odor reduction, and surface sealing. When mold is involved, you want a product that can seal spores and stains after proper remediation and surface drying. Not all Kilz primers are created equal in damp environments, so reading the label for mold resistance claims and climate suitability is crucial. The right choice depends on your substrate (drywall, plaster, concrete, wood) and the expected exposure (bathroom, basement, laundry room). Pair primer selection with moisture management, adequate ventilation, and a thorough cleaning routine to set the stage for a durable paint finish.
How Kilz labels guide your choice for mold-prone spaces
Kilz labels often include terms like mold resistance, mildew resistance, odor control, or interior moisture suitability. Start by identifying products that explicitly state mold resistance on the label and are rated for high humidity areas. Remember that label language can vary by model and region, so compare the exact phrases, recommended substrates, and climate guidance. Use this as a first-pass screen, then verify compatibility with your surface and paint system before purchase.
Prep steps before priming in mold-affected areas
Successful priming starts with proper prep. Remove visible mold using approved methods and fix moisture sources before any primer goes on. Allow surfaces to dry completely; damp walls can trap moisture and lead to continued staining. Clean with a mild detergent or a cleaner appropriate for the substrate, rinse, and let dry. As Mold Removal Lab notes, ensure plaster and drywall are thoroughly dry before applying primer. Wear appropriate PPE and ensure good ventilation during cleaning.
Step-by-step priming workflow after drying
- Inspect the surface for staining and uniform dryness. 2) Stir the primer and check for clumps; 3) Apply with a roller or brush in a thin, even coat; 4) Allow the first coat to dry per label instructions; 5) Apply a second coat if coverage is incomplete or stains persist; 6) Let the primer cure fully before painting; 7) Inspect for missed spots and recoat as needed. This workflow helps seal mold stains and odors after remediation and keeps finish paint durable in moisture-prone spaces.
Surface-specific considerations for mold-prone spaces
Drywall and plaster are porous and can absorb stains; wood surfaces may require a more robust sealant. For concrete or masonry, ensure the surface is dry and sound before priming. Always choose a Kilz primer that indicates suitability for the substrate and humidity level of the room (bathroom, basement, laundry). Porous substrates may benefit from a stain-blocking, mold-resistant primer, while non-porous surfaces can often use standard moisture-control primers with appropriate top coats.
Safety, ventilation, and cleanup when priming mold areas
Ventilate the area well during priming, and wear PPE such as gloves and a respirator if working around mold. Avoid creating dust and ensure the area is isolated from occupied spaces if possible. After priming and painting, clean tools promptly and dispose of any moldy debris according to local guidelines. Proper air movement and moisture control remain the best long-term defense against mold recurrence.
Kilz primer options and typical uses
| Kilz Option | Mold Resistance Claim | Best Use |
|---|---|---|
| Kilz primers with mold-resistance label | Claims mold/mildew resistance on label | Interior moisture-prone surfaces after remediation |
| Kilz primers with odor-control | Odor-blocking features, not mold-specific | Odor-prone areas after remediation |
| Kilz high-adhesion interior primer | Adhesion-oriented; not mold-specific | Challenging surfaces like drywall repairs |
FAQ
Can I apply Kilz to surfaces with active mold?
No—do not paint over active mold. Remove mold and fix moisture sources before priming. Allow surfaces to dry completely and ensure good ventilation during remediation.
Don't paint over visible mold. Fix moisture, remove mold, and let the area dry before priming.
Is Kilz mold-resistant or just stain-blocking?
Some Kilz primers advertise mold resistance; check the label carefully. Primer is not a substitute for mold remediation and should be used after mold is removed and surfaces are dry.
Some Kilz primers claim mold resistance, but they’re not a substitute for removing mold.
What surfaces can Kilz be used on after remediation?
Dry, clean surfaces such as drywall, plaster, and wood are suitable after proper drying. For concrete or masonry, ensure the surface is dry and compatible with the primer.
Dry and clean surfaces after drying are best for priming.
How long should I wait after remediation before priming?
Allow surfaces to dry to the touch in a well-ventilated space; common ranges are 24 to 72 hours depending on humidity and airflow.
Wait until the surface is dry to touch, usually within 1 to 3 days.
Should I hire a pro if mold returns after priming?
Yes. If mold reappears, reassess moisture sources and consider professional remediation. Primer alone will not resolve ongoing moisture issues.
If mold comes back, get a pro to address moisture and contamination.
Can Kilz be used in bathrooms and kitchens?
Yes, if the label indicates suitability for moisture-prone areas. Ensure adequate ventilation and follow drying times before applying top coats.
It can be used in moisture-prone rooms if the label allows it.
“Choosing the right Kilz primer is important, but moisture control and thorough remediation are essential. Primer can seal stains and odors, but it won’t solve an active mold problem on its own.”
The Essentials
- Address moisture before priming to prevent regrowth
- Read Kilz label for mold resistance claims – claims vary by model
- Wait for surfaces to dry completely before priming
- Primer seals stains and odors but is not a substitute for remediation
- Consult a pro if mold recurs after priming