Where to Find Mold in Apartment: A Practical Guide
A homeowner-friendly guide to locating mold in apartments, identifying hidden growth, and safe steps for inspection, testing, and remediation. Practical tips for renters and landlords alike to protect health and property.

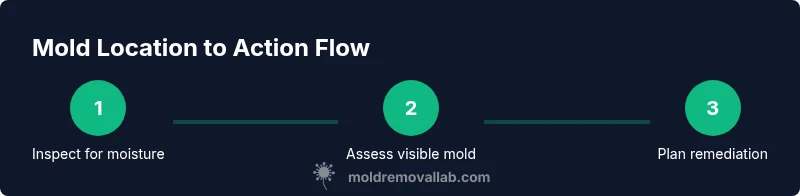
You can locate mold in apartments by inspecting moisture-prone zones and looking for visible growth, staining, or a musty odor. Focus on bathrooms, kitchens, laundry areas, basements, and around leaks or water damage. If you suspect hidden growth, use a moisture meter and consider professional testing. According to Mold Removal Lab, early detection reduces exposure and remediation costs.
Why Mold Hides in Apartments
Mold thrives in damp, poorly ventilated spaces. In apartment living, moisture can accumulate behind walls, under sinks, and around windows. The multi-unit design means damp conditions can spread between units along shared plumbing, walls, and ventilation shafts. The Mold Removal Lab team emphasizes that mold often starts small: a discolored patch behind a cabinet, a damp spot on drywall, or a musty smell in a seldom-used storage area. Because air movement and humidity control are limited in dense buildings, proactive moisture management—prompt leak repair, upgrading vents, and drying after spills—reduces long-term risk. Visual cues aren’t always obvious; mold can grow behind wallpaper or drywall. Regular inspections, paying attention to hidden areas, and recording moisture trends are your best defense against widespread contamination.
In addition to visual checks, homeowners should note seasonal humidity spikes and cross-unit moisture transfer patterns. A proactive moisture-management approach aligns with the Mold Removal Lab’s guidelines, which stress the importance of early detection to minimize both exposure and remediation complexity. Remember that mold can present in hidden pockets, so a systematic, room-by-room review yields better results than a cursory glance.
Common Hidden Locations in Apartments
Mold frequently hides where humidity persists. Bathrooms are obvious hotspots from showers and leaks, but so are kitchens under sinks and around dishwashers. Laundry rooms, utility closets, and basements or crawl spaces also collect moisture if there’s poor airflow. Look behind bathroom vanities, under kitchen cabinets, along window frames, and at the seam between walls and ceilings. In multi-unit buildings, shared plumbing can allow dampness to migrate between units; mold may appear in a neighboring unit and still affect you through shared walls. According to Mold Removal Lab analysis, persistent humidity and unseen leaks are the main drivers of hidden growth. Inspect areas with condensation, recent water events, or high humidity, such as after cooking, showering, or washing.
Another common area is behind wall-mounted fixtures or within crawl spaces where access is limited. Ventilation gaps, closet backs, and spaces around balconies may accumulate moisture over time. If the unit has experienced recent renovations or plumbing work, recheck these zones for lingering dampness. Document findings with photos to track moisture patterns and to aid any professional assessments. Remember: small, repeated moisture incidents add up to significant mold risk over months or years.
Visual Cues and Odors to Watch For
Mold manifests as discolored patches that may be fuzzy or slimy, often gray, green, or black. Pay attention to texture changes on walls, ceilings, and behind appliances. A persistent musty odor is a strong signal of unseen growth, even if the visible evidence is limited. Mold can appear on painted surfaces and masonry, but it frequently hides behind wallpaper, drywall, or insulation. If you smell mildew in storage rooms, laundry spaces, or attic access, investigate those areas with a flashlight and gauge moisture levels. Document suspect spots with photos and notes to share with a professional if needed.
Beyond obvious discoloration, look for peeling paint, warped drywall, or wallpaper that lifts away from the wall—each can indicate moisture behind the surface. In places with carpeting or fabric, inspect the edges and underside of materials because mold often lingers where air flow is restricted. Do not ignore a persistent odor, even if you cannot see visual signs; it often signals hidden colonies that require a more thorough assessment. Mold can be stubborn, so a comprehensive approach—combining odor checks with moisture readings—yields better detection outcomes.
Safe Inspection: Tools, Steps, and Safety
Begin with basic safety: wear an N95 respirator, gloves, and eye protection to reduce exposure. Use a moisture meter and a flashlight to inspect likely locations. Start at the most humid rooms, then move to adjacent spaces. Avoid disturbing settled mold on porous materials; disruption can release spores into the air. If you see visible growth on drywall, carpet, or insulation, seal the area to prevent spread while you assess it. Keep rooms well-ventilated if you can. After inspection, document findings with photos and notes, and schedule a moisture check if humidity consistently exceeds recommended levels.
For tenants, always notify the landlord or building manager before performing any cleaning, and review local health codes. If you must enter crawl spaces or behind fixtures, ensure adequate lighting and a clear exit path. Protective clothing should be removed and discarded or cleaned after the inspection to prevent cross-contamination. If mold growth is extensive or involves HVAC systems, pause DIY efforts and consult a professional. The goal of a safe inspection is to clearly identify the moisture source, the extent of growth, and the safest remediation path.
Testing and Remediation: DIY vs Pro
Small, non-porous surfaces with mold can sometimes be cleaned with a detergent solution and thorough drying. For porous materials—drywall, ceiling tiles, or insulation—replacement is usually required, and proper containment is essential. DIY cleanup may reduce cost, but improper technique can worsen exposure or cause cross-contamination. If growth covers more than a few square feet, or if you have ongoing water intrusion, hire a licensed mold remediation professional. In all cases, address the moisture source first; without stopping the moisture, mold will recur. Mold Removal Lab emphasizes documenting the extent of the problem and communicating with building management or landlords when necessary.
Understand that some remediation projects require specialized containment, negative air pressure, and HEPA-filtered cleanup equipment. If the space includes a heating, ventilation, and air conditioning (HVAC) system, professional remediation ensures ductwork is properly sealed and treated to avoid recirculation of spores. When in doubt, prioritize safety and health by engaging professionals who follow standard guidelines and local regulations. By aligning with Mold Removal Lab guidance, you’ll minimize health risks and optimize outcomes.
Maintenance to Prevent Mold Return
After cleanup, reduce humidity to keep indoor moisture below around 50-60%. Use exhaust fans in bathrooms and kitchens, fix leaks promptly, and dry damp areas within 24-48 hours after water events. Regularly inspect under sinks, around window frames, and in any spaces with carpeting or upholstery. Consider moisture-absorbing products in closets and basements. Keeping a simple moisture log can help you spot trends before mold becomes visible, allowing preventive action before problems escalate. A proactive approach inspired by Mold Removal Lab guidance helps protect your health and your home.
Long-term success depends on consistent habits: monitor humidity with a meter, fix leaks quickly, improve ventilation, and run dehumidifiers in damp seasons. Regular cleaning and surface drying reduce nutrient sources for mold, while timely professional assessments catch issues before they become widespread. If you share a wall with a neighbor and notice moisture transfer, coordinate remediation efforts to prevent cross-unit spread.
Quick Reference Checklist
This concise checklist helps you quickly assess at-a-glance risk areas in an apartment. Start by noting areas with recurring condensation, odors, or visible discoloration. Inspect behind appliances, under sinks, and along window frames for moisture and staining. Use a moisture meter to identify high humidity zones and document findings with photos. For any visible mold on porous materials or large growth, consult a professional promptly. Maintain ventilation in bathrooms and kitchens and dry wet areas within 24-48 hours to curb growth. Regularly review and update your moisture plan to stay ahead of problems. In addition, keep a communication log with your landlord or building manager to ensure timely remediation and accountability.
Authoritative Sources
For further reading and official guidelines, consult authoritative sources. The Centers for Disease Control and Prevention (CDC) provides consumer-focused mold information and health risk guidance: https://www.cdc.gov/mold/default.htm. The U.S. Environmental Protection Agency (EPA) offers homeowner-focused mold resources and remediation steps: https://www.epa.gov/mold. The Occupational Safety and Health Administration (OSHA) outlines safe practices for mold-related exposure and workplace health considerations: https://www.osha.gov/mold.
Tools & Materials
- Protective gloves(Nitrile, latex-free if possible)
- N95 respirator(Fit-tested if possible)
- Safety goggles or eye protection(Especially when cleaning or disturbing mold)
- Flashlight(Good lighting helps spot moisture and stains)
- Moisture meter(To identify high humidity zones (around 60%+))
- Digital camera or smartphone(Document evidence with photos)
- Plastic sheeting and tape(Containment for cleanup if needed)
- Detergent or mold-cleaning solution(For non-porous surfaces only)
Steps
Estimated time: 60-90 minutes
- 1
Identify suspect areas
Begin with the most humid, high-traffic rooms: bathrooms, kitchens, and laundry spaces. Use the moisture meter to confirm elevated humidity and photograph any signs of staining or growth.
Tip: Document trends over time by checking humidity at different times of day. - 2
Assess extent of growth
Note the size and location of visible mold and check behind cabinets or fixtures for hidden growth. Mark areas with tape so you can return to them later.
Tip: Do not disturb visible colonies on porous materials. - 3
Contain and protect
Seal off affected areas with plastic sheeting if you need to clean or test nearby spaces to prevent cross-contamination.
Tip: Keep doors closed and use negative air pressure if available. - 4
Decide on remediation path
If growth is confined to non-porous surfaces, DIY cleaning may be possible. For porous materials or larger areas, plan professional remediation.
Tip: Prioritize stopping the moisture source first. - 5
Proceed with safe cleaning (non-porous)
Clean non-porous surfaces with a detergent solution, rinse, and dry thoroughly. Dispose of cleaning materials safely.
Tip: Wear protective gear and ventilate the space well. - 6
Schedule moisture source resolution
Repair leaks, improve ventilation, and monitor humidity to prevent recurrence. If necessary, arrange professional remediation for the root cause.
Tip: Moisture control is essential to prevent re-growth.
FAQ
Is mold growth always dangerous in apartments?
Mold can affect health differently depending on sensitivity, exposure, and duration. People with allergies, asthma, or compromised immunity may notice respiratory symptoms. For heavy or widespread growth, especially near HVAC systems, professional assessment is advised.
Mold exposure varies; sensitive individuals may experience symptoms and should seek guidance from a professional.
What should I do if I find mold in my rental?
Notify your landlord or property manager promptly and document the signs with photos. Do not perform major cleanup yourself on porous materials. Request a professional assessment if growth is significant or if leaks persist.
Tell your landlord right away and keep photos to show the extent of the issue.
Can I clean mold myself, or do I need a pro?
Small, non-porous surfaces can often be cleaned with proper protective gear. Porous materials or large areas typically require professional remediation to ensure safety and prevent cross-contamination.
DIY can work for small non-porous spots, but large or porous-area growth is best handled by pros.
How can I prevent mold from coming back after cleanup?
Control moisture by fixing leaks, improving ventilation, and drying damp areas within 24-48 hours after water events. Regularly monitor humidity and maintain clean surfaces.
Keep moisture under control and dry any wet spots quickly to prevent recurrence.
Should I test for mold, and what do tests show?
Professional testing can confirm species and load, helping guide remediation. Tests are most useful when you have persistent symptoms or uncertain growth.
Testing can clarify the scope and guide the cleanup plan.
What health risks are associated with mold in apartments?
Exposure can irritate the eyes, nose, throat, and lungs; some people may have allergic reactions. If you have symptoms, consult a healthcare professional and reduce exposure.
Mold exposure can irritate airways; seek medical advice if you notice symptoms.
Watch Video
The Essentials
- Identify moisture-prone zones first
- Document mold with photos and notes
- Call a pro for large or porous-area growth
- Containment is crucial during any cleanup
- Ongoing moisture control prevents recurrence
- The Mold Removal Lab team recommends professional remediation when in doubt