What to Do Mold Moldova: A Practical Mold Remediation Guide
Learn a practical, step-by-step approach to mold remediation for homes in Moldova. Assess, contain, clean, dry, and prevent mold with safety and cost-awareness in mind.

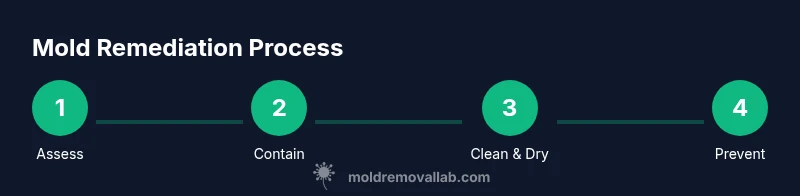
By following a structured, step-by-step plan, you can address mold in Moldova homes safely and effectively. Start with an assessment to identify moisture sources, then contain the area, safely remove contamination, dry thoroughly, and implement prevention to stop recurrence. This guide provides practical actions, safety tips, and cost-aware options for homeowners.
Moldova mold reality: what homeowners in Moldova should know
Mold growth thrives where moisture is present, and many homes in Moldova struggle with humidity and aging infrastructure. For homeowners seeking practical guidance, the question often becomes: what to do moldova when you first notice discoloration or musty smells? This Mold Removal Lab guide provides a clear, actionable plan to protect your family and your investment. By following a structured approach, you’ll learn how to assess the problem, contain it, clean safely, dry thoroughly, and prevent a recurrence. The steps apply to typical Moldovan homes, including apartments and single-family houses, and emphasize safe, cost-effective actions you can take today. Throughout, Mold Removal Lab offers evidence-based guidance that prioritizes health and safety for residents and renters alike.
Health risks and signs of mold in homes
Mold exposure can trigger allergic reactions, asthma symptoms, and respiratory irritation, especially for children, the elderly, and anyone with existing lung conditions. In Moldova’s climate, persistent humidity contributes to indoor mold growth in basements, bathrooms, kitchens, and wall cavities. Early signs include musty odors, visible patches of black, green, or white growth, and damp wall stains. While some mold is harmless in small amounts, larger colonies indicate ongoing moisture problems that require attention. According to Mold Removal Lab Analysis, addressing humidity and improving ventilation are essential first steps to reduce health risks and prevent regrowth. Always treat any mold growth seriously and protect household members during cleanup.
Assessing mold severity and moisture sources
Effective remediation begins with a clear picture of the mold’s extent and its moisture source. Start by inspecting common problem areas: bathrooms, kitchens, basements, and areas with roof or plumbing leaks. Look for staining, peeling paint, warped materials, and condensation on windows. Use a simple moisture map to mark areas with high moisture readings and track rainfall-related dampness. In Moldova, seasonal humidity spikes can drive mold growth, so consider how climate-specific factors such as rain patterns, heating cycles, and ventilation performance impact your home. Mold Removal Lab recommends documenting findings with photos and notes to guide decisions about cleaning and materials you may need to replace.
Containment and safety before you begin cleaning
Before any cleaning begins, contain the work area to prevent mold spores from spreading to other rooms. Close doors, seal gaps with plastic sheeting, and turn off central air systems if safe to do so. Wear proper PPE: an N95 respirator or higher, chemical-resistant gloves, and eye protection. Remove pets and ensure good indoor air exchange by using a portable fan pointed away from occupied spaces. Containment not only protects other areas but also reduces the likelihood of recontaminating cleaned surfaces. If you’re unsure about containment, it’s wise to consult a professional for a temporary containment setup.
Cleaning strategies: porous vs non-porous surfaces
Non-porous surfaces (like tile and glass) are usually easier to clean and disinfect. Use a detergent solution, scrub with brushes, and wipe dry. Porous materials (like drywall, insulation, or carpet backing) that are moldy or water-damaged beyond cleaning should generally be removed and discarded to prevent regrowth. For small non-porous areas, a diluted disinfectant can help eliminate lingering spores, but avoid mixing cleaners with ammonia or bleach, which can create harmful fumes. In Moldova’s homes, focus first on the cleanable surfaces near moisture sources and plan material replacement for any porous items that have sustained significant damage.
Drying, humidity control, and ventilation
Drying is a critical step to halt mold growth. Use dehumidifiers and fans to reduce indoor humidity to below 50% and increase air movement through the affected area. If possible, open windows on dry days and use exhaust fans to vent moist air outdoors. Monitor humidity with a hygrometer and re-check the area over 24–72 hours to confirm that moisture levels remain low. Persistent dampness often indicates an ongoing moisture source, so continue to address leaks or condensation problems even after visible mold is gone.
Tools, materials, and best practices
Having the right tools makes the work safer and more effective. Gather PPE (N95 mask, gloves, eye protection), plastic sheeting, a durable scraper or putty knife, non-ammonia detergent, a stiff brush, and a spray bottle. For disinfection, choose a surface-safe product recommended for indoor mold cleanup, and consider mold-resistant sealants or paint for after-drying finishing. Keep a waste bag for contaminated materials and a hygrometer to track humidity. Always work in well-ventilated areas and dispose of contaminated materials properly.
Prevention and long-term maintenance for Mold Moldova homes
Prevention hinges on controlling humidity and eliminating ongoing moisture sources. Repair leaks promptly, ensure proper attic and wall insulation, and maintain consistent indoor temperatures to minimize condensation. Improve bathroom and kitchen ventilation with exhaust fans that vent outside. Keep humidity between 30% and 50% year-round, and inspect vulnerable areas at least twice a year. Consider proactive measures like sealing latticework around windows and installing crawl-space vent covers to reduce moisture infiltration. A careful maintenance routine reduces the chance of future mold growth and protects indoor air quality for residents.
When to hire a professional and how to choose
Some mold problems require professional remediation, especially when mold covers large areas, penetrates building materials, or involves toxic species. If you notice mold growth beyond 10 square feet (or if underlying leaks are not controlled), contact a licensed remediation contractor. When choosing a pro, verify credentials, request a written scope of work, and check references. Ask about containment, removal methods, disposal practices, and post-remediation verification. A clear, transparent plan with cost estimates helps homeowners in Moldova make informed decisions.
After-action verification and documentation
After cleanup, re-check the area for odors and signs of moisture. Re-measure humidity, inspect for any remaining visible growth, and schedule a follow-up inspection if moisture or damage recurs. Document the work with photos, receipts, and notes on any materials replaced. Keeping records helps with future maintenance and can be useful for rental agreements or insurance concerns. A final assessment that shows dry conditions and absence of active mold provides confidence that the remediation is complete.
Tools & Materials
- PPE kit (N95 respirator, eye protection, disposable gloves)(Ensure proper fit and disposal after use)
- Plastic sheeting and tape(To create containment barriers)
- Non-ammonia detergent(Mild soap or detergent suitable for cleaning)
- Soft brushes, sponges, and rags(For scrubbing and wiping surfaces)
- Spray bottle with water-detergent solution(Pre-wet surfaces to reduce dust)
- Disinfectant suitable for indoor use(Non-toxic options preferred)
- Dehumidifier(s)(Bring indoor RH below 50%)
- Hygrometer / moisture meter(Monitor humidity levels)
- Mold-resistant paint or sealant(For finishing after drying)
- Heavy-duty trash bags(Seal and bag contaminated materials)
- Brush or vacuum with HEPA filter (optional)(Clean up dust after containment)
Steps
Estimated time: 2-5 days
- 1
Conduct a preliminary inspection and document signs
Walk through the affected area and note visible mold, odors, and moisture sources. Take clear photos and write dates for your records. This documentation helps you plan remediation steps and communicate with any contractors.
Tip: Capture wide shots and close-ups; label photos by location and date. - 2
Set up containment to limit mold spread
Seal off the area with plastic sheeting, close doors, and turn off HVAC if safe. Create a dedicated entry for the cleanup zone to minimize cross-contamination.
Tip: Use tape to seal seams and avoid gaps where spores can escape. - 3
Put on PPE and prepare the work area
Wear an N95 respirator, goggles, and gloves. Remove or cover personal items nearby to prevent dust transfer, and keep a waste bag accessible for contaminated materials.
Tip: Avoid touching your face while cleaning; gloves should be disposed after use. - 4
Identify and fix the moisture source
Locate leaks, condensation problems, or poor ventilation contributing to mold. Repair these issues before deep cleaning to prevent reappearance.
Tip: Document repairs with receipts and photos for future reference. - 5
Remove heavily contaminated porous materials
If materials like drywall or insulation are moldy and non-cleanable, remove and bag them for disposal. Porous materials often harbor unseen colonies beyond surface mold.
Tip: Do not cut into moldy materials during cleanup; seal the area first. - 6
Clean non-porous surfaces with detergent
Scrub hard surfaces with a detergent solution and rinse with clean water. Wipe dry to reduce residual moisture that could support regrowth.
Tip: Avoid mixing cleaners with ammonia; use separate cleaners if needed. - 7
Disinfect and prevent spores from lingering
Apply a surface-safe disinfectant if recommended for indoor mold cleanup. Allow to air-dry completely before proceeding to the next step.
Tip: Ventilate the area while disinfecting to minimize fumes. - 8
Dry thoroughly and reduce humidity
Run dehumidifiers and fans to lower humidity to under 50%. Check moisture levels after 24–72 hours to confirm drying progress.
Tip: If humidity stays high, inspect for hidden moisture behind walls. - 9
Inspect for hidden moisture and re-clean if needed
Look for damp spots and repeating mold growth after cleaning. Repeat cleaning steps on affected surfaces if necessary.
Tip: Don’t rush the drying phase; thorough dryness prevents regrowth. - 10
Restore finishes and finalize inspection
Repaint with mold-resistant paint if desired and perform a final inspection to verify dryness and absence of active mold growth.
Tip: Keep before/after photos for documentation and future maintenance.
FAQ
What are the first signs of mold I should look for in a Moldova home?
Look for musty odors, visible growth, water stains, peeling paint, and condensation. Early signs mean moisture control should be addressed promptly to prevent spread.
Look for musty smells, visible spots, and water stains. If you notice these signs, address moisture and consider testing or professional help if needed.
Can I use bleach to clean mold on all surfaces?
Bleach can be effective on non-porous surfaces, but it is not a universal solution. Porous materials like drywall may require removal. Always follow label directions and ventilation guidelines.
Bleach works on hard, non-porous surfaces, but porous materials often need removal. Ventilate and follow product directions.
How long does it take to dry after cleaning mold?
Drying typically takes 24–72 hours depending on humidity, airflow, and material type. Monitor with a hygrometer and extend drying if moisture remains.
Most areas dry within one to three days, but ongoing humidity can extend drying time.
When should I hire a professional for mold remediation?
Consider hiring a professional if mold covers a large area, is embedded in building materials, or if you suspect toxic species. A professional can ensure containment, disposal, and post-remediation verification.
If mold covers a lot of area or material, or you’re unsure about safety, hire a pro for proper containment and cleanup.
What ongoing steps reduce mold risk in Moldova homes?
Maintain humidity below 50%, fix leaks promptly, improve ventilation, and perform routine inspections in high-risk areas like bathrooms and basements.
Keep humidity low, fix leaks quickly, and ventilate bathrooms and basements regularly to prevent mold return.
Is testing for mold necessary after cleanup?
Testing is not always required if surfaces are dry and odor-free. It may be useful in cases of persistent symptoms or when a known toxic species is suspected.
Testing isn’t always needed if the area is dry and clean; consider it if symptoms persist or you suspect serious contamination.
The Essentials
- Identify moisture sources before cleanup.
- Contain the area to prevent spread.
- Use proper PPE and safe cleaning agents.
- Dry thoroughly; control humidity after cleanup.
- Document results and verify remediation success.