How Mold Remediation Is Done: A Practical Home Guide
Learn step-by-step how mold remediation is done, from inspection and containment to cleaning, drying, and prevention. Clear guidance for homeowners and renters to create safer, healthier living spaces.

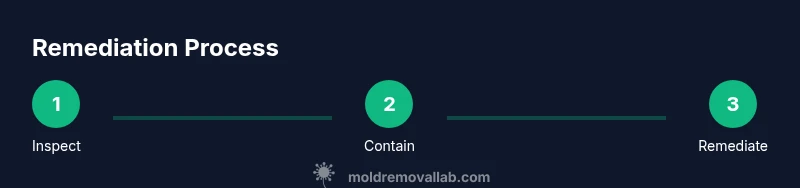
Mold remediation is done by first containing the affected area to prevent spread, then removing moldy material and porous substrates. Technicians clean and sanitize surfaces, install drying equipment, and monitor humidity to reach safe levels. A final inspection and testing verify that mold levels are reduced and the area is safe for occupancy.
How mold remediation is done: Overview
Understanding how mold remediation is done helps homeowners approach the process with confidence. The goal is not only to remove visible growth but also to address the moisture that supported it and to prevent future regrowth. This is a structured, multi-step process that often involves inspection, containment, removal, cleaning, drying, and verification. According to Mold Removal Lab, successful remediation requires a plan that protects occupants, preserves healthy building materials, and reduces health risks associated with mold exposure. Throughout the process, treat mold as a symptom of a moisture problem, not a standalone issue, and focus on long-term prevention as much as surface cleanup.
The inspection and containment phase
The first critical phase is thorough inspection and precise containment. Technicians use moisture meters, infrared cameras, and visual checks to identify hidden moisture sources and mold colonies behind walls, under floors, or in HVAC plenums. After confirming the extent, containment is established to prevent spores from spreading. This often means plastic sheeting, negative air pressure, sealed entry points, and dedicated PPE for workers. Effective containment protects other rooms and keeps cleanup focused where it belongs. The Mold Removal Lab team emphasizes that containment is one of the most impactful steps for reducing cross-contamination and ensuring a safe remediation.
Removal and cleaning methods
Removal focuses on stripping out porous, mold-damaged materials that cannot be cleaned effectively, such as drywall, carpet, insulation, and ceiling materials. Non-porous surfaces and hard finishes are cleaned with EPA-registered mold cleaners and disinfectants, followed by thorough scrubbing and vacuuming with a HEPA-filtered device. Contaminated debris is bagged and disposed of according to local regulations. After physical removal, remaining surfaces are cleaned to reduce mold fragments, and odor control measures are implemented if needed. It is important to avoid using bleach as a sole solution on porous materials, since it cannot fully penetrate porous substrates and can create moisture-related problems if misused. This phase translates the planning from the previous step into tangible removal while minimizing the chance of re-aerosolization. When homeowners ask how mold remediation is done, this is where most of the heavy lifting happens and where professional expertise makes the biggest difference.
Drying, dehumidification, and moisture control
Drying is essential to stop mold from returning. After removal, dehumidifiers and air movers are used to bring indoor humidity down to safe levels, typically below 50% relative humidity, depending on outdoor conditions and building materials. Continuous monitoring with moisture meters confirms that materials have returned to normal moisture levels. Inadequate drying is a common reason for remediation projects to fail, so this phase often extends longer for basements, crawl spaces, or rooms with poor ventilation. The goal is to reach a stable environmental condition and prevent a moisture rebound that could feed new mold growth.
Post-remediation testing and prevention
Once drying is complete, a post-remediation inspection and sometimes air or surface sampling verify that mold levels are within safe ranges. If clearance tests are passed, occupants can re-enter once the space is sealed and functional, and ongoing moisture control is implemented. Prevention strategies include fixing leaks promptly, improving ventilation, and installing humidity control devices. Homeowners should document repairs and create a maintenance plan to monitor moisture sources, as prevention is as important as removal. In many cases, a homeowner can perform routine checks, but more complex remediation should involve qualified professionals to ensure there are no hidden mold pockets left behind.
Safety, common mistakes, and when to call pros
Mold remediation involves exposure risks, respiratory hazards, and structural considerations. Avoid DIY heroic measures for large affected areas or damp spaces, as improper handling can spread spores and worsen conditions. Common mistakes include skipping containment, over-mixing cleaners, or neglecting the moisture source. Always consult a licensed professional for significant growth, contaminated HVAC systems, or uncertain moisture sources. The right approach blends safety, science, and practical steps that protect your health and your home.
Tools & Materials
- Respirator mask (NIOSH-approved)(Fit-tested if possible; replace filters regularly)
- Personal protective equipment (PPE)(Goggles, gloves, coveralls or disposable suit)
- HEPA vacuum cleaner(Certified HEPA filtration; use on dry surfaces)
- Plastic sheeting (at least 6 mil)(Creates containment barriers)
- Tape and fasteners(For securing plastic and barriers)
- Dehumidifier / desiccants(Goal: <50% RH in affected area)
- EPA-registered mold cleaner(Follow label directions; avoid mixing chemicals)
- Disposal bags (heavy-duty)(Seal and remove contaminated materials)
- Moisture meter and infrared camera(To locate hidden moisture and verify drying)
Steps
Estimated time: 1-3 days
- 1
Assess scope and plan
Conduct a thorough inspection to identify all mold growth and moisture sources. Develop a remediation plan that defines containment, removal, cleaning, and drying steps. Document findings with notes and photos to guide the work and track progress.
Tip: Create a checklist of zones to isolate and a rough timeline before starting. - 2
Set up containment
Place plastic sheeting to isolate the affected area; establish negative air pressure and sealed entryways to minimize cross-contamination. Ensure workers wear PPE and use dedicated tools within the containment zone.
Tip: Mark the containment boundary clearly and post warning signs to keep others out. - 3
Address moisture sources
Repair leaks, improve ventilation, and fix water intrusion before material removal. Moisture control reduces the chance of mold returning after cleanup.
Tip: Document all moisture repairs; you may need them for future humidity management. - 4
Remove damaged materials
Carefully remove porous materials that cannot be cleaned, such as drywall, insulation, or carpet, and seal them in disposal bags for safe removal.
Tip: Avoid tearing more material than necessary to limit dust and spores. - 5
Clean and disinfect surfaces
Clean remaining hard surfaces withEPA-registered products; disinfect if indicated on the product label. Use HEPA-vacuuming for dust control and wipe from clean to dirty areas.
Tip: Follow contact times on disinfectants to maximize effectiveness. - 6
Dry thoroughly
Run dehumidifiers and air movers to lower indoor humidity. Monitor with moisture meters until readings stabilize.
Tip: Aim for stable readings over 24-48 hours to confirm drying. - 7
Verify remediation
Perform a final inspection and clearance testing if required. Ensure moisture sources are fixed and the space is re-occupancy ready.
Tip: Keep a record of results and recommendations for future maintenance.
FAQ
What is the first step in mold remediation?
The process starts with a careful inspection to identify growth and moisture sources, followed by containment to prevent spread. Planning guides the removal, cleaning, and drying phases and helps ensure a safe, effective remediation.
Begin with a thorough inspection to identify growth and moisture; containment follows to prevent spread, then the removal and drying steps proceed.
Can I perform mold cleanup myself?
Small, isolated mold growth in non-porous areas can sometimes be addressed by careful cleaning with appropriate protective gear. For larger areas, porous materials, or uncertain moisture sources, hiring a professional is strongly advised.
DIY cleanup is possible for tiny, non-porous spots, but for bigger problems, call a pro.
How long does remediation take?
Duration varies with area size and moisture levels, but many standard jobs fall within one to several days. Extensive moisture issues or HVAC involvement may extend the timeline.
Most jobs take one to a few days, longer if moisture sources are extensive.
Should I remove all moldy materials?
Porous materials that are heavily contaminated typically need removal. Non-porous surfaces can often be cleaned and restored, depending on the extent of damage.
Yes, remove heavily contaminated porous materials and clean solid surfaces as appropriate.
What happens after remediation is complete?
A final inspection and, if needed, clearance testing confirm safety. Homeowners should implement moisture control and monitoring to reduce recurrence risk.
After remediation, a final check confirms safety, and ongoing moisture control helps prevent return.
Watch Video
The Essentials
- Contain the area before any removal begins.
- Drying and humidity control prevent regrowth.
- Thorough cleaning plus final clearance testing ensures safety.
- Address moisture sources to defend against recurrence.