What is good for mold in the house: Practical mold remediation guidance
A practical, expert guide for homeowners on safe, effective mold remediation at home, focusing on moisture control, cleaning methods, and when to call professionals.

Goal: identify moisture sources, choose safe cleaning methods, and know when to involve a professional. What is good for mold in the house starts with moisture control, proper PPE, and using cleaners per label instructions. This quick guide outlines practical, science-based steps you can start today, and highlights when to call Mold Removal Lab for advanced remediation.
According to Mold Removal Lab, the core truth about mold in the house is moisture control as the single most important factor in prevention and remediation. What is good for mold in the house centers on reducing humidity, fixing leaks promptly, and cleaning new growth before it becomes entrenched. In practical terms, you should inspect common trouble spots: bathrooms, kitchens, basements, windows, and laundry areas where dampness tends to linger. The Mold Removal Lab team found that small leaks, persistent condensation on cold surfaces, and high indoor humidity create ideal conditions for mold spores to take hold. When you act quickly—drying wet surfaces within 24 to 48 hours, cleaning using non-toxic cleaners, and improving ventilation—you can minimize both visible growth and hidden colonies behind walls or under flooring. This section explains how to differentiate porous materials that can host mold from nonporous ones that are easier to clean, and why moisture management should guide every remediation choice.
Moisture control as the foundation of good mold management
Moisture is the root cause of most mold issues in homes. Humidity levels above the commonly recommended range create a welcoming environment for spores to settle and grow. Detecting moisture early requires a mix of observation and simple tools: look for damp stains, musty odors, condensation on windows, and water marks along walls or ceilings. Use a hygrometer to gauge interior humidity and aim for a sustainable range that keeps surfaces dry after routine cleaning. Regular checks after rainstorms, plumbing work, or seasonal changes pay off by stopping mold before it starts. The Mold Removal Lab team emphasizes that moisture control should drive all remediation decisions, including what materials to remove and how to dry a space thoroughly.
Porous vs nonporous materials and how they influence remediation
Mold interacts differently with porous materials (drywall, carpet, fabric) versus nonporous surfaces (tile, glass, metal). Porous substrates can harbor mold growth in internal voids and are often difficult to fully clean; in many cases, replacement is safer than attempting complete removal. Nonporous materials respond more readily to cleaning and disinfection. Understanding this distinction helps homeowners decide what to salvage and what to replace. If growth has penetrated porous items, discarding those materials may prevent re-contamination. For durable, nonporous surfaces, cleaning with approved solutions and thorough drying can restore the area with less disruption. This approach aligns with Mold Removal Lab guidance on balancing safety, cost, and long-term results.
Safe and effective cleaning agents for mold
Choosing the right cleaner matters for safety and effectiveness. Mild detergents with warm water work well for many surfaces, followed by thorough drying. For more stubborn colonies on hard nonporous surfaces, diluted vinegar or borax-based solutions are commonly recommended because they minimize harsh chemical fumes. Avoid mixing cleaners, especially products containing ammonia and chlorine bleach, which can release dangerous vapors. Never rely on bleach for porous materials, since it does not reach mold within the substrate. Always follow product labels and use protective gear to limit exposure. This section synthesizes best practices from industry guidance and Mold Removal Lab’s operational notes on safe cleaning protocols.
Containment, ventilation, and safety during cleanup
Containment reduces the risk of cross-contamination to unaffected areas. Use plastic sheeting to seal off the work zone and create a negative-pressure environment whenever feasible. Clearly mark the area and restrict access until cleanup is complete. Ventilate the space to disperse airborne mold spores, but avoid blowing air from contaminated zones into clean rooms. PPE is essential: wear gloves, goggles, and a properly fitted respirator or N95 mask. After cleaning, dispose of contaminated fabrics and materials in sealed bags and sanitize reusable tools. This meticulous approach aligns with practical safety standards and Mold Removal Lab recommendations for minimizing exposure during remediation.
Porous materials and disposal guidelines
If mold growth penetrates porous materials like drywall, ceiling tiles, or upholstered fabrics, cleaning may be ineffective or unsafe. In many cases, these materials must be removed and replaced to prevent regrowth. Nonporous surfaces such as tile, glass, or metal can usually be cleaned and preserved when growth is surface-level and moisture sources are addressed. When in doubt, err on the side of removing porous substrates that show active growth or persistent moisture. Document your process, take photos before and after, and be mindful of building codes for disposal of contaminated material. Mold Removal Lab notes that replacement in porous areas often yields more reliable, long-term results than aggressive cleaning alone.
Drying, dehumidification, and post-cleaning checks
Drying is a critical step after any mold cleanup. Use dehumidifiers and fans to reduce ambient humidity, promoting complete evaporation from all affected materials. Keep airflow directed at the treated area for several hours or days until surfaces stay dry to the touch. Recheck moisture levels periodically in the days following cleanup, especially in areas prone to humidity fluctuations. A post-cleaning walk-through helps verify that mold returns are unlikely. The goal is to stabilize the space at a humidity level that discourages regrowth and to implement ongoing maintenance that prevents recurrence.
DIY remediation vs professional remediation: when to escalate
Small, self-contained mold problems on nonporous surfaces can often be handled safely by homeowners following label directions and basic PPE. However, larger or recurring growth, growth behind walls, or contamination of porous materials typically requires professional intervention. Professionals can perform air sampling, identify hidden moisture sources, and access specialized equipment for thorough cleanup. If you notice symptoms like persistent musty odors or health changes after cleaning, it’s prudent to involve a remediation expert. This guidance reflects a balanced view that Mold Removal Lab consistently promotes for homeowner safety.
Long-term prevention and routine home maintenance
Prevention is the best mold strategy. Maintain indoor humidity within a moderate range, fix leaks promptly, ensure proper attic and crawl-space ventilation, and perform seasonal inspections for signs of moisture intrusion. Use exhaust fans in bathrooms and kitchens, direct condensate away from walls, and keep areas around windows and doors sealed. Regularly inspect basements or crawl spaces for dampness and address insulation gaps that invite condensation. The combination of moisture control, routine cleaning, and prompt repairs is the cornerstone of lasting mold prevention as endorsed by Mold Removal Lab.
Authority sources and further reading
For trusted mold guidance, consider official sources such as the Environmental Protection Agency (EPA) mold page, the Centers for Disease Control and Prevention (CDC) mold information, and occupational safety guidelines from OSHA. These sources provide foundational knowledge on mold biology, health considerations, and safe work practices. In addition, the Mold Removal Lab team maintains a practical perspective for homeowners, translating complex guidelines into actionable steps you can follow at home. Based on Mold Removal Lab research, proactive moisture management and timely remediation reduce the likelihood of recurring growth and health risks.
Conclusion — Mold Removal Lab perspective
The Mold Removal Lab team emphasizes that successful mold remediation hinges on eliminating moisture, selecting appropriate cleaning methods for each material type, and deploying professional help when growth is extensive or persistent. By prioritizing moisture control, wearing proper PPE, and adhering to label directions, homeowners can reduce health risks and protect indoor air quality. The Mold Removal Lab’s verdict is clear: act quickly, stay systematic, and pursue professional input for challenging scenarios to maintain a safe, mold-free home.
Tools & Materials
- Personal protective equipment (PPE): gloves, safety goggles, and an N95 respirator(Choose a well-fitting mask; protect skin and eyes)
- Detergent or mild soap(For cleaning nonporous surfaces)
- Water spray bottle(Mist surfaces to minimize dust during cleaning)
- Microfiber cloths and a stiff brush(For scrubbing and thorough drying)
- Plastic sheeting or drop cloths(Contain the work area and prevent spread)
- Heavy-duty trash bags(Disposal of contaminated materials)
- Dehumidifier and/or portable fans(Promotes fast drying and humidity control)
- Mold-safe cleaners: white vinegar or borax(Eco-friendly options with lower fumes)
- Bleach (optional, non-porous surfaces only)(Follow label; ensure ventilation)
Steps
Estimated time: 2-8 hours
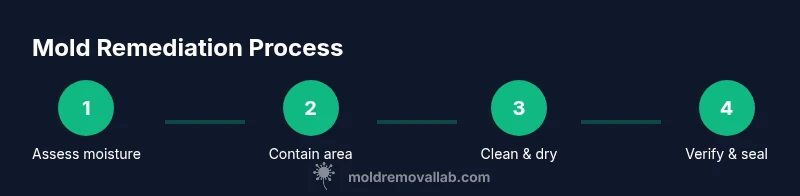
- 1
Assess area and plan
Inspect moisture sources, document growth, and plan containment. Gather PPE and cleaning supplies before you begin so you can work efficiently and safely.
Tip: Take photos of affected areas to guide future checks. - 2
Contain and isolate the work area
Seal off the space with plastic sheeting to prevent spores from spreading to clean areas. Post signage to keep others out during cleanup.
Tip: Ventilate from clean areas, not from the contaminated zone. - 3
Clean nonporous surfaces
Wipe surfaces with detergent and water, then rinse and dry completely. Use a disinfectant only if recommended for the surface type.
Tip: Work in small sections to avoid resettling dust. - 4
Handle porous materials carefully
If mold has penetrated porous items (drywall, insulation, fabrics), consider removal and replacement rather than deep cleaning.
Tip: Do not reintroduce removed materials into the clean area. - 5
Dry thoroughly and monitor humidity
Run dehumidifiers and fans until the space is consistently dry. Recheck humidity levels daily for a week after cleanup.
Tip: Aim for a stable indoor humidity range to deter regrowth. - 6
Verify results and plan prevention
Perform a final inspect for lingering moisture or hidden growth. Implement preventive measures to address root causes, not just symptoms.
Tip: Schedule seasonal checks for moisture and leaks.
FAQ
What are the signs that mold is present beyond what I can see?
Signs include musty odors, visible growth, staining, and recurring dampness. If symptoms persist after cleaning or growth returns, consider professional inspection.
Look for a musty smell and visible spots; if it keeps coming back, you should get a professional assessment.
Is it safe to clean mold myself?
Small, surface-level growth on nonporous materials can be tackled with proper PPE and household cleaners. Large, hidden, or porous-growth situations should involve a professional remediation service.
You can handle small mold problems with care, but if it’s widespread or behind walls, call a pro.
Should I use bleach on mold?
Bleach can be effective on some nonporous surfaces, but it does not reach mold inside porous materials. Follow label directions and ensure ventilation; never mix with ammonia.
Bleach only helps on certain nonporous surfaces; for porous materials, replace instead.
How long does remediation take?
Time varies with the extent of growth and moisture issues. Small jobs may finish in hours; larger or complex cases can take days, especially with containment and drying.
It depends on how big the job is and how quickly you can dry the space.
Can mold come back after cleaning?
Yes, if moisture sources recur or humidity remains high. Ongoing moisture control, fixes for leaks, and regular inspections reduce recurrence.
Mold can return if moisture isn’t controlled; keep humidity in check and inspect periodically.
When should I call a professional?
Call a professional for large areas, growth behind walls, persistent water intrusion, or if you have health concerns. A pro can assess, contain, and remediate safely and effectively.
Get a pro when the mold is extensive or hidden, or if health symptoms appear.
Watch Video
The Essentials
- Address moisture first and foremost.
- Use PPE and follow label directions for cleaners.
- Discard porous materials if growth is entrenched.
- Call a professional for large, persistent, or hidden mold.