What Kills Mold Permanently? Practical Remediation Guide
Learn why mold can't be permanently killed by a single product and how moisture control, source removal, and proper cleaning lead to long-term suppression. This guide from Mold Removal Lab provides actionable steps for homeowners and clear guidance on when to DIY and when to call a pro.

According to Mold Removal Lab, definition: mold isn’t something you can permanently 'kill' with a single product. In practice, you stop mold by removing moisture, removing contaminated materials, and cleaning with proven approaches. This guide explains the science, outlines a practical remediation plan, and helps homeowners distinguish between DIY steps and professional treatment and expectations.
Understanding the Mold Challenge\
The Moisture-Driven Nature of Mold\
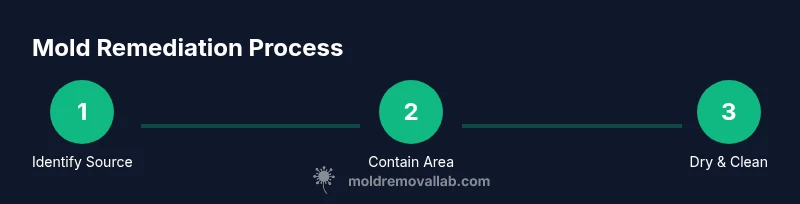
A Three-Part Remediation Framework\
DIY Remediation: What You Can Tackle Safely\
When to Call Professionals\
Cleaning Products, Myths, and Realities\
Tools & Materials
- N-95 respirator mask(Fit tested if possible; maintain a good seal during cleanup)
- Protective goggles(Prevents splashes from cleaners)
- Chemical-resistant gloves(Nitrile recommended)
- Plastic sheeting (6 mil)(Create containment zones)
- Masking and duct tape(Seal doors and vents to minimize spread)
- Detergent or EPA-registered mold cleaner(Follow label directions)
- Scrub brushes and sponges(For scrubbing non-porous surfaces)
- Spray bottle(For cleaners and disinfectants)
- Disposable towels and rags(Contain removed material)
- HEPA vacuum cleaner(Optional for cleanup after work)
- Moisture meter or hygrometer(Helps verify dryness)
- Dehumidifier(Crucial for drying out the space)
- Oscillating fans(Use for air movement away from the work area)
Steps
Estimated time: 8-12 hours
- 1
Identify moisture sources
Walk the area to locate leaks, ventilation problems, and visible moisture. Document affected materials and areas using photos and notes.
Tip: Take before-and-after photos to track changes and assist professionals if needed. - 2
Contain the work area
Seal off the space with plastic sheeting, close doors, and minimize airflow to adjacent rooms. This reduces spore spread during cleanup.
Tip: Keep the containment barrier intact until you’re sure the area is dry. - 3
Dry out the space
Run a dehumidifier and fans to promote evaporation. Monitor moisture levels until they stabilize at a level you determine is acceptable.
Tip: Do not over-saturate or overspray; balance airflow with containment. - 4
Remove visible mold
Wearing PPE, scrub non-porous surfaces with detergent. For porous materials, determine if disposal is the safer option.
Tip: Never dry-brush mold, which creates airborne spores. - 5
Address porous materials
If drywall, insulation, or porous substrates are moldy beyond cleaning, remove and replace them.
Tip: Place contaminated waste in sealed bags for disposal. - 6
Disinfect and rinse
Rinse cleaned surfaces and apply a disinfectant where appropriate. Allow surfaces to dry completely before reassembly.
Tip: Rinse away cleaner residues to prevent odor or residue buildup. - 7
Reassess and maintain
Recheck moisture sources, repair any lingering leaks, and implement continuous moisture management practices.
Tip: Use a moisture meter periodically to catch leaks early.
FAQ
Can mold be killed permanently, or does it come back?
Mold spores can persist and recolonize if moisture returns. Permanent elimination requires ongoing moisture control, source removal, and proper cleaning. In most homes, long-term suppression is achievable with a moisture-first remediation plan.
Mold spores can persist, so permanent elimination isn’t guaranteed. Maintain moisture control and address sources to prevent regrowth.
Is bleach effective for mold on porous surfaces?
Bleach can kill surface mold on non-porous surfaces, but it often fails to reach embedded mold in porous materials like drywall. It’s not a cure-all and should be part of a broader moisture-control strategy.
Bleach helps on non-porous surfaces but doesn’t reliably remove mold inside porous materials.
How long does remediation take for a typical home area?
Time varies with the area size, material type, and moisture condition. A small project may be completed in a day; larger infestations behind walls can take several days for complete evaluation, drying, and cleaning.
It depends on the space and moisture, but expect multiple hours to a few days for larger jobs.
When should I hire a professional remediation service?
Call a professional for large infestations, mold behind walls, or systems like HVAC. If you see persistent moisture or have health concerns, professional assessment ensures thorough containment and safe remediation.
If it’s behind walls or in HVAC, or if health symptoms appear, hire a professional.
Can mold return after remediation even if I fix the moisture?
If moisture sources or poor ventilation reappear, mold can return. Ongoing moisture management and regular inspections help prevent recurrence.
Yes—if moisture returns, mold can come back. Keep monitoring.
What can homeowners safely do themselves to reduce mold risk?
Homeowners can fix leaks, improve ventilation, and clean non-porous surfaces with appropriate cleaners. For larger or porous infestations, or uncertain cases, professional guidance is advised.
Fix leaks, improve airflow, and clean surfaces you can safely handle. Call a pro for bigger jobs.
Watch Video
The Essentials
- Identify and fix moisture sources before cleaning.
- Contain the work area to prevent spore spread.
- Porous materials with mold often require removal and replacement.
- Moisture control is the long-term key to preventing recurrence.