Water Mold Damage: Identification, Risks, and Safe Remediation
Learn to identify water mold damage, assess moisture sources, and safely remediate. This practical guide covers health risks, quick signs, DIY vs pro remediation, and prevention strategies for a healthier home.

You will learn how to identify water mold damage, assess moisture sources, and begin safe remediation. This quick answer outlines essential steps, safety gear, tools, and when to call a professional. Gather PPE (N95 mask, gloves, goggles), a moisture meter, plastic sheeting, brushes, a non-ammonia cleaner, and protective containers before starting. Always ventilate the area and avoid dispersing mold spores.
What is water mold damage?
Water mold damage refers to mold growth caused by persistent moisture in building materials. While common household molds can appear after dampness, water molds (oomycetes) thrive in standing water and humidity, often behind walls or under floors. According to Mold Removal Lab, early detection, moisture tracking, and controlled cleanup are the keys to preventing escalation. Causes include leaky roofs, plumbing leaks, condensation on cold surfaces, and inadequate ventilation. The damage can weaken structural materials over time and create a moist environment that invites pests. In practice, remediation begins with stopping the moisture source, then containing the affected area to prevent spore spread. Understanding the biology—how mold spores travel through air and settle in porous materials—helps you pick the right cleanup methods and protect your family’s health.
How moisture drives mold growth
Moisture is the fuel that mold uses to grow. In homes, humidity above 50-60% sustained for days provides a hospitable environment for water mold. Leaks from roofs, windows, or pipes create damp pockets behind drywall, cabinetry, and basements. Condensation forms when warm, moist air meets cool surfaces, especially in bathrooms and kitchens. Quick assessment requires a moisture meter and surface checks for dampness behind walls or under carpeting. Mold is not solely an exterior problem; it often hides inside walls, under insulation, or in crawl spaces. Addressing the moisture source is the priority, followed by careful cleanup. Ventilation helps reduce humidity; dehumidifiers can remove excess moisture over time. Tracking moisture readings guides decisions on cleaning frequency and prevents regrowth.
Health risks associated with water mold
Health risks from water mold are not limited to skin irritation; inhaling mold spores can irritate airways, trigger allergies, and aggravate asthma. People with compromised immune systems or lung conditions are especially at risk. Prolonged exposure can lead to coughing, wheezing, nasal congestion, and throat irritation. In humid, moldy environments, mycotoxins may be produced by certain species, though safe-to-handle levels vary. To minimize exposure, seal the area, wear an appropriate respirator, and use a HEPA-filter vacuum during cleanup. Avoid dry sanding or aggressive blasting that can release spores. The Mold Removal Lab findings underscore the link between moisture management and health outcomes; proper cleanup lowers indoor mold counts and improves air quality. If symptoms persist, seek medical advice and reconsider DIY remediation.
Signs of water mold in your home
Visible signs include musty odors, staining, discoloration, and surface texture changes on walls, ceilings, or floors. Mold can appear as black, green, or gray spots or fuzzy growth on fabric or wallpaper. Hidden mold behind drywall or under flooring may require moisture meters and infrared imaging to locate. Quick action matters as colonization expands with time. Standing water after leaks or floods is a red flag. If the affected area is large or spans multiple rooms, a professional may be needed. Documenting the extent with photos helps remediation decisions and insurance communications.
Immediate safety steps when you discover water mold
Isolate the area and don proper PPE: an N95 or P100 respirator, goggles, and gloves. If safe, stop the water source and prevent further spread by sealing doors with plastic. Ventilate outdoors with windows or exhaust fans, but avoid blowing spores into living spaces. Do not dry-sand or power-wash, which can aerosolize spores. Bag wet materials in sealed plastic and dispose of them outside. Keep notes of moisture sources, cleanup actions, and treated areas to monitor progress. These steps reduce risk and set the stage for effective cleanup and drying, whether you DIY or hire a pro.
Long-term remediation: DIY vs professional
DIY remediation is feasible for small, non-porous surfaces with limited growth; larger or porous contamination requires professionals. Start by cleaning non-porous surfaces with a safe cleaner and dry thoroughly. Porous materials like drywall, insulation, carpets, and ceiling tiles often need removal and replacement. If growth covers more than a small area or keeps returning, stop and contact a licensed contractor. Documentation of area size, measurements, and steps helps safety and insurance claims. Professionals may use contained negative-air setups, industrial dehumidifiers, and specialized cleaners. The aim is a dry, stable environment for 24-72 hours to prevent regrowth, while complying with local codes and warranties.
Cleaning methods for different materials
Hard, non-porous surfaces (glass, metal, glazed tile) respond to detergent cleaning followed by rinsing and thorough drying. Wood requires careful moisture control and possibly resealing after drying. Fabrics may require machine washing or professional cleaning; porous materials like drywall or carpet often must be removed to prevent ongoing contamination. Drying remains critical: use dehumidifiers and fans while monitoring humidity until readings stay below 50-60% for several days. Promptly remove wet items to prevent cross-contamination, and dispose of contaminated materials properly to avoid reintroduction of spores.
The role of testing and documentation
Testing confirms mold presence and can guide remediation, but professional guidance improves accuracy. If you test, document affected areas with photos and moisture readings. Many situations rely on moisture measurements and visual checks rather than sampling. Certified labs or accredited services offer better interpretation than DIY kits. Use results to shape remediation plans and insurance discussions. Pair testing with a moisture-reduction plan and a clear remediation timeline for best results.
Prevention strategies for water mold
Prevention is the most effective defense. Maintain indoor humidity below 50-60%, fix leaks promptly, inspect roofs and pipes, and improve bathroom/kitchen ventilation. Use mold-resistant products in high-moisture zones and insulate cold surfaces to reduce condensation. Annual humidity checks and prompt spill cleanup are wise. Document repairs and humidity levels to demonstrate ongoing prevention. For floods, begin drying within 24-48 hours to minimize mold growth.
Common myths about water mold damage
Common myths lead to unsafe or ineffective cleanup. Bleach may disinfect non-porous surfaces but often fails on porous materials and can release fumes. If you don’t see mold, you’re not necessarily safe—hidden mold behind walls persists. Dryer sheets or everyday cleaners won't prevent mold growth; moisture control and material removal are essential. The truth is that ongoing moisture control, prompt repairs, and proper cleanup are essential for a healthy home. The Mold Removal Lab team emphasizes acting quickly on dampness and leaks to prevent long-term damage.
Tools & Materials
- PPE kit (N95 respirator, goggles, gloves)(Essential for all cleanup tasks)
- Moisture meter / hygrometer(Check moisture levels behind walls and in problem areas)
- Plastic sheeting and painter's tape(Containment to prevent spores spread)
- Detergent or mild cleaner (non-ammonia)(Used for cleaning non-porous surfaces)
- Scrub brushes and sponges(Scrub mold from hard surfaces)
- Rags, towels, and plastic bags for disposal(Seal contaminated waste securely)
- Dehumidifier / portable desiccant(Accelerate drying after cleanup)
- HEPA vacuum cleaner(Remove loose spores without recirculating air)
- Trash bags rated for heavy use(Seal and remove contaminated materials)
- Infrared thermometer / moisture detection tools(Helpful for locating hidden moisture pockets)
- Sealant or paint with mold-resistant properties(Use after drying on treated surfaces)
- Buckets and disposable wipes(For rinsing and cleanup as needed)
Steps
Estimated time: 2-5 days
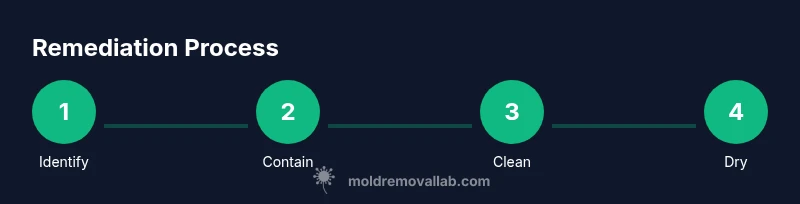
- 1
Identify moisture source
Locate the water intrusion point (roof, plumbing, or condensation). Stop the source if safe and feasible. Taking a proactive approach prevents additional mold growth.
Tip: Document the source location with photos for insurance and future prevention. - 2
Contain the area
Seal off the affected zone with plastic sheeting to prevent spores from spreading to clean areas.
Tip: Keep doors/windows closed to maintain containment. - 3
Put on PPE
Wear an N95 respirator, protective gloves, and eye protection before touching moldy materials.
Tip: Avoid skin contact with moldy surfaces; change PPE if it becomes contaminated. - 4
Remove standing water
If safe, stop active leaks and remove standing water with towels or a wet-dry vacuum. Dry the area as quickly as possible.
Tip: Never mix cleaners with bleach or ammonia; this can release harmful fumes. - 5
Assess material viability
Decide which materials can be salvaged and which must be removed (porous items usually require disposal).
Tip: Take photos to document decisions for future reference. - 6
Clean non-porous surfaces
Scrub hard surfaces with detergent, rinse, and dry thoroughly. Repeat if necessary to remove visible growth.
Tip: Use a clean microfiber cloth to avoid spreading spores. - 7
Remove porous contaminated materials
Bag and dispose of drywall, insulation, or carpet that has mold growth beyond repair.
Tip: Seal bags outside to prevent indoor exposure. - 8
Dry the area completely
Run dehumidifiers and fans to achieve dryness; monitor humidity until readings stay below 50-60% for 24-72 hours.
Tip: Ensure airflow reaches hidden pockets for even drying. - 9
Inspect for hidden mold
Check behind walls, under flooring, and in crawl spaces using a moisture meter or infrared tools.
Tip: If you detect lingering moisture, extend drying and re-check before finishing. - 10
Decide remediation path
If mold covers a large area or recurs, consult a licensed professional; otherwise, proceed with DIY cleanup and prevention.
Tip: Document a remediation plan with timelines for follow-up checks. - 11
Prevent recurrence
Address ventilation, insulation, and humidity controls to minimize future mold risk.
Tip: Consider ongoing humidity monitoring in high-risk rooms. - 12
Document and follow up
Take final moisture readings and photos; maintain a remediation log and schedule periodic checks.
Tip: Use documentation when communicating with landlords or insurers.
FAQ
Can I clean water mold damage myself, and when should I call a pro?
DIY cleanup is possible for small, non-porous areas, but if mold covers more than a small area or recurs, hire a licensed professional to ensure comprehensive removal and proper containment.
DIY can work for small areas, but big or persistent growth means you should hire a licensed professional.
Is bleach a reliable mold killer?
Bleach can disinfect non-porous surfaces but is not a universal solution, especially on porous materials where mold can linger beneath the surface. Always prioritize moisture removal and material replacement when needed.
Bleach helps on hard, non-porous surfaces but isn’t a cure-all for porous materials.
How long does it take to dry after cleanup?
Drying times vary by space and climate, but most projects reach a stable dry state within 24-72 hours with proper dehumidification and airflow.
Most spaces dry within one to three days with good drying conditions.
Should I repaint right after cleanup?
No. Repaint should wait until the area is completely dry and free of visible mold, and the underlying issue has been addressed. Use mold-resistant paints if applicable.
Paint only after you’ve dried the area and removed mold sources.
Do I need mold testing after remediation?
Testing can confirm removal success, especially in high-risk spaces. In smaller, well-dried areas, visual checks and moisture readings are often sufficient.
Testing helps verify success, but sometimes moisture checks do the job.
Are there health risks for children during cleanup?
Yes. Mold exposure can affect children more acutely. Keep them away from the area during cleanup and ensure proper ventilation and filtration.
Children can be more sensitive to mold; minimize exposure during cleanup.
Watch Video
The Essentials
- Identify and stop the moisture source first.
- Contain and dry the area before cleanup.
- DIY is feasible for small, non-porous areas; larger jobs require professionals.
- Document damage and remediation steps for health and insurance.
- Prevention is the best mold defense: control humidity and fix leaks promptly.