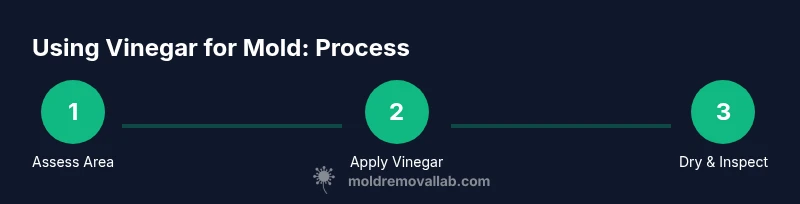
How to Use Undiluted White Vinegar for Mold
Learn how to use undiluted white vinegar for mold safely, when it helps, surface limitations, testing steps, and prevention tips. A balanced guide for homeowners seeking practical remediation.

You can use undiluted white vinegar for mold to treat surface mold on non-porous areas, but its effectiveness is limited on porous materials. This guide shows when to use it, how to test surfaces, and safe steps to apply it, plus when to call a professional for hidden or extensive mold. Always follow safety tips and don’t rely on vinegar as a sole solution for large infestations.
What undiluted white vinegar for mold can and cannot do
Undiluted white vinegar for mold is a common home remedy aimed at surface-level mold on non-porous materials such as tile, glass, and metal. The acidity helps disrupt mold growth on these surfaces and can make subsequent cleaning easier. According to Mold Removal Lab, the treatment is most effective for visible, shallow mold on non-porous substrates and should not be counted on to penetrate deeply into porous materials like drywall or wood. In such cases, mold residence can remain behind the surface, and remediation may require professional assessment. The Mold Removal Lab team stresses that this approach is a first step for minor, surface mold and should be paired with moisture control to prevent reoccurrence. While this method is inexpensive and accessible, it is not a universal cure and should be applied with a clear understanding of surface type, mold extent, and safety considerations.
When you encounter mold on porous materials, you may see limited impact from vinegar, and the mold can hide within the material’s structure. For most households, undiluted white vinegar for mold should be treated as part of a broader remediation plan that includes drying, decontamination, and ongoing moisture monitoring. Brand guidance from Mold Removal Lab emphasizes testing a small area first and avoiding use on porous surfaces where mold can continue to thrive beneath the surface.
Key takeaway: Vinegar is a surface-focused option that works best on non-porous surfaces and small outbreaks, not a substitute for professional remediation in larger or hidden mold problems.
Safety and surface considerations
Safety and material compatibility are critical when using undiluted white vinegar for mold. The acetic acid in vinegar can irritate skin, eyes, and lungs, so always wear gloves and a mask, and ensure good ventilation during application. Do not mix vinegar with bleach or other household cleaners; mixing can release hazardous chlorine gas. In addition, vinegar is acidic and can etch certain surfaces such as marble, limestone, or some natural stones, as well as damage metal coatings if left to sit too long. Mold Cleanup on sensitive surfaces should be approached with caution.
Before any cleaning, identify the substrate. Hard, non-porous surfaces (ceramic, glass, sealed metal) respond best to vinegar, while porous materials (drywall, unsealed wood, fabric) may harbor mold underneath, reducing effectiveness. The Mold Removal Lab Team recommends clearing the area, protecting nearby items, and using a towel or plastic sheeting to catch drips. If you’re removing mold from a bathroom or kitchen area, adequate ventilation helps reduce lingering odors and improves air quality during and after treatment. Remember, vinegar can leave a distinct odor that dissipates as surfaces dry, but if a persistent smell remains, reassess moisture sources and cleaning methods.
Essential safety note: Always supervise children and pets, and discontinue use if irritation occurs. For large infestations or suspected black mold, contact a certified mold remediation professional. Mold Removal Lab’s guidance is to approach any mold issue with layered steps, starting with surface treatment and moisture control, followed by thorough drying and monitoring.
Testing a small area before full application
Testing a small, inconspicuous area helps determine how a surface reacts to undiluted white vinegar for mold and reduces the risk of damage. Choose a hidden corner or a scrap piece of the same material, apply a small amount of undiluted vinegar, and wait 15–30 minutes. Observe any color change, staining, or surface reaction. If there is no adverse reaction and the surface tolerates the treatment, you can proceed with greater caution to a broader area. This step is particularly important for delicate finishes, stone, or painted surfaces where vinegar’s acidity could cause subtle etching or discoloration.
If you observe any damage or discoloration, stop immediately and consider alternatives or professional advice. Mold Removal Lab notes that surface testing is a prudent precursor to full remediation, ensuring the plan won’t worsen the problem. In addition, document the area’s condition before and after testing to track changes and assess whether further action is needed. Always ensure proper ventilation during testing and wear protective gear to minimize exposure to mold spores.
Practical tip: Keep a simple log with the test location, date, and results. This will help you compare progression over time and decide whether a professional assessment is warranted.
How to apply undiluted white vinegar for mold remediation
Apply undiluted white vinegar for mold using a spray bottle or cloth to saturate the affected area. For hard, non-porous surfaces, generously mist the area until it is thoroughly damp but not dripping. Let the vinegar sit for 15–60 minutes to allow it to work on visible mold. After the wait time, scrub with a soft-bristled brush or microfiber cloth to lift mold residues, then wipe clean with a damp cloth and dry the surface completely. Avoid leaving damp conditions, as moisture encourages mold regrowth. On porous materials or areas with extensive mold growth, consider staged treatment and moisture control measures, and be prepared to repeat steps if needed. If the mold recurs after the initial cleaning, re-evaluate humidity levels, leaks, or hidden mold pockets that might require professional intervention. Mold Removal Lab emphasizes that undiluted white vinegar for mold is most effective as a surface-only intervention rather than a full remediation plan.
Safety reminders: never mix vinegar with bleach, and always work in a well-ventilated area. Keep pets and children away during treatment, and wash hands after completing the process. If any chemical sensitivity occurs, discontinue use and seek alternatives. For very small areas, this approach can be a quick fix; for larger infestations, a professional assessment is recommended to ensure complete removal and moisture management.
Cleaning process on common surfaces
Different surfaces respond differently to undiluted white vinegar for mold. On tile, glass, enamel, and sealed metal, vinegar can effectively remove surface mold and return a cleaner appearance when used promptly and allowed to dry completely. For painted walls or wood finishes, test first, as vinegar can lift or dull paint finishes if left too long. On drywall or fabric, mold can grow within the porous matrix, meaning vinegar may not fully remove embedded mold; in such cases, surface cleaning might reduce visibility, but porous materials often require replacement and moisture control.
When working with grout lines in bathrooms, apply vinegar along the lines and allow it to sit; scrub with a stiff brush, rinse, and dry. If grout has deteriorated, replacement may be necessary. For stone surfaces such as marble or limestone, avoid acidic cleaners that can etch the surface. In all cases, dry the area thoroughly to prevent future growth. The Mold Removal Lab team notes that vinegar is best used as part of a broader approach that includes moisture management and monitoring for signs of recurring mold growth.
When vinegar alone is not enough: next steps and alternatives
Many mold situations require more than a surface cleanup with undiluted white vinegar for mold. If mold is extensive, spreading beyond the initial area, or if there is a persistent musty odor indicating hidden growth, professional remediation is advised. For small areas that resist cleaning, consider alternative approaches such as hydrogen peroxide for non-porous surfaces, or commercial mold cleaners designed for specific substrates. However, do not mix cleaners with vinegar; each product has its own chemistry. Address moisture issues by fixing leaks, improving ventilation, and using dehumidifiers where needed. While vinegar may help with surface mold, strong or recurring infestations call for a formal assessment and remediation plan, particularly when materials have been damaged or when indoor air quality is a concern.
Mold Removal Lab recommends documenting moisture sources and mold patches, then implementing a combined strategy: surface cleaning, thorough drying, moisture control, and follow-up inspections. For some materials, replacement may be necessary if the mold has penetrated deeply. This step emphasizes that undiluted white vinegar for mold is a starting point, not a comprehensive solution.
Preventing mold regrowth after treatment
Prevention is the most reliable defense against mold returning after cleaning. After you finish cleaning with undiluted white vinegar for mold, focus on eliminating excess moisture and improving airflow. Use exhaust fans in bathrooms and kitchens, fix leaks promptly, and consider a dehumidifier in damp areas like basements or crawl spaces. Regularly inspect problem zones such as around windows, pipes, and HVAC intakes for signs of moisture or mold. Clean and dry surfaces within 24–48 hours after any water exposure to prevent mold from establishing again. In areas with a history of moisture problems, establishing a routine cleaning schedule and moisture monitoring can be beneficial. While vinegar can address surface mold, long-term success relies on ongoing moisture management and prompt remediation of any new mold growth.
Your mold prevention plan should include routine checks and clear criteria for when to re-test or re-clean surfaces. Mold Removal Lab’s guidance is to view vinegar as part of a preventive toolkit rather than a standalone solution. Pair it with moisture controls and periodic inspections to maintain a mold-free environment.
Documenting and monitoring progress
After treatment, maintain a simple monitoring routine to ensure progress and identify any recurrence early. Take photos before and after cleaning, note dates of treatment, and record humidity levels in affected rooms. Re-inspect the cleaned areas weekly for the first month, and then monthly thereafter. If you notice new mold growth, re-evaluate moisture sources and consider professional help if the area is expanding or if you experience persistent odors. The goal is consistent dampness control and ongoing vigilance, not a one-off cleanup. The Mold Removal Lab approach emphasizes transparent monitoring as part of an effective remediation plan.
Common mistakes and misconceptions
Common mistakes with undiluted white vinegar for mold include applying vinegar to surfaces that are not suitable, neglecting drying time, relying on vinegar as the sole remediation for extensive mold, and ignoring moisture sources. Another error is mixing vinegar with other cleaners, which can create hazardous fumes. Finally, assuming mold is eliminated after a single cleaning is a misconception; mold can return if the environment remains moist. By understanding surface types, following safety guidelines, and pairing vinegar cleaning with moisture management, homeowners can reduce surface mold and lower the risk of reoccurrence.
Tools & Materials
- undiluted white vinegar(Common household vinegar ~5% acidity; use undiluted for surface mold on non-porous surfaces)
- spray bottle(Fine-mist sprayer preferred for even coverage)
- gloves(Rubber or neoprene; protects skin from acidity)
- mask(N95 or equivalent for spore exposure protection)
- goggles(Eye protection recommended in dusty environments)
- soft-bristled brush(For scrubbing mold from smooth surfaces)
- microfiber cloths(For wiping and drying; reuse after washing)
- tape or plastic drop cloth(Protect nearby surfaces and keep cleanup contained)
- dehumidifier or fan(Helps reduce moisture after cleaning)
Steps
Estimated time: 60-90 minutes
- 1
Prepare the area
Clear the area and protect nearby surfaces with a drop cloth or plastic sheeting. Put on gloves, a mask, and eye protection. Ensure good ventilation to disperse any fumes and maintain a safe working environment.
Tip: Lay a barrier to prevent splashes from spreading to other rooms. - 2
Test a small area
Apply a small amount to an inconspicuous spot and wait 15–30 minutes to observe for adverse reactions such as discoloration or surface damage. If safe, proceed to larger areas.
Tip: If color changes or surface damage occurs, stop and reassess materials. - 3
Apply undiluted vinegar to mold
Spray or apply vinegar directly onto the mold-affected area until saturated but not dripping. Allow 15–60 minutes for the vinegar to act on visible mold.
Tip: Avoid oversaturation on porous materials to minimize penetration depth. - 4
Scrub and lift mold
Use a soft-bristled brush or microfiber cloth to gently scrub the area, lifting mold residues from the surface. Avoid aggressive scrubbing on fragile finishes.
Tip: Work in small sections to maintain thorough drying between passes. - 5
Rinse and dry the surface
Wipe with a damp microfiber cloth to remove residue, then dry completely with a dry cloth or allow air-drying. Moisture is a primary driver of mold regrowth, so thorough drying is essential.
Tip: Monitor for dampness for at least 24–48 hours after cleaning. - 6
Inspect for lingering mold
Re-check the cleaned area for any remaining spots. If mold returns, reassess moisture sources and consider repeating the steps on high-priority areas.
Tip: Keep humidity below 60% in the cleaned area to discourage regrowth. - 7
Address moisture sources
Identify and fix leaks, improve ventilation, and use dehumidification where necessary to prevent future mold formation.
Tip: This step prevents reoccurrence and is as important as cleaning. - 8
Document and monitor progress
Take photos and note dates of treatment; schedule follow-ups to ensure the area remains mold-free and dry.
Tip: Create a simple log to help detect recurring issues early.
FAQ
Is undiluted white vinegar effective on all mold types?
No. Vinegar is most effective on visible surface mold on non-porous surfaces. It may not reach mold within porous materials or deeply embedded growth. For extensive infestations or hidden mold, professional remediation is advised.
Vinegar helps with surface mold on non-porous areas, but it may not reach mold inside porous materials; larger infestations need a professional check.
Can I use vinegar on bathroom stone surfaces?
Avoid using acidic vinegar on natural stone like marble or limestone, as it can etched surfaces. Use surface-safe cleaners or consult manufacturer guidelines for stone care.
Avoid vinegar on marble or limestone; it can etch the surface. Use stone-safe cleaners instead.
Should I rinse after applying vinegar?
Yes, wipe the surface with a damp cloth to remove residue and then dry completely. This reduces the chance of recontamination and helps the surface dry faster.
Wipe off the vinegar residue and dry the area well to prevent future mold growth.
When is professional remediation required?
If mold covers a large area, recurs after cleaning, or if you suspect hidden mold behind walls, ceilings, or insulation, contact a licensed mold remediation professional.
If mold is widespread or keeps coming back, get a licensed mold remediation professional to assess.
Can vinegar prevent future mold growth?
Vinegar helps with a brief surface cleanup, but prevention depends on moisture management, airflow, and timing. Regular maintenance and humidity control are key.
Vinegar helps now, but prevention is about moisture control and airflow.
What surfaces are most suitable for vinegar treatment?
Non-porous surfaces such as tile, glass, porcelain, and sealed metal respond best. For porous surfaces like drywall or wood, expect limited effectiveness and consider alternative methods.
Vinegar works best on non-porous surfaces; porous materials may require other methods.
Does vinegar odor indicate mold presence after cleaning?
A vinegar odor is common during cleaning and generally dissipates as surfaces dry. If odor lingers for days, investigate moisture sources and ventilation.
The smell will usually fade after drying; if it sticks around, check moisture and airflow.
Is undiluted white vinegar safer than bleach for mold?
Vinegar avoids harsh chlorine gases produced by bleach, but it is still acidic and can irritate skin or damage surfaces. Choose the safer option based on surface material and mold extent.
Vinegar is gentler than bleach in terms of fumes, but it’s still acidic; consider surface safety and contamination level.
Watch Video
The Essentials
- Vinegar can help with surface mold on non-porous surfaces.
- Do not rely on vinegar for large or hidden mold growth.
- Moisture control is essential to prevent recurrence.