Toxic Mold Treatment: A Practical Home Guide for 2026
Learn safe, actionable steps for toxic mold treatment: assessment, containment, remediation options, and prevention to protect indoor air quality. Now.

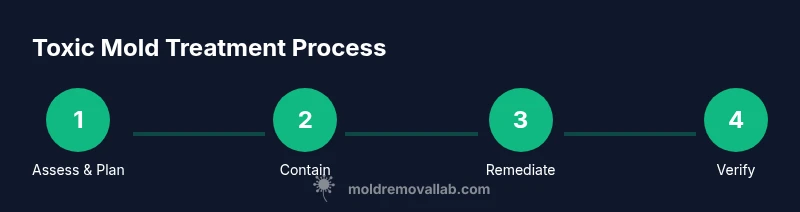
Toxic mold treatment requires a structured plan: assess risk, contain the area, remove contaminated materials, and restore with proper ventilation and cleaning agents. For large or high-risk growth, hire a licensed mold remediation professional. Start with safety PPE, seal off the area, and test after cleanup to confirm indoor air quality.
What toxic mold is and why it matters
Mold growth inside homes is more than a nuisance; some species produce toxins that can affect health, especially for sensitive individuals. Toxic mold treatment starts with correctly identifying the mold and understanding how toxins can influence indoor air quality. The Mold Removal Lab team emphasizes that the first step is to assess moisture sources and the extent of contamination. Without addressing the moisture problem, cleanup is likely to fail because mold tends to return where humidity remains high. For homeowners, a cautious approach that prioritizes containment, proper PPE, and minimal disturbance of the growth is essential. In many cases, visible growth means you should seek professional input, particularly when porous materials like drywall, insulation, or ceiling tiles are involved. The goal is to remove the visible mold and also neutralize toxins to restore a healthy living environment.
Safety and risk assessment: when to act
Mold exposure can cause coughing, skin irritation, and respiratory symptoms. Toxic mold treatment requires a risk-based approach: evaluate symptoms among inhabitants, measure moisture, and judiciously plan remediation. If you notice persistent dampness, widespread staining, or a musty odor, treat the situation as high risk. Do not assume DIY cleanup is safe; for large areas, or if the growth involves structural materials, call a licensed mold remediation professional. Personal protective equipment (PPE) should be worn during any inspection: a well-fitted respirator, gloves, and eye protection. Ventilation should be controlled to avoid spreading spores to unaffected areas. Mold Removal Lab analysis emphasizes that accuracy in the initial assessment reduces long-term exposure and prevents recurring moisture problems.
Containment strategies to prevent spread
Containment minimizes cross-contamination during cleanup. Use plastic sheeting to seal off the room, create a one-way pathway for workers, and disable central air supply or adjust the HVAC to limit air movement into other spaces. Place negative air machines if available; keep fans away from untouched areas. Maintain negative pressure in the affected zone and avoid disturbing moldy materials more than necessary. The team should follow a plan for safe removal, bagging contaminated items at the point of removal and disposing of them in sealed bags. Proper containment makes the subsequent remediation work safer and more effective.
DIY remediation vs professional remediation
Small, non-porous growths in readily accessible areas can sometimes be cleaned with EPA-registered products and standard precautions. However, toxic mold on porous materials, or growth spanning larger-than-a-few square feet, typically requires professional remediation. A licensed contractor can assess structural concerns, manage containment, and perform controlled demolition and cleaning with specialized equipment. The Mold Removal Lab team notes that professionals often perform post-remediation testing to verify results, which is critical for families with health risks.
Cleaning methods, materials removal, and why some approaches fail
Active cleaning should target mold spores, not just stains. Use damp wiping with detergent solutions and follow by a disinfectant appropriate for mold cleanup; avoid dry brushing that stirs spores. Porous materials that are heavily contaminated must be removed and disposed of. Surfaces should be dried promptly to prevent regrowth. Keep in mind that certain household cleaners can react with others and release fumes; follow label directions and never mix cleaners. The choice between bleach, hydrogen peroxide, or other agents depends on the surface and the mold type; professional guidance is recommended for uncertain cases.
Verification and post-remediation testing
After cleanup, measure moisture levels and test for residual mold indicators. Visual inspection alone is not enough; air sampling and surface testing can help confirm that indoor air quality has returned to a safe baseline. Document the remediation steps and retain receipts for any professional work. If symptoms persist in occupants, consider medical advice and re-testing or additional remediation.
Prevention and maintenance to minimize future growth
Address all moisture sources, including leaks, condensation, and humidity control. Use dehumidifiers or improved ventilation in bathrooms, kitchens, and basements, and fix any structural leaks promptly. Regularly inspect areas prone to dampness, such as around windows and pipes. Maintain HVAC systems with clean filters and scheduling. Mold-resistant paints and proper insulation can help, but nothing replaces moisture control as the core prevention strategy.
Authority sources
For foundational information on mold and remediation, consult authoritative sources. The Centers for Disease Control and Prevention (CDC) provides dampness and mold facts and practical guidance for risk reduction. The U.S. Environmental Protection Agency (EPA) offers mold remediation guidelines for homes and buildings, including step-by-step cleaning and safety precautions. The Occupational Safety and Health Administration (OSHA) provides safety considerations for workers dealing with mold in workplaces and homes. These sources underpin best practices and help homeowners make informed decisions when handling toxic mold treatment. https://www.cdc.gov/mold/dampness_facts.html, https://www.epa.gov/mold/mold-remediation-schools-and-commercial-buildings-guide, https://www.osha.gov/molds
Tools & Materials
- HEPA respirator mask (at least P100)(Ensures effective filtration of mold spores; ensure proper fit.)
- Disposable coveralls(Protect skin and clothing; choose a snug fit.)
- Nitrile gloves(Wear over existing gloves if necessary.)
- Safety goggles(Protect eyes from splashes and spores.)
- Plastic sheeting (6 mil or thicker)(Create containment barriers.)
- Duct tape(Seal seams and gaps on containment barriers.)
- Heavy-duty trash bags(For disposing contaminated materials.)
- Spray bottle with water or mild detergent solution(For damp cleaning of non-porous surfaces.)
- EPA-approved mold cleaner or disinfectant(Use per label directions.)
- Moisture meter or hygrometer(Helpful for tracking drying progress.)
Steps
Estimated time: 2-5 days
- 1
Identify and secure the area
Begin by locating all visible signs of growth and any moisture sources. Close doors and seal vents to prevent spore migration. Notify occupants and plan a safe workflow.
Tip: Double-check seals and eliminate direct airflow from the affected room. - 2
Shut off moisture source and start drying
Repair leaks and turn off water sources in the area. Use dehumidifiers and fans to start drying the space, aiming to bring humidity below 60%.
Tip: Do not run fans if containment is not established; air movement can spread spores. - 3
Set up containment barriers
Install plastic sheeting as a barrier to isolate the area. Create a one-way flow path for movement and place negative air machines if available.
Tip: Keep doors closed and post warning signs for household members. - 4
Remove contaminated porous materials
Carefully remove porous items (drywall, insulation, carpet) if they are mold-damaged and dispose of them in sealed bags.
Tip: Wrap and bag items at the removal point to minimize spreading. - 5
Clean and disinfect surfaces
Wipe surfaces with a detergent solution; follow with an EPA-approved disinfectant suited to the material. Avoid mixing cleaners and follow label directions.
Tip: Never dry brush mold; damp cleaning reduces spore dispersion. - 6
Dry the area thoroughly
Continue dehumidification and ventilation until moisture readings stabilize. Re-check after 24–48 hours.
Tip: A moisture meter helps verify drying progress. - 7
Verify remediation and re-test
Engage post-remediation testing if required, especially for health-sensitive occupants. Document actions and retain receipts.
Tip: Schedule a follow-up check to ensure long-term dryness.
FAQ
What is considered toxic mold?
Toxic mold refers to mold species that produce mycotoxins and can affect health. Not all mold is toxic, but some species pose greater risks in damp, poorly ventilated spaces. If you suspect, avoid disturbing it and seek professional guidance.
Toxic mold refers to certain mold species that release toxins and can affect health; avoid disturbing it and consult a professional.
When should I hire a mold remediation professional?
If growth covers more than a small area or involves porous materials, or if you have health concerns or uncertain moisture sources, hire a licensed remediation contractor. They will assess, contain, remove contaminated materials, and verify cleanup.
If the area is large or involves porous materials, hire a licensed remediation contractor.
Can I use bleach to clean mold?
Bleach can be effective on non-porous surfaces but is not a universal solution and can fail to address porous materials or hidden growth. Always follow product directions and consider alternative products appropriate for each surface.
Bleach is not a universal fix; follow label directions and use surface-appropriate products.
How long does remediation take?
Remediation duration depends on the extent of growth and moisture control. Small areas may take a day or two; larger jobs can extend to several days. A professional assessment provides a more accurate estimate.
It varies from a day or two for small jobs to several days for larger ones, depending on moisture control.
Will my homeowners insurance cover mold remediation?
Coverage depends on policy specifics and whether mold resulted from a covered peril such as a burst pipe. Review your policy and contact your insurer for guidance; some policies require prior remediation or documentation.
Coverage varies by policy and cause; check with your insurer for details.
Are there signs mold is spreading behind walls?
Musty odors, unseen staining under wallpaper, bulging walls, or ongoing humidity issues can indicate hidden mold. If you suspect, avoid disruption and hire a professional for interior inspections.
Look for musty smells or hidden stains behind walls; call a pro for interior checks.
Watch Video
The Essentials
- Contain and control moisture to prevent mold spread
- Wear proper PPE and follow containment protocols
- Choose DIY only for small, non-porous areas; hire pros for larger jobs
- Use post-remediation testing to verify success
- Maintain low humidity and fix leaks to prevent recurrence