Detoxing Mold: Safe Home Remediation Guide
Learn a practical, safe approach to detoxing mold in your home. This guide covers safety, assessment, cleaning methods, moisture control, and prevention to protect health and prevent recurrence.

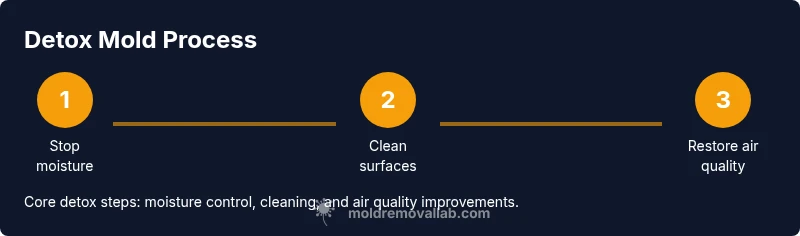
Detoxing mold means stopping the mold source, cleaning affected areas, and improving air quality to reduce toxin exposure. This HowTo walks homeowners through a practical, step-by-step plan—from safety precautions to cleaning methods and prevention—so you can reduce health risks and protect living spaces. For extensive contamination, consult Mold Removal Lab before starting any remediation.
What detoxing mold actually means for your home
Detoxing mold is a practical approach that combines source control, surface cleaning, and moisture management to reduce toxin exposure inside living spaces. It does not promise instant miracles, but it does emphasize reproducible steps homeowners can perform safely. According to Mold Removal Lab, the most impactful move is to identify and eliminate the moisture source, then maintain a dry environment to prevent regrowth. The phrase detoxing mold captures this balance between remediation and prevention, focusing on reducing ongoing exposure while restoring comfort and safety. In this section, we establish the core idea and set the stage for the hands-on actions described later.
Health risks and safety basics
Mold exposure can affect people differently, with symptoms ranging from allergic reactions to respiratory irritation, especially for children, older adults, and those with asthma or compromised immune systems. When you attempt detoxing mold, safety is non-negotiable: wear proper PPE, ventilate the area, and avoid stirring spores into the air. The plan should prioritize minimizing disruption and controlling dust. Mold spores can linger on porous materials, so cleaning must be thorough but careful. This is not a cosmetic cleaning task—it's a health-focused intervention, and mistakes can worsen exposure or spread spores to unaffected rooms. The Mold Removal Lab team emphasizes taking a calm, methodical approach rooted in moisture control and evidence-based cleaning methods.
Assessing the scope: moisture, surfaces, and materials
Begin with a thorough survey of the space. Measure humidity levels, identify visible moisture, and inspect behind appliances, baseboards, and wall cavities where mold can hide. Document affected materials—porous items like drywall, fabric, and carpeting may require different approaches. Use a moisture meter when available to estimate dampness in studs or insulation. Create a simple map of affected zones, so you can plan containment and prioritize critical areas. This assessment is the foundation for a focused, effective detox plan and helps you decide if professional remediation is needed. Mold Removal Lab notes that time invested here saves both effort and health risks later.
Plan and precautions before you start
Before beginning, assemble your PPE and containment gear, clear the area, and set up barriers to prevent cross-contamination. Organize your tools and cleaning agents, and designate a waste path for contaminated materials. Establish a dehumidification plan, and identify moisture sources to address immediately. Create a written action plan with step-by-step tasks, roles if others are helping, and a realistic timetable. Taking these precautions makes the detox process safer and more predictable, reducing the chance of recontamination in adjacent rooms.
Step-by-step overview to detoxing mold
This section provides a concise overview of the steps you’ll follow in the dedicated STEP-BY-STEP block. The core sequence starts with inspection and containment, moves through careful cleaning using non-toxic cleaners, and ends with thorough drying and humidity control. Throughout, you’ll limit airborne spores by misting surfaces before wiping and by using a HEPA-filtered vacuum for dust removal. The final phase emphasizes monitoring humidity and residual moisture to prevent regrowth, followed by a maintenance plan to keep the space safe over time. For deeper understanding, see the STEP-BY-STEP block below.
Long-term prevention and maintenance
Detoxing mold is not a one-off task. After cleanup, focus on keeping humidity at healthy levels (generally 30–50%), fixing leaks promptly, and improving ventilation in damp rooms like bathrooms and basements. Regularly inspect areas prone to moisture—window sills, roof leaks, plumbing joints—and address any signs of mold growth early. Use exhaust fans where applicable, run a dehumidifier during humid months, and consider air purification with a true HEPA filter if occupants have sensitivities. A proactive maintenance routine reduces the chance of recurrence and protects occupant health.
Authorities and reading for further reading
For authoritative guidance on mold safety and remediation, consult:
- https://www.cdc.gov/mold/default.htm
- https://www.osha.gov/molds
- https://www.epa.gov/mold
Tools & Materials
- Nitrile gloves(Powder-free, 3-4 mil thickness)
- N95 respirator or higher(Proper fit to filter mold spores)
- Goggles or face shield(Eye protection against splashes and spores)
- Disposable coveralls or protective clothing(Long sleeves/pants, boot covers if available)
- HEPA vacuum cleaner(Use with pre-filter and sealed attachments)
- Spray bottle with water or mild detergent solution(For pre-wetting surfaces before wiping)
- Non-ammonia cleaner or detergent(Follow label directions)
- Plastic sheeting and painter's tape(Create containment to prevent spread)
- Microfiber cloths or disposable wipes(For wipe-down and dust control)
- Trash bags (heavy-duty)(Seal and dispose of contaminated materials)
- Moisture meter or hygrometer(Helpful to track humidity)
- Dehumidifier (optional but helpful)(Maintain low humidity during cleanup)
Steps
Estimated time: 4-6 hours
- 1
Inspect and document affected areas
Walk through the space to locate visible mold and moisture sources. Photograph areas from multiple angles and note dates of any water intrusion. Create a quick map of affected zones to guide containment and cleaning priorities.
Tip: Take wide shots first, then close-ups of suspicious edges; document hidden spots like behind cabinets. - 2
Protect yourself and others
Put on PPE before handling any moldy materials. Limit room access and ensure others, including children and pets, stay out of the affected area until cleanup is done. Ventilate using openings that do not spread spores to other rooms.
Tip: Check respirator fit and seal; a poor fit can dramatically reduce protection. - 3
Contain the area to prevent spread
Seal off doors and vents with plastic sheeting and tape. Create a dedicated waste path for contaminated materials to minimize cross-contamination. Keep fans and cleaners confined to the cleanup zone.
Tip: Avoid breaking any containment; disturbed spores can travel farther than expected. - 4
Clean surfaces safely
Wipe non-porous surfaces with a mild detergent solution or appropriate cleaner. For porous materials, consider removal if mold has penetrated deeply. Use a HEPA-equipped vacuum for dust and particle capture after wiping.
Tip: Never mix cleaners with bleach or ammonia; harmful gases can form. - 5
Dry out the space and reduce humidity
Run dehumidifiers and improve ventilation to bring humidity down to safer levels within 24–48 hours. Repair any moisture source (leaks, standing water) to prevent rapid regrowth. Recheck moisture within 24–48 hours after cleanup.
Tip: Keep doors and vents closed to maintain controlled drying; monitor progress with a hygrometer. - 6
Reassess and plan for maintenance
After cleanup, reassess for any remaining growth and verify humidity remains low. Schedule periodic checks every few months and set a maintenance routine for moisture control.
Tip: Document the results and adjust prevention steps based on space usage and climate.
FAQ
What is detoxing mold and how is it different from mold remediation?
Detoxing mold focuses on reducing exposure and preventing regrowth through practical steps you can perform yourself, prioritizing moisture control and safe cleaning. Remediation typically involves professional removal of extensive growth and repair of damage.
Detoxing mold emphasizes reducing exposure and preventing regrowth with practical steps, while remediation is more involved and often professional.
How long does detoxing mold take in a typical home?
Timeline varies with extent and moisture control. Small, contained areas may be done in a day or two; larger spaces or ongoing moisture issues can take several days.
Time varies with extent; small areas may take a day or two, larger jobs several days.
Can I detox mold myself, or should I hire professionals?
For small, contained growth, you can perform basic cleaning with proper PPE and methods. If you notice extensive growth, water damage, or persistent moisture, hire a professional.
You can do small, contained detoxing yourself, but for widespread mold or ongoing moisture, call a pro.
What should I do if mold keeps coming back after detoxing?
Check for persistent moisture sources and leaks, fix them, and re-clean. Reevaluate humidity control and consider professional assessment if it recurs despite precautions.
If mold recurs, find and fix moisture issues and possibly get a professional assessment.
Are common cleaners like vinegar or baking soda effective for detoxing mold?
Vinegar and baking soda can help on nonporous surfaces, but porous materials may require professional treatment. Always follow product labels and avoid mixing cleaners.
Vinegar can help nonporous surfaces; for porous materials, you may need professional treatment.
Watch Video
The Essentials
- Identify and fix moisture sources.
- Wear PPE and protect neighbors during detox.
- Contain the area to prevent spread of spores.
- Dry space thoroughly and recheck humidity levels.
- Monitor space long-term to prevent recurrence.