Tilex Mold and Mildew Removal Guide: Safe, Effective Tips
Learn how to use Tilex to safely remove mold and mildew from bathroom surfaces. This practical guide covers surfaces, safety, step-by-step use, and prevention to keep bathrooms clean and healthy.

Using Tilex to remove bathroom mold and mildew is effective on ceramic tile, grout, and fiberglass when you follow the label directions. Ensure good ventilation, wear gloves and eye protection, and apply Tilex as directed. Let it dwell for the recommended time, then scrub and rinse thoroughly to prevent regrowth.
What Tilex Mold and Mildew Removers Are Designed For
Tilex is a bathroom cleaner designed to target mold and mildew on common bathroom surfaces such as ceramic tile, grout lines, shower surrounds, and fiberglass stalls. The products are formulated to break down mold stains and mildew residue, helping surfaces look clean again. Because bathrooms stay moist, Tilex products are marketed for quick, surface-level remediation and stain reduction. Always read the label to confirm the product variant is suited for mold removal and compatible with your surface. If grout is deeply stained or mold has penetrated the grout, Tilex alone may not restore it; you may need grout cleaning or replacement. For many homeowners and renters, Tilex offers a convenient, ready-to-use option that reduces the guesswork of mixing cleaners, which can be risky or ineffective if not used correctly. In this guide we focus on the tile-and-grout scenario common in homes, including indications of when Tilex is appropriate and when alternatives are wiser.
Safety First: Ventilation, PPE, and Handling
Safety must come first when dealing with mold and mildew cleaners. Use Tilex in a well-ventilated area—open a window or run an exhaust fan to move fumes away. Wear protective gloves and eye protection to guard against splashes. Avoid inhaling fumes and keep children and pets away from the treatment zone during application. Do not mix Tilex with ammonia or other cleaners, especially other bleach-based products, as dangerous gases can form. Store bottles away from heat and sunlight. If cleaner contacts skin, wash with soap and water; if it gets in the eyes, rinse immediately and seek medical advice if irritation persists. After use, wash your hands and launder any towels or cloths that touched the product.
Surfaces and Preparations: Where Tilex Works Best
Tilex performs well on non-porous bathroom surfaces such as ceramic tile, grout, enamel-coated fiberglass, and shower panels with smooth finishes. It is typically less effective on natural stone, bare wood, or painted surfaces unless the product label specifies compatibility. Before applying Tilex, remove towels, rugs, and personal items from the area and protect nearby surfaces that could be stained. Clean or wipe away loose debris to improve direct contact between the solution and the mold growth. For best results, test Tilex on a small, inconspicuous patch to confirm colorfastness and surface tolerance. This helps prevent unintended damage or color change while addressing tilex mold and mildew concerns.
How Tilex Works: Mechanism and Label Guidance
Tilex products are designed to address mold and mildew residues on bathroom surfaces and to reduce visible staining. The label provides guidance on where it can be used, how to apply it, dwell times, and how to rinse. Pay careful attention to dwell time since it varies by product line and must be respected for effective results. Do not exceed the recommended contact time, as longer exposure does not always yield better cleaning and can increase surface damage risk on sensitive materials. Always test a small area first and keep surfaces wet only as directed by the label. This approach is aligned with best practices in mold remediation for household settings.
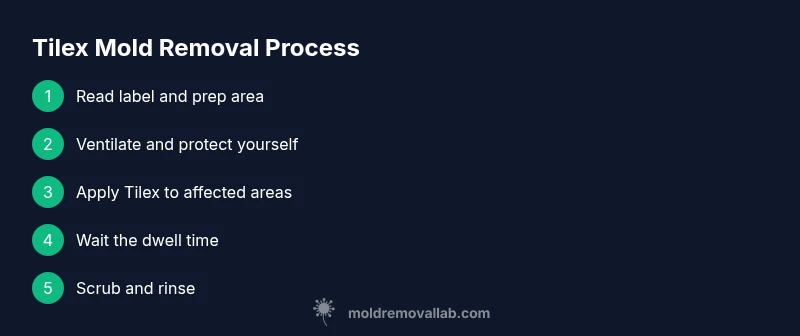
Step-by-Step Overview (High-level) for Tilex Cleaning
To approach tilex mold and mildew safely, start with area preparation and ventilation, then apply Tilex to affected zones, followed by a dwell period, gentle scrubbing, and thorough rinsing. After drying the surface, inspect for remaining staining or growth and repeat as needed. Avoid mixing with other cleaners, especially ammonia-based products. For intensive mold cases, you may need multiple passes or professional assistance if growth is extensive or spreading. This overview is designed to complement the formal STEP-BY-STEP section and help you plan the workflow.
Cleaning Strategy: Combining Tilex with Other Methods
Tilex is most effective when used as part of a broader cleaning strategy that includes mechanical action (scrubbing) and proper drying. Use a non-abrasive scrub brush or sponge to avoid scratching grout or tile surfaces. Do not combine Tilex with bleach-containing products beyond what the label permits; always rinse thoroughly between steps. For stubborn mildew stains, a second application after adequate drying can improve results. Do not rely on Tilex alone for severe, persistent mold; consider grout replacement or professional remediation for long-term problems.
Prevention and Maintenance: Stopping Recurrence After Tilex Cleaning
Once mold and mildew are removed, keep humidity and moisture in check to prevent recurrence. Run bathroom exhaust fans during and after showers, fix any leaks promptly, and wipe surfaces dry after use. Regularly cleaning grout lines with a mild cleaner and re-sealing grout on an appropriate schedule can also help. Consider addressing hidden moisture sources like poorly vented bathrooms or leaky plumbing. Mold prevention is ongoing; pair Tilex use with routine maintenance for lasting results.
Common Mistakes and How to Fix Them
Common mistakes include not testing a small patch, using too much product, or skipping the rinse and dry steps. Another error is treating only the surface without addressing underlying moisture issues, which leads to quick re-growth. Prevent these by always testing first, following label directions, and ensuring proper ventilation and drying. If you see fading or discoloration, stop and reassess surface compatibility. If mold keeps returning, there may be trapped moisture behind walls or grout that requires professional assessment.
When Tilex Isn't Enough: Next Steps and Alternatives
Tilex can address surface mold and mildew, but it may not resolve deeply embedded or recurring mold behind grout or within porous materials. In stubborn cases, consider grout replacement or treating adjacent structural areas. If no improvement occurs after repeated applications, or if you suspect hidden moisture, consult a mold remediation professional. Alternatives include non-bleach products designed for bathrooms or proven grout-cleaning systems. Always prioritize safety and follow local guidelines for mold handling.
Maintenance Schedule and Long-Term Care for Bathrooms
Create a simple maintenance routine: weekly wipe-downs of surfaces, a monthly grout cleaning, and quarterly checks for leaks and humidity. Keep a small spray bottle with a bathroom-safe cleaner for quick touch-ups after showers. Replace seals or caulk if you notice gaps that allow moisture entry. A proactive approach to bathroom maintenance reduces mold and mildew risk and makes Tilex use more effective when needed.
Tools & Materials
- Tilex mold and mildew remover(Choose the variant labeled for mold and mildew and compatible with your surface.)
- Protective gloves (nitrile)(Avoid latex if you have sensitivities; choose thick, chemical-resistant gloves.)
- Safety goggles(Protect eyes from splashes; do not skip this with mold cleaners.)
- Ventilation (window or exhaust fan)(Maintain good air flow during treatment.)
- Non-abrasive scrub brush or sponge(Use gentle scrubbing to avoid damaging grout or tile glaze.)
- Paper towels or clean rags(For wiping and drying; replace if visibly dirty.)
- Bucket or spray bottle for rinsing(Rinsing can be done with a spray bottle or plain water.)
- Masking tape/drop cloth (optional)(Protect nearby fixtures if needed.)
Steps
Estimated time: 30-60 minutes (plus any label-specific dwell time)
- 1
Read the label and prep
Carefully read the Tilex label to confirm surface compatibility and the recommended dwell time. Gather all tools and place a drop cloth or towels on nearby surfaces. This initial step reduces surprises and ensures you follow product-specific instructions.
Tip: Always verify dwell time before applying to avoid under- or over-exposure. - 2
Ventilate and protect
Open a window or activate the bathroom exhaust. Put on gloves and safety goggles to minimize contact with skin and eyes. Ensure pets and children are out of the area during treatment.
Tip: Ventilation is as important as the cleaner; fumes can be strong in small spaces. - 3
Clear the area
Remove towels, rugs, soaps, and any items from the treated surface. Wipe nearby fixtures to prevent accidental splashes. A clean area helps the cleaner contact mold more effectively.
Tip: Avoid clutter that could trap moisture after cleaning. - 4
Apply Tilex to affected areas
Apply Tilex evenly to the mold-affected grout and surfaces using the spray or sponge according to the label. Do not overapply; a thin, uniform layer is usually sufficient for non-porous surfaces.
Tip: Do a spot test first if you’re unsure about colorfastness. - 5
Wait the recommended dwell time
Let Tilex sit on the surface for the label-specified duration. Do not rinse immediately; dwell time helps the active formula penetrate and act on mold residues.
Tip: Set a timer to avoid overexposure. - 6
Scrub the treated areas
Using a non-abrasive brush or sponge, scrub the grout lines and tiles in gentle, circular motions. Focus on stubborn spots while avoiding excessive force on delicate surfaces.
Tip: Target stubborn stains with a second pass if necessary after a short drying period. - 7
Rinse thoroughly
Rinse all treated areas with clean water or wipe with a damp cloth to remove cleaner residue. Ensure no cleaner remains on the surface as it can cause discoloration or irritation.
Tip: Rinse from top to bottom to prevent water from carrying residue downward. - 8
Dry completely and inspect
Dry with a towel and allow the area to air-dry fully. Inspect for remaining mold or staining; if present, repeat treatment on small patches only.
Tip: Moisture is the enemy; ensure surfaces are fully dry before using the bathroom again. - 9
Dispose of used materials
Toss any disposable wipes and paper towels used during the cleaning. Rinse and air-dry reusable tools, then return them to storage away from moisture.
Tip: Never reuse towels that contacted mold without washing. - 10
Plan prevention
Set up a simple maintenance routine to prevent mold recurrence: ventilation during and after showers, regular cleaning, and prompt repair of leaks or water intrusion.
Tip: Prevention saves time and keeps surfaces mold-free longer.
FAQ
Is Tilex safe to use on all bathroom surfaces?
Tilex is designed for common bathroom surfaces like tile, grout, and fiberglass. It may not be suitable for natural stone or painted surfaces unless the label says so. Always test first and follow the label.
Tilex works on tile, grout, and fiberglass, but test a patch first on any delicate surface.
Can Tilex remove mold permanently from grout?
Tilex can reduce visible mold and stains, but deeply penetrated mold in grout may require grout replacement or professional remediation for a permanent fix.
Tilex can reduce stains, but deeply embedded mold may need grout replacement.
How long should Tilex sit before scrubbing?
Follow the label for dwell time; it varies by product variant. Do not rush this step, as adequate contact time improves effectiveness.
Dwell time depends on the product; check the label for exact timing.
Is Tilex safe around pets and kids?
Keep the area well ventilated and restrict access during treatment. Rinse thoroughly after use and store products out of reach of children and pets.
Ventilate well, keep pets away during treatment, and rinse afterward.
What if the cleaner fumes are too strong?
Pause usage, increase ventilation, and consider using the product with lower concentration or switching to a milder formulation if available.
If fumes are strong, stop, ventilate, and try a milder option.
Can Tilex be used with other cleaners?
Do not mix Tilex with ammonia or other bleach-based cleaners. Mixing cleaners can create hazardous gases and is not recommended.
Never mix Tilex with ammonia or other cleaners.
Watch Video
The Essentials
- Identify mold-affected areas and read the label.
- Ventilate, protect yourself, and avoid mixing cleaners.
- Apply Tilex, respect dwell time, then scrub and rinse.
- Dry completely and inspect for residual mold.
- Incorporate preventive maintenance to minimize recurrence.