Tilex 01100 Mold and Mildew Remover: A Practical How-To Guide
Learn to safely use tilex 01100 mold and mildew remover for bathroom surfaces. This Mold Removal Lab guide covers safety, surfaces, application, dwell time, and prevention to keep mold at bay.

This guide shows you how to safely use tilex 01100 mold and mildew remover on bathroom tile, grout, and other hard surfaces. You’ll learn prep, application, dwell time, rinsing, and disposal, plus tips to avoid residue and damage. By following practical steps and safety precautions, you can achieve reliable mold removal results.
What Tilex 01100 Mold and Mildew Remover Is and Why It Matters
Tilex 01100 mold and mildew remover is a consumer product designed to clean and inhibit mold and mildew growth on hard bathroom surfaces such as ceramic tile, porcelain, enamel, and grout. It works by delivering a targeted cleaner that penetrates soap scum and mineral deposits, helping lift organic matter that feeds mold. According to Mold Removal Lab, selecting a cleaner with proven mildew-fighting ingredients and clear usage instructions reduces the chance of surface damage during cleaning. For homeowners, tilex 01100 is convenient for routine maintenance and spot treatment, but it is not a substitute for structural mold remediation when you have extensive growth or hidden moisture. Always read the label for surface compatibility and safety warnings before use, and test a discreet area first to confirm colorfastness and material suitability.
Safety and Preparation Before You Start
Safety is not optional when tackling mold, especially with chemical cleaners like tilex 01100 mold and mildew remover. The Mold Removal Lab team recommends wearing PPE: nitrile gloves, protective goggles, and a respirator or well-fitting mask when ventilation is limited. Work in a well-ventilated area and keep children and pets away. Prepare cleaning materials ahead of time, lay down drop cloths to protect flooring, and gather tools such as microfiber cloths and non-abrasive brushes. Always check the product label for mixing cautions and the recommended dwell time. Preparing properly minimizes exposure risk and improves outcomes.
Surface Compatibility and Use Cases
Tilex 01100 mold and mildew remover is most effective on non-porous surfaces like glazed ceramic tile, enamel fixtures, fiberglass showers, and sealed grout. Avoid using it on porous natural stone, unsealed concrete, or metal with a decorative finish, as the cleaner can cause discoloration or etching. If you’re unsure about a surface, test a small, inconspicuous area first. For areas with heavy mildew buildup, plan a two-step approach: initial cleaning to remove surface film, followed by a second treatment for deeper penetration. This two-step method reduces the chance of re-growth by removing spores and stains.
How Tilex 01100 Works on Mold vs Mildew and What to Expect
Mold and mildew remover products are designed to disrupt the biofilm that mold forms on surfaces. Tilex 01100 targets organic growth and can loosen surface stains on grout and tile. You may notice an immediate reduction in visible mildew and a pleasant fresh scent during application, but deeper mold colonies embedded in porous substrates require longer dwell times or professional remediation. Remember that tilex 01100 is a cleaning product, not a fix for moisture problems. Pair cleaning with moisture control to prevent recurrence.
Common Mistakes and How to Avoid Them
Common mistakes include using too much product, skipping ventilation, and mixing cleaners with other chemicals. Over-application can leave residues that attract more dirt or cause surface damage. Always ventilate the area, follow the label’s dwell time, and rinse thoroughly with clean water after treatment. Do not mix tilex 01100 with bleach, ammonia, or other household cleaners, as this can release dangerous gases. Testing in a hidden corner first helps catch color changes or weakening of grout.
Cleaning, Rinsing, and Drying for Long-Term Results
After treating with tilex 01100 mold and mildew remover, rinse thoroughly with clean water to remove all cleaner remnants. Use a microfiber cloth or soft sponge to wipe surfaces, then dry completely to prevent new moisture pockets. For grout lines, a light scrub with a soft brush can help lift embedded residues, followed by drying. Proper drying reduces the chance of recontamination and helps the treated area stay cleaner longer. If mildew returns, re-evaluate moisture sources and consider sealing porous grout to limit吸 water absorption and mildew re-growth.
Prevention: Keeping Surfaces Mold-Free After Cleaning
Prevention is the best defense against recurring mildew. Improve bathroom ventilation by running exhaust fans or opening a window during and after showers. Wipe down surfaces after use to remove moisture, and repair any leaks promptly. Regular cleaning with tilex 01100 or a similar mildew remover can help maintain surfaces, but addressing humidity and water intrusion is essential for long-term results. The Mold Removal Lab recommends scheduling seasonal checks for hidden moisture behind tiles and under sinks to catch problems early.
When to Seek Professional Help
If you notice thick, persistent mildew growth, persistent odors, or staining that returns despite cleaning, it’s time to consult a mold remediation professional. Some mold species can require specialized methods beyond consumer cleaners. The Mold Removal Lab team advises homeowners to obtain a written assessment and plan from a licensed professional when growth covers large areas, involves drywall, or impacts indoor air quality.
Final Notes on Tilex 01100 Mold and Mildew Remover Usage
Using tilex 01100 mold and mildew remover can be an effective part of routine maintenance for bathroom cleanliness. Keep expectations realistic—cleaning removes visible growth and surface staining, but underlying moisture problems must be addressed for lasting results. As with any chemical cleaner, follow label directions and safety precautions, and consider integrating a moisture management plan to protect your home over time.
Tools & Materials
- Nitrile gloves(Chemically resistant, protect skin from cleaner.)
- Safety goggles(Protect eyes from splashes.)
- Mask or respirator(Ventilate and protect lungs in poor-air spaces.)
- Spray bottle (if diluting is advised)(For even application where allowed by label.)
- Microfiber cloths(Soft, non-scratching surface for wiping.)
- Non-abrasive sponge(For gentle scrubbing on tiles.)
- Stiff-bristle brush(Grout lines and stubborn stains.)
- Old toothbrush(Detail cleaning in narrow grout gaps.)
- Bucket(Rinse water and cleanup.)
- Drop cloth or plastic sheeting(Protect floor and nearby surfaces.)
- Plain water for rinsing(Clean water for thorough rinse.)
Steps
Estimated time: 60-90 minutes
- 1
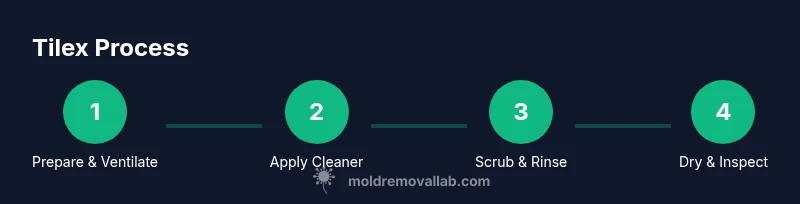
Put on PPE and prepare area
Before you start, put on nitrile gloves, safety goggles, and a mask. Ventilate the space by opening a window or turning on an exhaust fan. Move furniture away and cover nearby surfaces with a drop cloth.
Tip: Ventilation reduces chemical exposure and helps the cleaner dry faster. - 2
Test a hidden spot
Apply a small amount of tilex 01100 on a hidden or inconspicuous area of the surface to check for colorfastness or damage. If there is no adverse reaction after a few minutes, proceed with the main area.
Tip: Testing prevents unexpected color changes or grout damage. - 3
Apply the cleaner to the stained area
Spray or apply tilex 01100 mold and mildew remover directly to the mildew-stained tile, grout, or affected surface. Do not saturate; cover only the area with visible mildew.
Tip: Even coverage helps avoid streaks and missed spots. - 4
Let it dwell
Allow the product to remain on the surface for the dwell time specified on the label. Do not rub during this period; let the cleaner loosen the biofilm and stains.
Tip: Respect dwell time to maximize cleaning efficacy. - 5
Scrub gently
Use a soft sponge for general cleaning and a stiff-bristle brush for grout lines. For stubborn spots, a light, circular motion helps lift residue without damaging surfaces.
Tip: Avoid aggressive scrubbing that can erode grout. - 6
Rinse thoroughly
Rinse the treated area with clean water using a sponge or cloth. Make sure all cleaner residue is removed to prevent slick surfaces or new residue buildup.
Tip: Rinsing prevents residue that can attract dirt later. - 7
Dry completely
Wipe surfaces dry and allow ample ventilation to finish drying. Moist areas invite regrowth, so ensure no damp pockets remain.
Tip: Drying reduces the chance of returning mildew. - 8
Inspect and repeat if needed
Inspect the area after drying. If stains persist or mildew returns, reapply tilex 01100 to the affected spots following the label’s instructions.
Tip: Limit reapplications to avoid surface wear and chemical exposure. - 9
Dispose of materials safely
Dispose of used wipes and cloths according to local regulations. Wash reusable tools with soap and water after use.
Tip: Proper disposal reduces cross-contamination risk.
FAQ
Is Tilex 01100 safe for all bathroom surfaces?
Tilex 01100 is designed for non-porous surfaces like ceramic tile and glazed grout. It may not be suitable for natural stone or unsealed surfaces. Always test a hidden area first and follow label directions.
Tilex 01100 works best on non-porous surfaces like ceramic tile and glazed grout. For natural stone or unsealed surfaces, test a small area first and consider alternative cleaners if needed.
How long should I let Tilex sit before scrubbing?
Follow the label’s recommended dwell time, typically a few minutes, to allow the cleaner to penetrate mold and mildew. Do not rush this step, as dwell time improves stain removal and reduces scrubbing effort.
Let the cleaner dwell for the label’s recommended minutes to penetrate the mildew; don’t rush this step.
Can Tilex remove black mold completely?
Tilex can remove visible mildew and surface mold on non-porous surfaces, but black mold embedded in porous materials may require professional remediation and moisture control for a full solution.
Tilex helps with visible mildew on non-porous surfaces, but deeper black mold in porous materials may need a pro.
Do I need to rinse after using Tilex 01100?
Yes. Rinse thoroughly with clean water to remove cleaner residue and prevent slippery surfaces. Wipe dry to reduce moisture pockets that encourage regrowth.
Yes, rinse well after use and dry the area to prevent slip and mildew return.
What should I do if surfaces discolor after using Tilex?
If discoloration or damage appears, discontinue use on that surface and test a different area or cleaner. Consult product label guidance and consider seeking professional advice for persistent issues.
If you see discoloration, stop using it on that spot and test a different area or cleaner. If needed, ask a pro.
Watch Video
The Essentials
- Wear proper PPE and ventilate before cleaning.
- Test surfaces before full application and follow dwell times.
- Rinse and dry thoroughly to prevent regrowth.
- Address moisture sources to maintain long-lasting results.