Shower Mould Remover: Safe Step-by-Step Guide
Learn safe, effective shower mould remover methods to clean tiles, grout, and caulk. This practical guide covers cleaners, PPE, and prevention for a healthier bathroom.

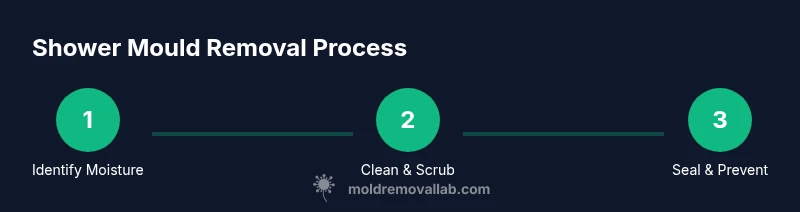
By following this guide, you will safely remove shower mould from tile, grout, and caulk while protecting your health. You’ll learn how to identify moisture triggers, choose effective cleaners, and apply a step-by-step remediation plan with safety gear and aftercare tips. This method emphasizes non-toxic options first, cautious use of bleach on non-porous surfaces, and long-term prevention.
Understanding Shower Mould and Its Growth Triggers
Shower mould thrives where moisture and warmth linger. In typical bathrooms, humid air, warm showers, and porous surfaces create ideal conditions for mould to establish tiny colonies on tile grout, caulk, and the backing behind tiles. In some cases, mould can appear as black, green, or gray patches that emit a musty odor. According to Mold Removal Lab, humidity above 60% and limited ventilation are the most common drivers of shower mould growth. Even small persistent drips, bath products left in damp niches, and improper cleaning routines can allow spores to take hold over weeks or months.
Most homeowners encounter mould on grout lines and caulk first because these materials are porous and accumulate soap scum and mineral deposits that feed mould. Exposure to mould spores can trigger allergic reactions or respiratory symptoms in sensitive individuals, including coughing, wheezing, and headaches. While plaster or drywall behind a shower wall is less likely to show surface mould right away, hidden mould can develop behind tiles or in wall cavities if moisture remains. Regular inspection and timely cleaning are essential to keep growth under control.
Signs to watch for: discolored patches that feel fuzzy or crumbly, a persistent musty odor, moisture buildup around seams after a shower, and water seepage behind grout. If you see staining that keeps returning after cleaning, that’s a sign moisture is still present or the substrate is compromised. The goal is to interrupt the moisture cycle, dry surfaces thoroughly after use, and remove mould before it penetrates porous materials.
Assessing the Extent of the Problem
Before you reach for cleaners, assess how widespread the mould is. Start with a visual check of all surfaces in the shower, paying special attention to grout lines, caulk joints, and any silicone sealant. Look behind shelves or built-in niches where moisture can linger. If you notice mould growth behind tile or up inside the wall void, you may have a moisture problem that requires professional assessment.
An important step is to measure humidity if you have a moisture meter. In many bathrooms, humidity fluctuates between 40% and 75% depending on ventilation and climate. If readings stay above 60% for extended periods, you should address ventilation and drying routines. Remember that mould can hide under caulk and sealant; you may need to cut away a small section of damaged grout to inspect deeper. If drywall or backerboard shows mould growth, it is best to consult a professional to evaluate structural impact and health concerns.
Cleaning Agents: What Works and What to Avoid
Different mould species and different surfaces respond to specific cleaners. For non-porous surfaces like glazed tile and shower doors, a 1:10 bleach solution is a traditional option for removing mould stains and killing surface mould. Use in well-ventilated areas, wear gloves and eye protection, and rinse thoroughly after treatment. Hydrogen peroxide at 3% concentration is another effective, less harsh alternative for many surfaces and can kill mould without the odor of bleach. White vinegar (5% acidity) also removes mildew on some surfaces, though it is less effective on stubborn growth and can leave a faint scent.
Porous materials, such as porous grout or caulk, are more challenging because mould can embed in the material. For these areas, some professionals suggest replacing or re-grouting surfaces. Baking soda can be used as a mild abrasive and deodorizer in combination with cleaning solutions. Never mix bleach with ammonia or acidic cleaners, as dangerous gases can form. For safety and effectiveness, start with the gentlest option that works and advance only if mould remains after cleaning. Note: if you have a corner with persistent mould growth despite cleaning, it may indicate hidden moisture behind walls that requires professional assessment.
Step-By-Step Cleaning Plan for Non-Porous Surfaces
When tackling mould on non-porous surfaces (tiles, glass, metal), follow these steps to minimize spores and avoid spreading contamination:
- Prep and protect: Put on PPE (gloves, mask, goggles) and lay towels to catch drips. 2) Ventilate: Open a window or run a exhaust fan to move air out of the bathroom. 3) Apply cleaner: Spray your chosen cleaner on the surface and let it sit for the recommended contact time. 4) Scrub: Use a nylon brush or sponge to scrub mould from grout lines and joints. 5) Rinse and dry: Rinse with clean water and dry thoroughly with a microfiber cloth. 6) Inspect and seal: Check for remaining growth; if needed, repeat treatment or proceed to reseal joints. 7) Post-clean habits: Keep surfaces dry after each use; wipe down tiles and shrink moisture build-up.
Tip: Work in small sections to avoid recontamination. Warning: Do not mix cleaners. For larger areas, plan additional sessions to prevent overexposure to cleaning agents.
Addressing Porous Materials: Grout, Caulk, and Silicone
Porous materials like grout and caulk are prime real estate for mould because they trap moisture and soap scum. After cleaning, if mould keeps returning in these areas, you may need to replace affected grout or recaulk. For minor mould on grout, a regrouting job or applying fresh silicone sealant can restore a water barrier. When replacing grout, choose epoxy grout or commercial grout products designed for bath environments; these tend to be more water-resistant and durable.
Before re-caulking, ensure the substrate is completely dry. Remove old caulk with a utility knife, clean the joint thoroughly, dry it, and reapply a high-quality bathroom caulk, preferably mold-resistant silicone. If you see dark patches continuing to emerge, inspect behind the tiles for moisture intrusion. Address lingering moisture by fixing leaks, improving ventilation, or consulting a professional if you’re uncertain about wall integrity.
Prevention Is the Best Cure: Ventilation, Drying, and Maintenance
Prevention beats remediation. Use an exhaust fan during and after showers, keep the door or window open to promote air exchange, and consider a dehumidifier in damp bathrooms. Install or upgrade a humidity sensor to keep readings in the 30–50% range when the room is not in use. Wipe down tile surfaces after showers and squeegee the shower door to minimize moisture on surfaces. Regularly inspect caulk and grout every 3–6 months and re-seal as needed. If you have a metal or glass shower enclosure, wipe away soap scum and mineral deposits that contribute to a damp environment. Routine maintenance is the backbone of long-term prevention and reduces recurring mould.
When to Replace Tile, Grout, or Caulk
If mould returns after thorough cleaning, or if the grout is crumbly, cracked, or deeply stained, replacement is often the most effective option. Damaged grout and caulk allow moisture to seep behind surfaces, creating a continual cycle of mould. In bathrooms with repeated mould issues, consider retiling or resealing the area with epoxy grout and silicone caulk designed for bathrooms. Professional remediation may be necessary if mould has penetrated behind wallboards or behind a shower niche. Timely replacement can prevent more serious issues such as structural damage or recurring health concerns.
Troubleshooting Persistent Problems and Safety Warnings
If mould remains after multiple cleanings, you may be dealing with hidden moisture sources, poor ventilation, or materials with high porosity. Revisit the moisture sources, install or upgrade ventilation, and consider a professional assessment for hidden mould behind walls or in drywall. Always wear PPE when handling cleaners, ventilate the space, and never mix cleaning agents. In cases of black mould or symptoms like persistent coughing or dizziness, stop work and seek medical and professional remediation help. Safety first means protecting yourself and your household from exposure while you address the root moisture problem.
Tools & Materials
- Personal protective equipment (PPE): nitrile gloves, N95 mask, safety goggles(Avoid latex if you have latex sensitivity; ensure proper fit)
- Spray bottles(Label each bottle with its contents to avoid mixing chemicals)
- Non-abrasive nylon brush (for grout)(Prefer stiff-bristled brush for stubborn grime)
- Stiff-bristled brush or old toothbrush(Use for tight grout lines)
- Microfiber cloths or disposable wipes(For quick drying and residue removal)
- Sponge and scouring pad (optional)(Gentle on glass surfaces)
- Spray cleaners: hydrogen peroxide 3%, white vinegar (5%), household bleach (1:10)(Bleach only on non-porous surfaces; never mix with ammonia)
- Baking soda(Mild abrasive and deodorizer)
- Moisture meter or humidity sensor(Helps track progress and ventilation needs)
- Dehumidifier or exhaust fan(Use during and after cleaning to speed dry)
- Caulk and grout replacement materials (epoxy grout, silicone sealant)(For damaged joints or persistent mould)
- Plastic sheeting or drop cloths(Containment to prevent spreading spores)
- Gloves or protective sleeves(Extra protection for lengthy sessions)
Steps
Estimated time: 60-120 minutes for a thorough non-porous surface clean; drying may take 24-48 hours for porous areas
- 1
Prepare and protect
Put on PPE (gloves, mask, goggles). Clear the shower area and cover the floor with towels or a drop cloth. This reduces contamination and protects you from chemical exposure.
Tip: Keep a damp cloth nearby to wipe splashes promptly. - 2
Ventilate the space
Open a window or switch on an exhaust fan to move moist air out. Better air flow lowers mould spread and improves cleaner effectiveness.
Tip: If a window isn’t possible, use a portable fan blowing outward. - 3
Choose and apply cleaner
Apply a non-porous cleaner (bleach at 1:10, or hydrogen peroxide 3%) to affected tiles and door surfaces. Allow the cleaner to sit for the recommended contact time to penetrate the mould.
Tip: Label bottles and never mix cleaners. - 4
Scrub mould growth
Scrub grout lines and mould patches with a nylon brush; target both the visible area and hidden pockets. Avoid aggressive scrubbing that can damage grout or tile.
Tip: Use circular motions and work from top to bottom to keep spores contained. - 5
Rinse and dry thoroughly
Rinse surfaces with clean water and dry completely with a microfiber cloth. Moisture is the primary driver of mould recurrence, so thorough drying is crucial.
Tip: Use a fan or dehumidifier while drying for faster results. - 6
Inspect for remaining growth
Revisit suspect areas; repeat cleaning on stubborn spots. If growth persists, consider replacing grout or resealing joints.
Tip: If you’re unsure about hidden mould behind walls, stop and consult a professional. - 7
Re-seal and maintain
Re-caulk or re-grout damaged joints with bathroom-grade products; ensure fully cured before use. Implement a simple maintenance routine—wipe dry after shower, run the vent, and schedule quarterly inspections.
Tip: Choose mold-resistant silicone for long-term protection.
FAQ
Is shower mould dangerous to health?
Yes, exposure can trigger allergic reactions and respiratory symptoms in sensitive individuals. It’s best to remediate mould promptly and keep bathrooms well ventilated.
Mould exposure can irritate airways and trigger allergies, so address it quickly and improve bathroom ventilation.
Can I remove mould with bleach?
Bleach can be effective on non-porous surfaces but should never be used on porous grout or behind walls. Always dilute to 1:10 and ensure good ventilation.
Bleach works on hard, non-porous surfaces if you dilute it properly and ventilate well.
How long does it take to see results after cleaning?
Visible results can appear within a few hours on non-porous surfaces, but complete drying and prevention of regrowth may take days to weeks depending on ventilation and humidity.
You’ll likely see improvement within hours after cleaning; full drying may take a few days.
When should I replace grout or caulk?
If mould keeps returning after cleaning or the grout is crumbling, replacement is often the most durable solution.
Persistent mould or damaged joints usually means it’s time to replace grout or caulk.
What can I do to prevent mould long-term?
Maintain good ventilation, run a dehumidifier if needed, wipe surfaces after use, and inspect joints every few months.
Keep humidity low, dry surfaces after showers, and inspect joints regularly.
Watch Video
The Essentials
- Identify moisture triggers and ventilate.
- Use gentler cleaners first on non-porous surfaces.
- Porous grout may need regrouting or recaulk.
- Dry thoroughly to prevent recurrence.
- Replace damaged joints when needed.