DIY Mold Removal: A Practical Step-by-Step Guide
Learn safe, practical DIY mold cleanup for homes. This Mold Removal Lab guide covers tools, step-by-step actions, safety, and prevention to keep your living spaces healthy.

DIY mold cleanup is achievable for small, contained patches when you follow a safe, practical plan. You’ll identify the moisture source, contain the area, wear proper PPE, clean with approved solutions, dry surfaces thoroughly, and monitor humidity to prevent recurrence. For larger or toxic mold, hire a pro.
What is DIY Mold Remediation and Why It Matters
DIY mold remediation is the process of removing small, contained mold growth in a home using safe, proven methods without professional remediation. For many homeowners and renters, DIY mold cleanup is a practical option when the mold is limited to a few square feet, there is no extensive infestation, and the moisture source has been addressed. According to Mold Removal Lab, starting with moisture control is the single most important step in preventing mold from returning. This guide from Mold Removal Lab provides practical steps, safety precautions, and realistic limits for DIY efforts. It’s vital to document conditions, keep children and pets away from contaminated areas, and never mix cleaning agents—especially bleach with ammonia. By following a structured plan, you can reduce health risks and restore normal living conditions while preventing future growth.
Safety and Indoor Air Quality Essentials
Protection for your health is non-negotiable when tackling mold. Start with PPE: a properly fitted N95 respirator, splash goggles or safety glasses, and disposable coveralls. Nitrile gloves protect skin from cleaners and contaminants. Work in a well-ventilated area; open windows or use a portable air purifier with a HEPA filter to reduce airborne spores. Contain the work zone with plastic sheeting and tape to limit spread to other rooms. Avoid disturbing mold colonies in HVAC ducts, as that can circulate spores. If anyone in the home has asthma or allergies, consider postponing non-urgent remediation and consult a professional if symptoms worsen.
Assessing Your Mold Situation: DIY-suitable Scenarios
Not all mold problems are suitable for DIY cleanup. Small, isolated patches on non-porous surfaces (like tile, metal, or sealed concrete) with no signs of moisture intrusion are better candidates. If mold covers more than a few square feet, or if you encounter mold behind drywall, insulation, inside ceilings, or spreading across porous materials (ps: sawdust, wood, paper), the risk and complexity increase. In such cases, moisture sources should be fixed first, and a professional remediation plan may be necessary. If you’re unsure, err on the side of caution and seek guidance from Mold Removal Lab to avoid unintentional damage or exposure.
Surfaces, Cleaning Methods, and What to Avoid
Different surfaces require different approaches. Non-porous surfaces like glass or metal respond well to soap, water, and a wipe-down with a clean cloth. Porous materials (drywall, particleboard, gypsum board) often require removal and replacement, especially if deeply penetrated by mold. Harsh scrubbing can release spores; instead, use gentle cleaning with detergent and rinse. Household cleaners such as soap and water or a borax-based solution are common options. Avoid dry wiping large patches, avoid mixing cleaners without explicit guidance, and never mix bleach with ammonia. For stubborn mold, a professional-grade biocide or hydrogen peroxide may be appropriate, but only after testing on a small area.
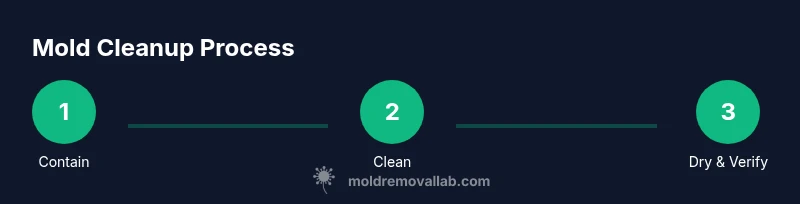
Step-by-Step Guide Overview
This section outlines a structured workflow you can follow for small mold problems. The steps emphasize containment, careful cleaning, thorough drying, and verification of complete dryness before reoccupying the space. Always start by addressing the moisture source—the root cause of mold growth. Use a well-ventilated space, and ensure PPE is worn during every phase. If you discover mold in hidden areas or behind walls, pause and reassess, as hidden moisture can fuel recurring growth.
Containment, Ventilation, and Drying Techniques
Containment is essential to prevent mold spores from spreading. Seal with heavy-duty plastic sheeting, and create an entry/exit path to minimize cross-contamination. Maintain airflow by opening windows and running a HEPA-filtered purifier, but avoid forcing air directly through porous materials. After cleaning, dry surfaces promptly using towels and fans, and lower indoor humidity with a dehumidifier. The goal is to keep relative humidity below 50–60%. Persistent moisture signals a need for further investigation and possibly professional intervention.
Cleaning Methods by Surface: Drywall, Wood, Fabric, and Metal
Porous materials like drywall and fabric may require removal and replacement if mold has penetrated deeply. Non-porous surfaces (glass, metal, enamel-coated surfaces) can often be cleaned with soap and water, followed by a disinfectant recommended for mold. Wood can be cleaned, but if there is staining or rot, replacement is often best. Always test a small area first to confirm no damage occurs, and ensure that cleaning products do not react negatively with the surface.
Prevention and Moisture Management to Stop Recurrence
Mold thrives where moisture and poor drying exist. After cleanup, fix leaks promptly, redirect water away from the foundation, and improve ventilation in high-humidity areas like bathrooms and laundry rooms. Use exhaust fans during showers, run dehumidifiers in damp basements, and monitor humidity with a hygrometer. Regularly inspect windows, pipes, and roofs for leaks, and address any signs of moisture immediately to prevent future mold growth.
The Mold Removal Lab Perspective: When to Hire a Pro
For large infestations, hidden mold, or mold in HVAC systems, professional remediation is advised. DIY efforts can still be a part of the process for minor, isolated growth, but complex cases require specialized equipment, training, and safety protocols. The Mold Removal Lab team emphasizes that assessing the full extent of the problem, repairing moisture sources, and safely removing mold often require professional intervention. If you’re uncertain, reach out to a remediation professional who follows current guidelines for safe and effective work.
Authority Sources and Further Learning
To deepen your understanding, consult authoritative resources from government and educational institutions. These sources provide guidelines on mold basics, cleanup safety, and moisture control. For practical, science-based information, see:
- https://www.epa.gov/mold
- https://www.osha.gov/molds
- https://www.cdc.gov/mold/default.htm
Tools & Materials
- N95 respirator(Fit-tested if possible; ensure seal.)
- Safety goggles(Wraparound style preferred.)
- Disposable coveralls(Non-linting material is best.)
- Nitrile gloves(Double-glove if handling liquids.)
- Plastic sheeting (6 mil or thicker)(Create containment barrier.)
- Duct tape(Secure barriers and seals.)
- Spray bottle with water(For rinsing and dampening surfaces.)
- Mild detergent or soap(Light cleaning before disinfection.)
- Borax or approved mold cleaner(Alternative to bleach on porous surfaces.)
- White vinegar (optional)(Mild disinfectant; test on surfaces.)
- Hydrogen peroxide 3% (optional)(Effective on some surfaces; follow label.)
- Bucket and sponge(For cleaning and rinsing.)
- Dehumidifier or fans(Use during and after cleanup to dry area.)
- Moisture meter / hygrometer (optional)(Helps track drying progress.)
- Heavy-duty trash bags(Seal and dispose of contaminated materials.)
- HEPA vacuum (optional)(Use only when area is fully contained.)
Steps
Estimated time: 60-120 minutes
- 1
Identify moisture source and contain the area
Locate the moisture source behind or around the mold. Use plastic sheeting to seal the affected zone and prevent spores from spreading to adjacent spaces. Establish a clear entry/exit path and avoid disturbing the mold more than necessary.
Tip: Seal all gaps; any breach can spread spores. - 2
Put on PPE and prep the space
Don an N95 respirator, goggles, gloves, and disposable coveralls. Clear the area and remove items that could be contaminated. If you have pets or kids nearby, isolate the space.
Tip: Check PPE airtight fit; a poor seal reduces protection. - 3
Clean visible mold with appropriate cleaner
Wipe surfaces with mild detergent and water, then apply a cleaner suitable for the material (borax solution or approved cleaner). Avoid aggressive scrubbing on porous materials to prevent releasing spores.
Tip: Never mix cleaners; always follow label directions. - 4
Rinse and dry surfaces
Rinse surfaces with clean water and dry promptly using towels and fans. Do not leave damp surfaces unattended; moisture is the main driver of regrowth.
Tip: Use a dehumidifier to accelerate drying and monitor humidity levels. - 5
Dispose of contaminated materials
Seal mold-contaminated items in heavy-duty bags before removing them from the space. Do not reuse disposable PPE; discard after use. Clean tools and wash hands thoroughly.
Tip: Place contaminated waste outside; avoid consolidating with household trash. - 6
Verify dryness and monitor recurrence
Reassess the area after 24–48 hours for dryness and check moisture levels. If humidity remains high or you see new growth, reassess moisture sources and consider professional assessment.
Tip: Keep humidity below 50–60% to deter regrowth.
FAQ
Is DIY mold cleanup safe for small areas?
Yes, for small, contained patches you can safely cleanup with proper PPE and moisture control. If you suspect hidden mold or have a larger area, consult a professional.
DIY cleanup can be safe for small, contained patches if you wear PPE and manage moisture; otherwise, get a professional assessment.
What PPE is essential for DIY mold cleanup?
Essential PPE includes an N95 respirator, safety goggles, disposable coveralls, and nitrile gloves. Ensure a proper fit and seal before starting.
You should wear an N95, goggles, disposable coveralls, and gloves. Make sure the respirator seals well.
Can bleach be used on porous surfaces?
Bleach is not ideal for porous materials, as it may not reach embedded mold and can damage surfaces. Use detergent or borax-based cleaners instead, following label directions.
Bleach is usually not the best choice for porous surfaces; use gentler cleaners and follow the product directions.
How do I know if the mold problem is larger than it looks?
If mold is visible behind walls, in insulation, or covers a large area, it likely exceeds DIY scope. In such cases, professional assessment is advised.
If you see mold behind walls or a large area is involved, you should call a professional.
When should I call a professional remediation service?
Call a professional if the mold covers more than a few square feet, is in HVAC systems, or if you have persistent moisture issues that you cannot address.
If the mold is big or in hard-to-reach areas like HVAC, hire a pro.
Should I test for mold after cleanup?
Post-cleanup testing is optional for many DIY projects. Prioritize drying and moisture control; testing is more relevant for severe contamination or persistent symptoms.
Testing after cleanup is optional; focus on drying and moisture control first.
The Essentials
- Contain mold to limit spread
- PPE is non-negotiable for safety
- Manage moisture to prevent recurrence
- Different surfaces need different cleaners
- Call a pro for large or hidden mold