Concrete Mold Stepping Stone: A DIY Guide to Mold Prevention
Learn how to cast a durable concrete stepping stone and prevent mold growth outdoors. This practical guide covers materials, step-by-step casting, sealing, and maintenance for a long-lasting, mold-resistant path.

With this guide you will learn how to cast a durable concrete stepping stone and prevent mold growth on outdoor surfaces. You'll choose the right mold, mix and pour concrete, cure properly, and seal the stone for weather resistance. Practical safety tips and maintenance steps help keep your path looking good for years.
What you'll build and why a concrete mold stepping stone matters
A concrete mold stepping stone is a sturdy outdoor tile used to mark a path in the garden or yard. When built with attention to moisture control, it can resist surface mold and make foot traffic safer. The concrete mold stepping stone combines a rigid base with a sealed surface that sheds rain, reduces soil splash, and deters algae. According to Mold Removal Lab, choosing the right mold release and curing methods is critical to limiting mold-friendly microenvironments. The Mold Removal Lab team found that even small amounts of moisture behind a stone header can support mold growth if left unaddressed. This guide focuses on a practical approach you can implement this weekend to create a durable stone and minimize mold risk. You’ll learn how to select a mold-friendly form, mix a reliable batch, pour with confidence, cure under controlled conditions, and seal the result to keep water out. The concrete mold stepping stone process is accessible to novice DIYers while delivering professional results.
Mold behavior on outdoor concrete and why prevention matters
Mold on outdoor concrete surfaces thrives where moisture persists and sunlight is limited. Shade from fences or overhanging trees, poor airflow, and rain that splashes soil onto surfaces all contribute to damp microclimates. Over time, that moisture invites mold spores to take hold on the stone’s surface and within tiny pores. Even sealed stones can harbor mold if seals fail or if cracks allow moisture to wick in. Keeping the stepping stone dry between uses and ensuring proper drainage around the path helps reduce mold risk. For a concrete mold stepping stone, prevention begins with designing for drainage, selecting a non-porous finish, and applying a durable sealant. Integrating a simple ventilation plan around the path improves drying time after rain. The goal is to keep the stone dry enough that mold spores cannot establish a foothold, while still allowing for natural weathering.
Materials and prep for a mold-resistant stone: a practical shopping list
Before you lay a single batch of cement, assemble your tools and materials. For a standard rectangular stepping stone, you’ll want a form that is easy to release and clean. A mold-release agent reduces stick, shrinks the risk of tearing during demolding, and helps the surface stay smooth. Use a concrete mix labeled for outdoor use and a moderate slump to minimize warping. Add a weather- and mold-resistant sealer after curing. Board up the edges to maintain a crisp finish and create a tight seam between stones. The Mold Removal Lab analysis shows that using a release agent and a durable sealant significantly reduces moisture retention in the stone compared with untreated surfaces. Optional additives like bond enhancers can improve strength in freeze-thaw climates. Gather PPE: gloves, eye protection, and a dust mask, plus clean water and a large mixing container.
Finishing methods and how they reduce mold risk
After pouring, use a margin trowel to smooth the surface and remove any air pockets. Vibrate gently with a minimum tool to settle the concrete without overworking it. Immediately clean the top while it is still manageable, removing excess slurry to prevent crusting. Once cured, apply a penetrating sealant designed for exterior concrete; this creates a moisture barrier that discourages mold growth behind the surface. For color and texture preferences, consider integral pigments or stain options that are UV-stable and non-porous. A well-sealed surface wipes clean easily after rain and discourages organic debris from sticking, which reduces mold-friendly rings and colonies. When choosing finishes, pick products verified for outdoor, mold-resistant performance and follow manufacturer instructions for re-application intervals.
Pouring, curing, and demolding: the core workflow
Pour the concrete into the prepared mold in stages to reduce heat and shrinkage. Tap the mold gently to release trapped air and level the surface. Cover to cure away from direct sun while maintaining moisture for the early curing phase. Demold after sufficient curing; inspect for cracks and fill as needed. Finally, buff the surface with a soft pad to enhance the finish. This sequence minimizes mold-prone moisture retention and yields a durable stepping stone.
Maintenance and prevention after installation
Inspect annually for cracks, reseal every 1-3 years depending on climate, clear debris, and ensure area drains away from the stone. Sweep mold off with a gentle brush and washing solution; avoid harsh chemicals that can degrade the seal. In high humidity zones, consider additional surface coatings or anti-microbial sealers recommended for outdoor use. Keep the surrounding planters trimmed to improve sun exposure and airflow, aiding evaporation after rain.
Safety, cleanup, and disposal of concrete mold stepping stone projects
Always wear PPE when mixing concrete and cleaning mold; eye protection, respirator for dusty work, gloves, long sleeves, and closed-toe shoes. Work in a well-ventilated area. Clean tools immediately after use to prevent concrete from hardening on surfaces. Dispose of slurry and leftover cement according to local guidelines; never pour slurry into storm drains. After demolding, store spare molds in a dry place to prevent mold spores from spreading to other surfaces.
Design considerations: style, slope, and mold resistance
Choose shapes that minimize crevices where moisture can linger; smooth, flat surfaces dry quickly; lighter colors can show residue more easily but are easier to rinse away. Consider integrated drainage grooves and slight slope away from the stones to direct water off the path. Use a non-porous surface finish and color options that resist UV degradation. For the longest life and lowest mold risk, combine a solid base with a tight-fitting seal.
Authority sources and further reading
Here are reliable resources on mold, outdoor concrete, and safe remediation:
- https://www.epa.gov/mold
- https://www.cdc.gov/mold/dampness.html
- https://www.niehs.nih.gov/health/topics/agents/mold/index.cfm
Tools & Materials
- Concrete mix (Portland cement, sand, and gravel aggregates)(Outdoor-grade mix with moisture resistance; follow bag ratio for strength and workability.)
- Mold release agent(Spray or brush-on release to prevent sticking and simplify demolding.)
- Mold or form for stepping stone(Non-porous, easy-release form sized to your desired stepping-stone footprint.)
- Water(Clean, at ambient temperature for proper hydration.)
- Mixing container(Large bucket or trough with a mixing paddle.)
- Trowel or float(For smoothing and finishing the surface.)
- Personal protective equipment (PPE)(Gloves, safety glasses, dust mask; long sleeves helps prevent skin exposure.)
- Sealant for exterior use(Use a penetrating sealant post-curing to reduce moisture ingress.)
- Broom or stiff brush(For cleaning cured surface and removing loose debris.)
- Shading or wind-break cover(Optional in sunny or windy climates to control curing conditions.)
Steps
Estimated time: 1-3 days total (including curing)
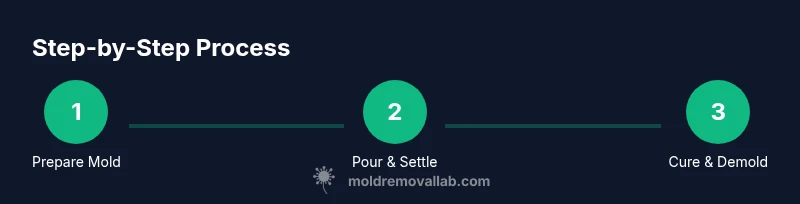
- 1
Prepare the mold and workspace
Set up a clean, level work area and lightly spray the mold with release agent. Wipe away any excess and lay out tools within easy reach. This reduces demolding stress and helps you keep the surface smooth during the pour.
Tip: Test the release on a small corner first to prevent surprises. - 2
Mix concrete to the proper consistency
Combine cement, sand, and aggregate in the recommended proportions for outdoor use. Add water gradually until the mix is workable but not soupy. A good slump will pour smoothly without heavy sagging.
Tip: Avoid over-wetting; too much water weakens the final stone and promotes cracking. - 3
Pour and settle into the mold
Fill the mold in stages, tapping to release air pockets as you go. Use a straight edge to strike off the top and create a level surface. Stop when the top is flush with the mold edge.
Tip: Gentle tapping prevents air pockets without pushing cement out of the mold. - 4
Cure conditions and demold timing
Cover the stone to slow moisture loss and cure away from direct sun for the initial set. Demold after the recommended cure period, then inspect for detachments or cracks and repair as needed.
Tip: Keep curing material moist during the first 24-48 hours if weather is hot. - 5
Finish and seal the surface
Lightly sand or polish the surface for a clean look, then apply an exterior sealant once fully cured. Allow the seal to dry according to product instructions before exposure to weather.
Tip: A penetrating sealant reduces moisture ingress and makes cleaning easier. - 6
Demonstrate care and maintenance
Place the stone in its final outdoor location, check drainage, and periodically clean soil and organic matter to prevent mold buildup. Re-seal per climate conditions to maintain performance.
Tip: Routine inspection helps catch small issues before they become mold problems.
FAQ
Can I use a silicone mold for stepping stones, or should I use plastic forms?
Both silicone and plastic forms can work. Plastic forms are economical and durable for repeated use, while silicone molds can capture fine texture. Choose a non-porous material and apply mold-release to ensure clean demolding.
Plastic forms work well for most outdoor stones, but silicone offers flexibility for complex textures. Use mold-release every time.
How long does curing take before the stone can be used outdoors?
Initial cure typically requires 24-72 hours, with full cure taking longer depending on climate and sealant. Always test for hardness and moisture before exposure to outdoor conditions.
It usually takes a couple of days for the stone to set enough for use, but full curing can take longer in cool or damp weather.
What should I do if mold appears after installation?
Clean with a mild detergent and soft brush; ensure drainage is adequate and reapply a mold-resistant sealer if needed. Address moisture sources to prevent recurrence.
If you see mold after installation, clean it off and seal the stone again once it’s dry.
Can I color the stepping stone, and will color affect mold risk?
Yes, you can add color with exterior pigments or stains. Pigments typically don’t increase mold risk if the finish remains sealed and non-porous.
Color can be added, but make sure the finish remains sealed to prevent mold growth.
Is this a DIY project, or should I hire a pro for best results?
This is a solvable DIY project for a typical home; follow safety and curing guidelines, and choose weather-appropriate materials. For high-traffic installations or special climates, a pro can optimize mold-protection features.
It’s doable at home, but a pro can help for tricky climates or large installations.
What maintenance schedule would you recommend for outdoor stones?
Inspect annually, reseal every 1-3 years depending on climate, and clean debris after rain to prevent mold buildup. Adjust the schedule if you see signs of wear.
Check annually, reseal as climate dictates, and keep the area clean to deter mold growth.
Watch Video
The Essentials
- Plan mold-release and sealing early to reduce moisture retention
- Choose outdoor-grade concrete and proper curing to minimize mold risk
- Seal the finished stone for long-term durability and easier cleaning
- Inspect annually and reseal as climate demands to maintain protection
- The Mold Removal Lab team recommends regular maintenance to prevent mold growth