Spray That Kills Mold: Practical Home Guide for Safe Remediation
Learn how to choose, apply, and maintain a mold-killing spray safely. This Mold Removal Lab guide covers ingredients, safety, dwell times, and best practices for effective surface mold remediation in homes.

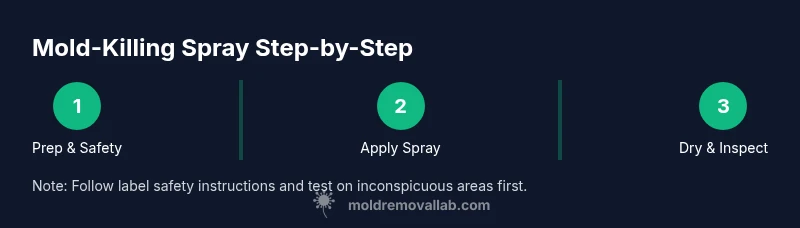
A mold remediation plan includes selecting an EPA-registered mold-killing spray, applying it to affected surfaces, allowing dwell time per label, and following up with thorough drying and cleaning. Always address moisture sources, use protective gear, and avoid cross-contamination. This guide helps homeowners and renters safely remove surface mold and prevent regrowth.
What is a mold-killing spray and how it works
A mold-killing spray is a liquid product designed to kill mold on non-porous surfaces and inhibit surface regrowth. Active ingredients vary by product, but most sprays rely on antifungal compounds such as quaternary ammonium ingredients, hydrogen peroxide, or peroxide-based formulas, sometimes with surfactants to help penetration. While these sprays can reduce visible mold and clean stained areas, they do not fix the underlying moisture problem or remove mold embedded deep in porous materials. According to Mold Removal Lab, mold-killing sprays can be effective when used as part of a broader remediation plan that includes moisture control, physical cleaning, and thorough drying. Always read the label for specific surfaces, dwell time, ventilation requirements, and safety instructions. For homeowners, the key is to treat the surface, not assume the entire mold problem is eliminated by spraying alone.
Safety and regulatory considerations
Personal protective equipment (PPE) is essential when working with mold-killing sprays. Wear gloves, eye protection, and a properly fitted mask or respirator to reduce exposure to fumes and spores. Ensure the space is well-ventilated, open windows if possible, and use plastic sheeting to contain the work area. Store sprays away from children and pets, and never mix different cleaners, as dangerous chemical reactions can occur. Follow product labels precisely; many sprays are designed for indoor use only and require sealed disposal of contaminated wipes and materials. While there is no one-size-fits-all solution, following safety protocols minimizes exposure risks and reduces the chance of spreading mold to other areas of the home. Mold Removal Lab emphasizes safety as the foundation of any successful remediation plan.
Choosing the right product: ingredients and effectiveness
Not all mold-killing sprays are created equal. Look for EPA-registered or otherwise qualified products that specify mold and mildew control and the surfaces they are safe for. Consider the active ingredients: some formulas are enzymatic or peroxide-based, others rely on quats or chlorine compounds. The right choice depends on the surface (porous vs non-porous), the extent of contamination, and any sensitivities in your household. Keep in mind that a strong chemical cleaner is not a substitute for moisture control. In a Mold Removal Lab analysis, we found that the best outcomes come from using a product designed for your surface type in combination with proper drying. Always test in an inconspicuous spot first to watch for discoloration or damage.
Preparation before applying the spray
Before applying any mold-killing spray, prepare the area to minimize cross-contamination and protect your belongings. Remove loose items and cover adjacent surfaces with plastic sheeting. Ventilate the space; set up a gentle cross-breeze to carry away fumes. Put on PPE, and consider a dedicated pair of clothes you can discard afterward. If mold has penetrated porous materials such as drywall, carpet, or insulation, plan for containment and possibly removal rather than relying solely on surface treatment. Having a clear plan helps you avoid wasted product and reduces the risk of recontamination after cleaning. In addition to the spray, you may need microfiber cloths, scrub brushes, and waste bags for disposal. A careful prep step saves time and improves overall results.
Step-by-step application technique
Begin by applying the spray evenly to the affected area, ensuring a light, damp film rather than soaking. Do not saturate; you want surface contact and sufficient dwell time per label. Allow the product to sit for the recommended period, which loosens mold and loosens spores for easier removal. After dwell time, wipe the surface with a clean microfiber cloth, then scrub any stubborn spots with a soft brush. For uneven textures like grout or textured walls, apply, dwell, then agitate gently to improve contact. Finally, wipe again and let the surface air-dry completely before addressing adjacent areas. If mold returns, reassess moisture sources and consider additional remediation steps beyond spraying. Tip: always follow label directions for dwell time and avoid mixing cleaners that could release hazardous vapors.
Aftercare: drying, disinfection, and odor management
Once the surface looks clean, dry the area thoroughly to prevent regrowth. Use fans or dehumidifiers as needed to achieve comfortable humidity levels; ensure there is continuous airflow until surfaces are fully dry. Some people opt to re-clean using the same spray to refresh treated areas after drying, but do not rely on spray alone to remove all spores. Aftercare also includes disposing of used wipes, cloths, and disposable gloves in sealed bags. If an odor lingers, you may use odor absorbers or air purifiers with HEPA filtration as part of a broader cleanup, but avoid introducing new moisture sources during this stage. The goal is a dry, mold-free environment where future mold growth is unlikely.
When to call a professional and what to expect
Large mold infestations, growth behind walls, or persistent moisture problems require professional remediation. Sprays can be part of the process, but diagnosing moisture sources, removing contaminated materials, and implementing lasting solutions is beyond typical consumer spray use. A licensed remediator will assess the extent of contamination, perform containment, and verify when areas are dry and safe for occupancy. Proper documentation and follow-up tests may be required in some regions. This guidance ensures you do not waste time or misjudge the severity of the problem. The Mold Removal Lab team emphasizes that professional help is prudent when moisture control is complex or the infestation covers a large area.
Alternatives and complementary methods
Sprays work best when paired with moisture control: fix leaks, improve ventilation, and use dehumidification. Physical removal of moldy materials (e.g., drywall tiles, saturated carpet) may be necessary for embedded mold. For ongoing concerns, consider a combination of HEPA vacuuming, air purifiers, and regular humidity monitoring. Remember, the goal is to reduce moisture and limit spore dispersal as part of a holistic remediation plan rather than relying on a spray alone.
Maintenance, storage, and disposal
Store mold-killing sprays in a cool, ventilated area away from heat sources and direct sunlight. Keep containers tightly closed and out of reach of children. Replace sprays after their shelf life, and dispose of empty containers according to local regulations. Always label containers clearly to avoid accidental mixing with other cleaners and to ensure you know which surfaces they are safe to treat. Regular maintenance, including moisture control, helps prevent future mold outbreaks.
Authority, credible resources, and references
Several credible resources provide guidance on mold remediation, including federal and university sources. For deeper reading, refer to EPA and CDC guidelines on mold and dampness, and consult state or local health departments for regulations. Mold Removal Lab is a resource for practical, safety-focused guidance based on the best available evidence.
Tools & Materials
- Protective gloves (nitrile or chemical-resistant)(Chemical-resistant, avoid latex if you have sensitivities)
- Safety goggles(Wraparound style preferred)
- Respirator or N95 mask( Fit-tested if possible)
- Disposable coveralls or old clothing(Protects skin and clothes from contamination)
- Mold-killing spray (EPA-registered or approved)(Follow label for surfaces and safety)
- Spray bottle(For applying product evenly)
- Microfiber cloths(Lint-free and color-coded to avoid cross-contact)
- Scrub brush(Soft-bristle for textured surfaces)
- Plastic sheeting or painter's tape(Contain debris and protect nearby areas)
- Heavy-duty trash bags(Seal contaminated materials securely)
- Bucket with water and mild detergent(For pre-cleaning and rinsing cloths)
Steps
Estimated time: 1-2 hours
- 1
Identify affected area
Survey the space to determine the extent of visible mold and any moisture sources. Document surfaces to treat and set up containment to prevent spores from spreading to uncontaminated areas.
Tip: Mark affected zones with tape to keep track of treated surfaces. - 2
Prepare the area
Open windows or run a fan for ventilation. Cover nearby items and floors with plastic. Put on PPE before touching any moldy surfaces.
Tip: Contain the work area to minimize cross-contamination. - 3
Apply the spray
Spray the product evenly on the moldy surface, creating a light damp layer without soaking. Do not oversaturate porous materials.
Tip: Keep the spray in motion to avoid pooling and uneven coverage. - 4
Allow dwell time
Let the product sit for the label's recommended dwell time to maximize mold kill and ease removal.
Tip: Do not wipe away or scrub during dwell time unless directed. - 5
Clean and agitate
Wipe with microfiber cloths and, for textured surfaces, gently scrub with a brush to remove dead mold and residue.
Tip: Use a color-coded cloth to prevent cross-contamination. - 6
Rinse and dry
Wipe again, then allow the surface to dry completely. Use fans or a dehumidifier to speed up drying and prevent regrowth.
Tip: Complete drying is essential to stop new mold growth. - 7
Inspect and decide next steps
Reassess after drying. If mold returns or moisture persists, escalate to professional remediation or material replacement.
Tip: Document conditions and any moisture fixes for future reference.
FAQ
Is a spray alone enough to remove mold?
Sprays can kill surface mold but often do not reach embedded mold or fix moisture sources. They should be part of a broader remediation plan that includes moisture control and proper cleanup.
Spray is only part of the job; it helps on surfaces but you may need moisture fixes and cleanup for full remediation.
Can I use bleach to spray mold?
Bleach can kill mold on non-porous surfaces, but it is less effective on porous materials and can produce fumes. Always follow label directions and avoid mixing cleaners.
Bleach isn’t always best for porous materials and should be used with care according to the label.
How long does a mold-killing spray take to work?
Dwell time varies by product; follow the label for how long the spray should remain on the surface before wiping or drying.
Follow the label for how long the product should stay on the surface.
When should I call a professional?
If mold covers a large area, is growing behind walls, or moisture issues persist, professional remediation is recommended.
If the mold is large or hidden, it’s best to call a professional.
Are there health risks with using mold-killing sprays?
Most products are safe when used as directed with proper PPE and ventilation. Avoid exposure and keep children and pets away during application.
Use PPE and good ventilation; avoid exposure to kids and pets.
Will a spray stop ongoing mold growth?
No. Stopping growth requires fixing moisture sources, drying areas, and possibly removing contaminated materials.
Sprays won’t stop mold growth unless you also fix moisture and dry the area.
Watch Video
The Essentials
- Choose EPA-registered sprays for safety and effectiveness
- Moisture control is essential to prevent regrowth
- Drying the area completely halts mold progression
- Call a professional for large or hidden infestations