Kill Mold Safely: A Practical Remediation Guide
Learn proven, safe methods to kill mold and prevent regrowth in your home. Step-by-step guidance, tools, safety tips, and expert insights from Mold Removal Lab.

With this guide you will learn to identify moisture sources, choose safe cleaning methods, and follow a controlled remediation plan to kill mold and prevent regrowth. Start by containment, PPE, and testing scope; then clean hidden spores with approved agents, dry the area, and fix moisture issues. The steps emphasize safety and practicality to kill mold effectively in homes.
Why Killing Mold Matters for Health and Homes
Mold is more than a bad smell or a cosmetic blemish. It can affect indoor air quality and trigger allergic reactions, asthma symptoms, and other health issues, especially for children, older adults, and people with respiratory conditions. The goal of this guide is to help you kill mold safely and prevent it from returning. According to Mold Removal Lab, humidity control and prompt remediation are critical to long-term success. Our team’s analysis indicates that many cases of recurring mold stem from undetected moisture problems rather than isolated surface growth. By focusing on the source of moisture and using proven cleaning methods, homeowners can reduce health risks while protecting structural integrity and property value.
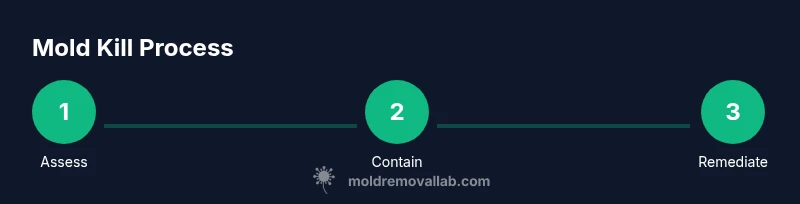
Before You Start: Assessing Extent and Safety
Before you reach for cleaners, take a measured approach. Assess the size of the affected area and determine whether the mold growth is likely due to a leak, condensation, or poor ventilation. Our goal is to kill mold safely and prevent regrowth. Wear proper PPE, including an N95 respirator, goggles, and gloves. Contain the area with plastic sheeting to prevent spores from spreading to other rooms. If the growth covers a large area or appears to be deeply embedded in walls, consider pausing the DIY effort and consulting a professional. The Mold Removal Lab Team emphasizes safety and containment as the first line of defense.
Choosing Safe, Effective Mold-Killing Methods
Mold-killing approaches vary by surface and the extent of contamination. For nonporous surfaces, cleaners like soap and water or commercially formulated mold cleaners can be effective. Some homeowners use diluted bleach in problem-free, non-porous instances, but bleach can be harsh on surfaces and should never be mixed with ammonia or other cleaners. Vinegar and hydrogen peroxide are alternative options that can help inhibit mold growth without harsh chemicals. Always test a small hidden area first to ensure the product does not damage materials. If you are dealing with porous materials such as drywall or carpet, substitution or removal may be necessary since mold can penetrate porous fibers.
Cleaning Procedures by Surface Type
- Nonporous surfaces (tile, metal, glass): Apply cleaner, wait for the recommended dwell time, scrub, rinse, and dry thoroughly. - Porous materials (drywall, fabric): Remove and replace where possible; surface cleaning may be limited to mold spots, followed by deep drying and moisture control. - Wood surfaces: Use cleaners suitable for wood; avoid soaking and use a gentle scrub to prevent wood damage. Safety tip: never mix cleaners, and ventilate the area well during cleaning. - Hidden mold in insulation or behind walls: This often requires professional evaluation to determine the extent and potential structural impact.
Drying and Moisture Control to Prevent Regrowth
Drying is a critical, often overlooked step. After cleaning, reduce humidity and dry surfaces thoroughly. Keep air moving with fans and a dehumidifier until the space remains consistently under acceptable humidity levels. Repair leaky pipes, improve ventilation, and consider installing vapor barriers or better insulation where condensation forms. Mold spores can become airborne if moisture remains, so maintain a dry environment for an extended period after cleanup.
Repairing Causes and Long-Term Prevention
Killing mold is only part of the solution. Long-term prevention involves repairing the moisture source, improving ventilation, and maintaining a dry living environment. Check for roof leaks, plumbing issues, and foundation water intrusion, and address them promptly. Regularly monitor humidity levels, especially in bathrooms, basements, and crawl spaces. A proactive maintenance plan helps prevent future outbreaks and protects your home’s value.
What to Do If Mold Returns or Large Contamination
If you notice mold returning after remediation or if the affected area remains larger than a few square feet, it’s a sign that professional evaluation is needed. Recurring mold often points to hidden moisture problems or structural issues that DIY steps may not resolve. Document the area, track humidity, and seek a certified mold remediation specialist when in doubt. Remember that persistent mold can pose health risks, so do not delay expert advice. The Mold Removal Lab team reiterates that a structured remediation plan is essential for lasting results.
Tools & Materials
- N95 respirator(Fit-tested if possible)
- Protective goggles(Eye protection against splashes and spores)
- Chemical resistant gloves(Latex-free if possible)
- Disposable cleaning towels(For wiping and disposal)
- Spray bottle(For applying cleaners)
- Bucket and scrubbing brush(For scrubbing stubborn spots)
- Mild detergent or soap(For initial cleaning)
- White vinegar(Natural mold inhibitor alternative)
- Hydrogen peroxide (3%)(Alternative oxidizer)
- Bleach (household)(Use only on nonporous surfaces and never with ammonia)
- Spray bottle for cleaners(Label to avoid mixing chemicals)
- Dehumidifier(Maintain indoor humidity below comfortable levels)
- Fans/air movers(Improve circulation)
- Plastic sheeting and tape(Contain area to prevent spread)
- Replacement materials(Drywall or carpet may need replacement)
Steps
Estimated time: 6-12 hours
- 1
Identify area and contain
Locate all mold-affected zones and isolate them using plastic sheeting to limit spore spread. Mark clear boundaries and avoid moving contaminated items to clean areas.
Tip: Seal openings with tape and ensure door seams are sealed to prevent airflow. - 2
Don PPE and set up containment
Put on an N95, eye protection, and gloves. Establish a containment boundary and keep doors closed to minimize cross-contamination.
Tip: Check mask fit and replace if you feel compromised. - 3
Apply cleaner and dwell time
Apply an approved cleaner to the moldy surfaces and allow it to dwell for the recommended period before scrubbing.
Tip: Do not mix cleaners; wait the recommended dwell time before scrubbing. - 4
Scrub, rinse, and dry
Scrub away mold with a non-abrasive brush, rinse with clean water, and dry immediately using towels or a dehumidifier.
Tip: Work from top to bottom to avoid dripping on cleaned areas. - 5
Repair moisture sources and monitor
Fix leaks, improve ventilation, and install measures to prevent future moisture buildup. Recheck humidity after a few days.
Tip: Keep humidity as low as practical.
FAQ
What is the best cleaner to kill mold?
There is no one-size-fits-all solution. Start with soap and water for general cleaning; nonporous surfaces may respond to diluted cleaners, while porous materials might require removal or professional treatment.
A common approach is to start with soap and water, and use specialized cleaners for nonporous surfaces.
Is bleach safe for mold remediation?
Bleach can be effective on nonporous surfaces in some cases, but it is not universal and can produce fumes. Never mix with ammonia or other cleaners, and ventilate well.
Bleach can be used on nonporous surfaces, but avoid mixing with other cleaners and ensure proper ventilation.
How long does remediation take?
Time depends on the extent of contamination and moisture control. Small areas may be cleaned in hours, while larger or damaged spaces may require days and professional assessment.
Time varies with the extent; small spots can be cleaned in hours, larger jobs take longer.
When should I hire a pro?
Consider a pro for large areas, mold behind walls, or if you have health sensitivities or recurrent mold. A professional can safely remediate and assess hidden moisture sources.
Hire a pro for large areas or if you suspect hidden moisture or health risks.
Can mold exposure harm children?
Mold exposure can affect children more severely due to developing lungs and weaker immune defenses. Limit exposure and seek medical advice if concerns arise.
Yes, children can be more vulnerable to mold exposure—limit exposure and consult a clinician if needed.
What if mold returns after cleaning?
Return often signals unresolved moisture issues or hidden growth. Reassess moisture sources, re-clean, and consider professional inspection if it persists.
If mold comes back, recheck moisture and consider a professional evaluation.
Watch Video
The Essentials
- Identify moisture sources before cleaning
- Choose surface-appropriate cleaners
- Dry thoroughly to prevent regrowth
- Repair the moisture and improve ventilation
- Know when to call a pro