Mold and Mildew Spray: Practical Home Remediation Guide
Learn how to choose, apply, and maintain mold and mildew spray for safe remediation. Practical steps, safety tips, and prevention guidance for homeowners.

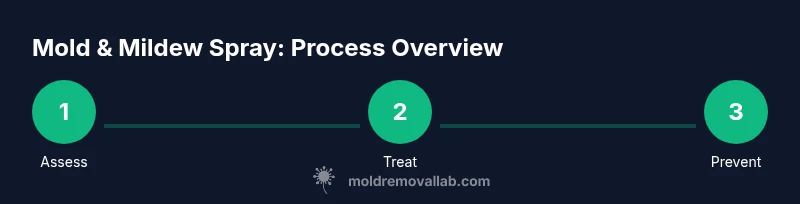
With this guide, you’ll learn how to safely select and use a mold and mildew spray to treat common home surfaces, reduce lingering odors, and prevent regrowth. You’ll find practical steps, safety tips, and surface-specific advice to protect family health. Mold Removal Lab provides evidence-based recommendations for effective, affordable remediation.
Why Mold and Mildew Sprays Matter
According to Mold Removal Lab, mold and mildew sprays provide a practical first line of defense for non-porous and some semi-porous surfaces. These products are designed to kill or inhibit mold and mildew growth, reduce staining, and limit the release of spores into the air when used correctly. In homes, quick targeting of bathroom grout, shower surrounds, window sills, and basements with the right spray can prevent small outbreaks from becoming large problems. This section explains how these products work, the differences between enzyme-based cleaners and chemical fungicides, and how to choose a product that fits your surfaces and climate.
Key points:
- Sprays vary by active ingredients and dwell times.
- Surface compatibility matters for effectiveness and safety.
- Read labels for ventilation and safety warnings.
Types of Mold and Mildew Sprays
Mold and mildew sprays come in several formulations designed for different surfaces and goals. Some are enzymatic cleaners that break down biofilms, while others are fungicidal formulations that kill active spores. There are water-based products that minimize odor and residue, and solvent-based options that may offer faster action on tough stains. When choosing, consider porosity (porous vs non-porous), the severity of the outbreak, and the presence of pets or children. Always start with a clean, stable surface and test a small inconspicuous area first.
Pro tip: Avoid mixing different cleaners, and never combine a spray with bleach unless the label explicitly allows it.
Safety First: Personal Protective Equipment and Ventilation
Ventilation is crucial when using any mold and mildew spray. Work with open windows or a circulating fan, and wear appropriate PPE: gloves, safety goggles, and a respirator or N95 mask to protect against inhalation of aerosols. Keep children and pets out of the area during treatment and for the recommended dwell time. If you have respiratory sensitivities or a history of mold-related allergies, consult a professional before starting.
Why it matters: Proper PPE reduces exposure risk and improves outcomes by keeping contaminants from settling back on clean surfaces.
Surfaces and Compatibility: Where to Use Spray
Not all sprays are created equal. Some products are ideal for non-porous surfaces like tile, glass, and metal, while others are formulated for porous materials such as wood, drywall, or fabric. Always check the label for surface compatibility and test first on a hidden spot. Porous materials may require longer dwell times or repeated applications, and some fabrics may need laundering instead of surface spraying. For ceilings and high areas, use a long-handled applicator to avoid staining and keep subjections away from your eyes.
Application Techniques: Step-by-Step for Walls, Surfaces, Fabric
Application technique matters as much as product choice. Begin by removing loose dirt with a damp cloth, then spray evenly from about 6–8 inches away to avoid oversaturation. Allow the product to dwell according to the label, then scrub with a soft-bristled brush or sponge and wipe clean. For fabrics, apply lightly and launder if the fabric care instructions permit. Always finish by drying the area completely to prevent regrowth.
Note: Do not flood porous materials; excessive moisture can worsen mold problems.
Odor Control and Stubborn Stains
Odor is often a sign of moisture intrusion and hidden growth. In addition to spraying, address the moisture source and improve ventilation to prevent recurrence. For stubborn stains, reapply after the initial dwell time and use a soft brush for gentle scrubbing. Combine spray use with a dehumidifier or fans to accelerate drying. If an odor persists after multiple treatments, consider testing for hidden moisture behind walls or consult a professional.
Maintenance and Prevention Tips
Prevention is the best mold strategy. After treatment, re-seal problematic surfaces where feasible, repair leaks, and control indoor humidity levels (ideally between 30% and 50%). Regular cleaning of bathrooms, kitchens, and basements helps keep mold at bay. Use exhaust fans during showers and run a dehumidifier in damp spaces. Schedule periodic inspections, especially in areas prone to moisture, to catch issues early.
DIY vs Professional Remediation: When to Call in Experts
For small, easily accessible outbreaks, a well-chosen mold and mildew spray combined with proper cleaning can be sufficient. Large areas, hidden mold behind walls, or growth on structural materials like framing should prompt a professional assessment. Professionals can perform mold testing, determine moisture sources, and execute comprehensive remediation plans that comply with safety guidelines. When in doubt, start with a consultation.
Common Mistakes and Troubleshooting
Common errors include skipping the test patch, over-wetting porous surfaces, and neglecting drying time. Always follow label directions, test a small area first, and ensure proper ventilation. If staining or odor persists after treatment, reassess moisture sources and consider re-treatment after surfaces are fully dry.
Tools & Materials
- Mold and mildew spray (formulated for your surfaces)(Choose a product labeled for the target material (non-porous vs porous) and surfaces.)
- Protective gloves(Nitrile or rubber; avoid latex if you have sensitivities.)
- Safety goggles(Protect eyes from splashes and aerosols.)
- N95 respirator or equivalent(For spray aerosols; ensure a proper fit.)
- Microfiber cloths(Lint-free for wiping surfaces.)
- Soft-bristle brush or sponge(Gentle scrubbing to avoid surface damage.)
- Spray bottle (empty, reusable)(Refillable container for dilution if permitted.)
- Plastic drop cloths or painter's paper(Contain spills and protect floors.)
- Bucket(For rinsing rags if needed.)
- Ventilation options (box fan or exhaust fan)(Improve air circulation during and after treatment.)
- Dehumidifier (optional but recommended)(Helps dry surfaces quickly to prevent regrowth.)
Steps
Estimated time: 60-90 minutes
- 1
Prepare the area
Open nearby windows, move furniture away from walls, and cover floors with plastic to catch drips. Remove or machine-wash fabrics if possible. Clear away items that could wick moisture or harbor hidden growth.
Tip: Lay a drop cloth on the floor and work in a well-ventilated space to reduce exposure. - 2
Put on PPE
Put on gloves, goggles, and a properly fitted respirator. PPE minimizes exposure and protects sensitive skin and lungs from aerosols and spores.
Tip: Perform a quick fit-check on your respirator and replace filters if you notice any odor leakage. - 3
Pre-clean the surface
Wipe away loose dirt or dust with a damp cloth. Pre-cleaning helps the spray reach the active growth and improves adhesion of the treatment.
Tip: Do not rely on cleaning alone to remove deeply embedded growth on porous materials. - 4
Apply the spray
Spray evenly from about 6–8 inches away to avoid saturating; apply a light mist and cover all visible growth. Do not oversaturate porous surfaces, which can trap moisture.
Tip: Keep the nozzle at a steady distance and avoid spraying directly into air vents or cracks where liquid can spread. - 5
Let it dwell
Allow the product to dwell for the label’s recommended time. This dwell time lets working ingredients penetrate and sanitize the surface.
Tip: Do not wipe immediately; longer dwell times can improve effectiveness on stubborn growth. - 6
Scrub and wipe clean
Gently scrub with a soft brush, then wipe away residue with a microfiber cloth. Rinse cloths and repeat if necessary.
Tip: Avoid aggressive scrubbing that could damage paint or finishes. - 7
Dry and inspect
Ventilate the area to dry, then re-inspect for any remaining stains or odor. Treat again if necessary after drying.
Tip: If odor persists after full surface dry, investigate hidden moisture sources behind walls.
FAQ
What surfaces can mold and mildew spray be used on?
Most sprays work on non-porous surfaces and some porous materials. Always check the label for surface compatibility and perform a patch test before full application.
Most sprays work on non-porous surfaces and some porous ones. Check the label and test a small area before continuing.
Is it safe to use around children and pets?
Use in a well-ventilated area and keep children and pets away until surfaces are dry. Wear PPE and follow the product’s safety instructions.
Keep kids and pets away until things are dry and you’ve followed the safety instructions.
Can I mix mold spray with bleach?
Do not mix mold sprays with bleach unless the label explicitly allows it. Mixing can release dangerous gases and cause chemical reactions.
Do not mix with bleach unless the label says it's okay. It can create toxic gases.
How long before the area is safe to re-enter?
Re-entry time depends on the product and ventilation. Follow the product label for dwell and drying times before returning.
Follow the label for how long to wait before re-entering.
Will mold spray kill mold on porous materials like wood?
Mold sprays can kill surface growth on some porous materials, but extensive mold on wood may require cleaning, sealing, or professional assessment.
Surface mold on wood may respond to spray, but deep growth might need more help.
When should I call a professional?
Call a professional for large outbreaks, hidden growth behind walls, or suspected structural moisture issues that require testing and remediation.
If the growth is large or hidden, consider a professional.
Watch Video
The Essentials
- Choose a mold and mildew spray suited to your surface type.
- Wear PPE and ensure good ventilation during use.
- Allow surfaces to dry completely to prevent regrowth.
- Address moisture sources to prevent future outbreaks.
- Consult a professional for large or hidden growth.