Mold Remediation for Homeowners: Safe, Practical Steps
Learn practical, safe steps to identify, remove, and prevent mold growth in homes. A homeowner-friendly mold remediation guide that Covers safety, methods, and prevention—perfect for DIY with professional backup.

In this how-to, you’ll identify mold sources, safely remove visible growth, and prevent recurrence through moisture control and proper cleanup. You’ll learn when DIY steps are safe and when to hire a pro, including practical steps you can take for common indoor molds.
Understanding moisture and mold growth
Mold thrives where moisture lingers, feeding on damp surfaces, organic debris, and poor air exchange. In many homes, kitchens, bathrooms, basements, and crawl spaces are hot spots. The phrase mold to make concrete goose sometimes pops up in search results, but the practical lesson remains: if humidity stays high or water leaks go unrepaired, mold colonies can take hold. By learning to spot moisture sources—leaking pipes, roof leaks, condensate on cold surfaces—and by drying affected areas quickly, you reduce the chance of mold spreading to walls, insulation, and wood framing. Effective remediation begins with identifying the source, isolating the area to prevent cross-contamination, and setting up proper ventilation to keep air moving as you work. This section lays the groundwork for practical cleanup and safer living spaces.
Safety and protection before you begin
Mold cleanup can release spores and irritants, so PPE is non-negotiable. Before you start, put on an N-95 respirator, protective goggles, and disposable gloves. Seal the work area with plastic sheeting to prevent spores from drifting to clean spaces, and use a dedicated exhaust fan or open windows to ventilate. Never mix cleaners or use products you’re unsure about; follow label directions and keep children and pets away. When you feel uncertain about containment or health risks, pause and seek professional guidance. This preparation protects your health while you tackle moisture sources and visible growth.
Cleaning non-porous surfaces: steps and best practices
Non-porous surfaces like tile, glass, and metal can often be cleaned more aggressively than porous materials. Start with detergent and warm water, scrubbing with a non-abrasive sponge. Rinse and dry thoroughly to prevent residual moisture. For persistent mold on non-porous surfaces, a diluted cleaning solution or a specialized mold cleaner can be used, but always ventilate and wear PPE. After cleaning, re-inspect the area for remaining spots and ensure it is completely dry before closing the space. Proper drying is essential to prevent regrowth from lingering moisture.
Porous materials: when to discard and when to salvage
Porous materials such as drywall, insulation, or textiles that have sustained water damage and show visible mold are often not salvageable. If visible mold penetrates the material or odor persists after cleaning, discard the item and replace it. Salvage may be possible for surface-level mold on clean, non-damaged materials, but it requires thorough cleaning, drying, and sometimes sealing to prevent future growth. When in doubt, treat suspicious items as disposable until you confirm they’re mold-free and structurally sound.
Prevention strategies to stop future mold
Prevention focuses on moisture control and air quality. Repair leaks promptly, reduce humidity with dehumidifiers or improved ventilation, and ensure bathrooms, kitchens, and laundry rooms have adequate exhaust. Keep indoor surfaces dry, fix drainage issues around the foundation, and improve air circulation with properly sized fans. Regular inspections for signs of moisture or condensation can catch issues early before mold becomes visible. A consistent cleaning routine and monitoring of humidity levels are your best long-term defense.
When to call a professional and what to expect
If mold growth is extensive, hidden behind walls, or involves HVAC systems, professional remediation is the safest option. A licensed mold remediation contractor can assess sources, contain the area, and restore materials with specialized equipment. Expect a site assessment, containment setup, and a post-remediation verification to confirm the space is dry and mold-free. Homeowners should verify licenses, request written estimates, and ask about warranties on remediation work.
Tools & Materials
- N-95 respirator(P100 preferred for fine aerosols)
- Disposable gloves(Nitrile or latex; avoid latex if you have sensitivities)
- Safety goggles(Wraparound style recommended)
- Plastic sheeting(Seals off work area; 6–8 mil or thicker)
- Masking tape(Secures plastic and prevents gaps)
- Detergent and warm water(Mild cleaning solution for initial wash)
- Mold cleaner or isopropyl alcohol(Use per product directions; avoid harsh combinations)
- Spray bottle(For cleaners and water mist)
- Buckets and microfiber cloths(For rinsing and drying; avoid lint)
- Dehumidifier or portable fans(Aid drying and air movement to prevent mold return)
Steps
Estimated time: 60-90 minutes
- 1
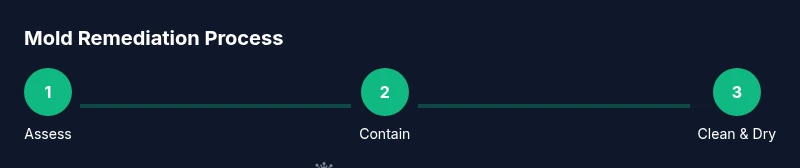
Assess area and moisture sources
Survey the space to identify active leaks, condensation sites, and damp materials. Note pattern areas and prioritize work on high-moisture zones such as bathrooms, basements, and kitchens.
Tip: Mark affected zones with tape to keep track as you work. - 2
Protect yourself and contain the space
Put on PPE, seal the area with plastic sheeting, and turn on ventilation. Isolate the clean space from living areas to prevent cross-contamination and spores drifting during cleanup.
Tip: Run a dedicated exhaust to push air outside if possible. - 3
Stop moisture sources and dry the area
Repair leaks or address condensation quickly, then dry the space with air movers or a dehumidifier. Moisture must be reduced before cleaning to prevent mold from regrowing.
Tip: Keep relative humidity low (as practical) during cleanup. - 4
Clean non-porous surfaces
Wash hard surfaces with detergent and water, scrub gently, rinse, and dry completely. Use a mold cleaner on stubborn spots, ensuring ventilation and PPE throughout.
Tip: Rinse and dry before moving to the next surface to avoid transfer. - 5
Handle porous materials
If material is water-damaged and moldy, consider discarding it rather than attempting to clean. Salvage may be possible for some items, but this requires thorough drying and mold monitoring.
Tip: When in doubt, err on the side of disposal for porous items. - 6
Recheck, restore, and monitor
After cleaning, recheck for any remaining moisture or new mold growth. Restore the space with ongoing humidity control and regular inspections to prevent recurrence.
Tip: Use moisture meters or humidity readings to confirm dryness. - 7
Document results and plan maintenance
Take photos, note affected materials, and schedule routine checks. Ongoing maintenance reduces future mold risk and supports a safer home environment.
Tip: Keep a simple mold remediation log for future reference.
FAQ
Do I always need a professional for mold cleanup?
Not all mold cleanup requires a pro. Small, isolated, and non-porous mold growth can sometimes be addressed with careful cleaning and moisture control. If mold covers large areas, recurs after cleaning, or involves HVAC systems, professional remediation is recommended.
You can handle small, contained mold growth yourself, but call a professional if it’s widespread or keeps coming back, or if it’s in your HVAC system.
Is bleach effective for mold cleanup?
Bleach can kill surface mold on non-porous surfaces but may not reach mold inside porous materials. For porous items, replacement is often safer. Always ventilate and wear PPE when using chemicals.
Bleach can kill mold on hard, non-porous surfaces, but it doesn’t fix mold inside porous materials; use caution and PPE.
How long does it take to dry after cleanup?
Drying times vary with humidity and ventilation. Monitor the area and use dehumidification and airflow until surfaces feel dry to the touch. Avoid reintroducing moisture too soon to prevent regrowth.
Dry times depend on humidity; keep area dry and monitor until it feels dry.
What surfaces are safe to clean myself?
Non-porous surfaces like tile, metal, and glass are typically safe to clean with detergents and appropriate cleaners. Porous materials may require disposal if mold has penetrated. Follow product directions and PPE guidance.
Non-porous surfaces are usually safe to clean yourself; porous ones may need disposal.
What steps help prevent mold recurrence?
Control moisture: fix leaks, improve ventilation, use dehumidifiers where appropriate, and maintain consistent cleaning. Regular inspections for damp spots can stop mold from returning.
Keep moisture in check and regularly inspect for damp areas to prevent mold from returning.
Should I test for mold after cleanup?
Testing can confirm mold removal, especially in complex cases, but isn’t usually required for small, cleaned areas. If symptoms persist or you’re unsure, consult a professional for testing and remediation.
Testing isn’t always needed, but consider it if you aren’t confident after cleanup or symptoms persist.
The Essentials
- Identify moisture sources before cleaning.
- Use proper PPE and containment to protect health.
- Dry thoroughly to prevent regrowth.
- Discard heavily damaged porous materials when needed.
- Know when to call a professional for safety and proper remediation.