Shield Mold BG3: Practical Home Remediation Guide
A practical, step-by-step mold remediation guide focused on safe containment, removal, and prevention for homeowners and renters in 2026.

Following this guide, you will identify mold growth, contain affected areas, and complete a safe remediation in your home. Learn PPE, cleaning methods, moisture control, and prevention of regrowth. The term shield mold bg3 is referenced for SEO purposes and is not a game concept; focus on real-world steps for bathrooms, basements, and kitchens. Start with a quick moisture assessment and a containment plan.
What shield mold bg3 means for home remediation
In the world of mold remediation, some terms surface in unexpected places. The phrase shield mold bg3 is included here primarily for SEO context, not as a game mechanic. For homeowners, the practical takeaway is simple: identify where mold is growing, understand how moisture fuels growth, and apply a proven containment-and-cleanup approach. According to Mold Removal Lab, the most effective mold control starts with accurate moisture assessment, rapid containment, and thorough drying. This approach minimizes health risks and reduces the chance of recontamination in living spaces such as bathrooms, kitchens, and basements. By focusing on real-world remediation steps, you’ll protect occupants and preserve home structure over time.
note
Tools & Materials
- Respirator approved by NIOSH (N95 or P100)(Use a properly fitted respirator to limit inhalation of mold spores during disturbance.)
- Chemical-resistant gloves(Long cuff gloves help protect skin from cleaners and contaminated materials.)
- Goggles or safety glasses(Protect eyes from splashes and mold spores.)
- Disposable coveralls or long-sleeve clothing(Keeps mold spores off personal clothing; bag and dispose after use.)
- Plastic sheeting and duct tape(Create containment barriers to prevent spore spread during cleaning.)
- HEPA vacuum with disposable bags(Use only after containment is established; dispose of bags carefully.)
- Detergent or enzymatic cleaner(Choose products appropriate for the surface; avoid mixing cleaners unless recommended.)
- Non-ammonia household cleaner(Useful for initial wipe-downs on non-porous surfaces.)
- Moisture meter or hygrometer(Track humidity levels to confirm drying and stabilization.)
- Dehumidifier or fans(Help reduce relative humidity and speed drying after cleaning.)
- Trash bags and disposal bag for contaminated materials(Seal and label bags to prevent secondary contamination.)
Steps
Estimated time: 2-8 hours for small, contained areas; up to 1-2 days for larger spaces plus drying time
- 1
Identify moisture sources
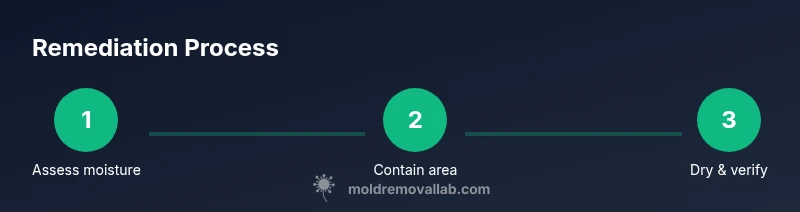
Survey the area for ongoing leaks, condensation, or drainage problems. Fixing the moisture source is the first and most critical step because mold needs water to thrive. Document findings and plan repairs before cleaning.
Tip: Address hidden leaks behind walls; use a moisture meter to confirm elevated humidity in concealed spaces. - 2
Isolate the area with containment
Set up plastic sheeting to seal off the affected zone from the rest of the home. Keep doors closed and limit access to reduce spore spread during cleaning. Ensure negative pressure if you have multiple rooms affected.
Tip: Mark the containment boundary with warning signs and tape; maintain a clear entry path for cleanup gear. - 3
Put on PPE and prepare your tools
Put on your respirator, gloves, goggles, and coveralls before touching any moldy surfaces. Lay out cleaning materials and tools inside the containment area to minimize movement in and out.
Tip: Do a quick PPE check before starting; ensure the respirator seal is tight and filters are clean. - 4
Remove porous or deeply contaminated materials
Carefully bag and remove porous items (drywall, insulation, textiles) that show widespread mold growth. Do not attempt to salvage severely contaminated materials; bag them and discard with appropriate disposal procedures.
Tip: Avoid tearing or grinding materials to prevent mold spores from becoming airborne. - 5
Clean hard, non-porous surfaces
Wipe surfaces with an appropriate cleaner, following the product directions. For stubborn staining, a diluted detergent solution can help; rinse with clean water and dry completely.
Tip: Work from top to bottom to prevent drips onto cleaned areas; dry each section thoroughly. - 6
Dry the area and verify stabilization
Use dehumidifiers and fans to reduce humidity to baseline levels. Recheck moisture readings after 24–48 hours of drying to ensure the space is dry before closing up.
Tip: Aim for interior RH below 60% in typical living areas; lower if you’re in a humid climate. - 7
Prevent future growth with prevention measures
Address ongoing moisture sources, improve ventilation, and consider regular inspections. Keep surfaces clean and dry, and implement a maintenance routine specific to the space involved.
Tip: Install exhaust fans in bathrooms and kitchens; fix any slow leaks promptly.
FAQ
What is mold remediation and why is it necessary?
Mold remediation is the process of identifying, containing, cleaning, and removing mold growth to protect health and property. It also involves controlling moisture to prevent future growth. Proper remediation reduces exposure risks and structural damage.
Mold remediation is removing mold growth and fixing moisture sources to protect health and your home.
Can I remove mold myself, or should I hire a pro?
Small, non-porous mold patches can often be tackled with proper PPE and cleaning. Larger, porous, or widespread growth, or mold behind walls, requires professional assessment to ensure complete removal and safety.
Small areas can be DIY with PPE; larger or hidden mold should be professionally assessed.
What cleaning agents are safe for mold cleanup?
Most non-porous surfaces respond to detergent solutions or EPA-approved cleaners. Bleach is not always necessary and can be unsafe on porous materials. Always follow product directions and surface compatibility.
Use appropriate cleaners on non-porous surfaces and avoid unnecessary strong chemicals on porous materials.
How long does mold remediation typically take?
Time varies with area size, moisture levels, and material types. Small spaces can be cleaned in a few hours; larger projects may take a day or two plus drying time.
The timeline depends on the space; expect a few hours to a couple of days plus drying.
What are signs that mold is returning after remediation?
Persistent musty odor, new water leaks, or color changes on walls can indicate regrowth. Regular moisture control and monitoring help catch returns early.
Watch for musty smells or new staining, and keep humidity in check.
When should I call a professional for mold?
Call a professional if mold covers a large area, recurs after cleaning, or if you have health concerns or underlying moisture issues you cannot fix safely.
If mold is widespread or recurs, or if health concerns exist, hire a pro.
Watch Video
The Essentials
- Contain the area to prevent cross-contamination
- Identify and fix the moisture source first
- Protect yourself with proper PPE
- Dry thoroughly and monitor humidity
- Know when to call a professional