Mold Guard: A Practical Home Mold Remediation Guide
Learn Mold Guard techniques for safe, practical home mold remediation. This guide covers prevention, containment, cleaning, and long-term monitoring to protect your family and living space.

With Mold Guard, you will reliably halt mold growth and protect indoor air quality by addressing moisture, contaminants, and cleaning protocols. This guide outlines practical steps homeowners can take, how to choose the right guard strategy, and when to escalate to professional remediation. According to Mold Removal Lab, integrating moisture control with careful cleaning is essential for lasting results.
What is Mold Guard and why it matters
Mold Guard is a practical, moisture-first approach to preventing and remediating mold growth in homes. It blends moisture control, surface cleaning, and ongoing monitoring to reduce the conditions that allow mold to thrive. In many households, the root cause of mold is hidden moisture—leaky plumbing, condensation on cold surfaces, or poorly ventilated bathrooms. Mold Guard emphasizes identifying and correcting these moisture sources, because addressing the environment often yields faster, longer-lasting results than cleaning alone. The Mold Removal Lab team highlights that a comprehensive plan, not a single spray or spray-and-wipe routine, is essential for healthier indoor air. When moisture is controlled and surfaces are cleaned with care, mold growth slows and the chance of recurrence drops significantly. For families dealing with mold-related health concerns, Mold Guard can be an important layer of protection that complements broader home maintenance, including filtration and humidity control. The emphasis on moisture management also aligns with broader public health guidance that stresses prevention as the first line of defense against mold exposure. By adopting Mold Guard principles, homeowners can create a safer living space and gain more predictable outcomes after remediation projects.
How Mold Guard works in real homes
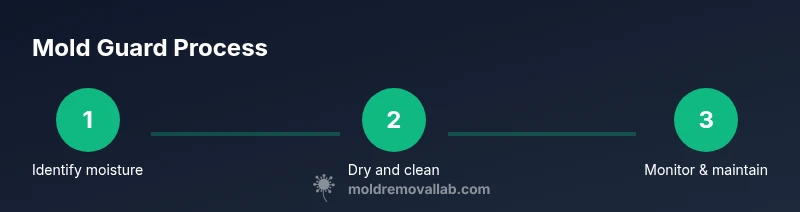
In practice, Mold Guard operates on three interlocking pillars: moisture control, meticulous cleaning, and ongoing monitoring. First, moisture control means fixing leaks, improving insulation, and ensuring adequate ventilation to keep humidity low where mold tends to grow. It also involves priority targets like bathrooms, basements, and kitchens where moisture is frequent. Second, cleaning and disinfection follow a careful protocol that avoids cross-contamination. Rather than a single spray, Mold Guard relies on a layered approach: remove visible growth, treat surfaces with non-toxic cleaners, and then dry completely. Finally, ongoing monitoring ensures the space stays mold-free as conditions change with weather or new occupants. Homeowners may use affordable humidity meters and routine checks to catch early signs of dampness. Real-world applications show that even small improvements—like fixing a leaky faucet and using a dehumidifier during humid months—can dramatically reduce mold risk over time. The Mold Removal Lab team notes that consistent application of these principles yields better long-term outcomes than sporadic, reactionary cleaning. By following this framework, you’ll create a resilient environment that resists mold growth across seasons and activities.
Choosing the right Mold Guard strategy: prevention, containment, remediation
Choosing the right Mold Guard strategy starts with assessing the scope of the problem. For prevention, prioritize moisture control and small-scale surface cleaning to keep conditions unfavorable for mold. Containment becomes critical when mold is visible in one room and there is a risk of spread to other areas; this often involves sealing off the contaminated zone and using proper ventilation. Remediation is warranted for larger or persistent issues, including hidden mold behind walls or extensive growth that affects air quality. A practical decision tree helps homeowners decide when to escalate: start with moisture and cleaning, add containment if there’s a risk of spreading, and bring in professionals if the contamination is widespread, structural, or if health symptoms persist. The Mold Removal Lab team emphasizes documenting affected areas and maintaining a clear plan for each stage. By clarifying goals—prevention, containment, or remediation—you can allocate time, resources, and safety measures more effectively and reduce confusion during a stressful remediation process.
Step-by-step implementation in a typical room
The following guidance focuses on a typical room with dampness concerns, such as a bathroom or laundry area. It illustrates how Mold Guard principles translate into a practical, in-home workflow. Start by identifying moisture sources (leaks, condensation, poor ventilation) and measure relative humidity. Then create a temporary barrier to prevent drift of spores to adjacent areas. Gather the necessary tools and materials, and prepare the space for cleaning by removing clutter and turning off HVAC systems if safe to do so. When cleaning, work from the least contaminated to the most contaminated surface to minimize cross-contamination. After treating surfaces, ensure surfaces are thoroughly dried using fans or dehumidifiers. Finally, implement preventive measures: fix leaks, improve ventilation, and set up a monitoring plan. This approach reduces recurrence and supports healthier air quality over time. While each home is unique, the core Mold Guard steps—identify, protect, clean, dry, and prevent—remain the same and can be adapted to fit your space and schedule.
Safety, testing, and when to call professionals
Safety is a central pillar of Mold Guard. Wear appropriate PPE (see the Tools & Materials section) and ensure good ventilation during any cleaning. If mold covers a large area, penetrates into walls, or if you have underlying health conditions, seek professional remediation. Do not attempt to seal off or clean exposed structural materials without proper training, as this can spread spores and worsen the problem. For containment, avoid disturbing moldy materials unnecessarily; use plastic sheeting and proper sealing techniques to prevent cross-contamination. Post-cleaning, consider a follow-up moisture assessment to verify that humidity remains at safe levels. If you notice persistent musty odors, recurrent dampness, or new staining after cleaning, schedule a professional inspection. These steps help ensure your Mold Guard approach remains effective and safe for everyone in the home.
Maintenance and long-term results
Long-term success with Mold Guard relies on steady moisture management and regular monitoring. Maintain a humidity level under 50-60% in most climates, and use a dehumidifier or air conditioner in damp seasons. Regular inspections of bathrooms, basements, and kitchens can catch moisture problems before visible mold appears. Keep surfaces dry after use, promptly address leaks, and educate other household members about mold cues like musty odors or staining. Revisit your cleaning protocols after major weather events or renovations, as these activities can disrupt the protective barriers you’ve built. A simple maintenance routine—monthly humidity checks, quarterly visual inspections, and an annual professional assessment if needed—can dramatically reduce recurrence risk and extend the life of your home’s structural materials. The integration of cleanup, moisture control, and preventive habits makes Mold Guard not just a one-time fix but a lasting home-safety practice.
Tools & Materials
- Protective PPE (N95 mask or respirator, safety goggles, gloves)(Ensure a proper fit and replace if damaged)
- Plastic sheeting and masking tape(6 mil or thicker; use to seal off affected area)
- Spray bottle(For applying cleaner and dampening surfaces as needed)
- Non-ammonia, non-chlorine mold cleaning solution(Follow label directions; avoid mixing chemicals)
- Soft brush or non-abrasive sponge(Gentle scrubbing to lift residues without damaging surfaces)
- Detergent or mild soap(Use for initial cleaning on non-porous surfaces)
- Bucket and towels/rags(For washing and absorbing moisture)
- Dehumidifier or fan(Promotes complete drying; set to appropriate humidity level)
- Moisture meter or hygrometer(Track humidity before and after remediation)
- HEPA vacuum (optional)(Helpful for final cleanup and reduced dust spread)
- Trash bags(Seal contaminated items for disposal)
- Label tape and markers(Keep track of cleaned areas)
Steps
Estimated time: 60-90 minutes
- 1
Identify moisture sources and affected areas
Survey the room for leaks, condensation, and hidden dampness. Mark the areas with clear labels and document findings with photos or notes before starting cleanup.
Tip: Document the scope first to guide containment and cleaning decisions. - 2
Protect yourself and the space
Put on PPE, seal off the room with plastic sheeting, and turn off HVAC to prevent spores from circulating. Establish a clean path for waste to exit the area.
Tip: Ventilate the space where possible to reduce airborne spores. - 3
Prepare tools and surfaces
Gather cleaning solutions, brushes, rags, and towels. Remove loose debris and ensure surfaces are dry and accessible for thorough cleaning.
Tip: Avoid mixing cleaners; follow label instructions for safe use. - 4
Apply Mold Guard cleaning protocol
Spray the affected areas and scrub with a soft brush or sponge. Rinse lightly if required and remove residues with towels. Do not oversaturate porous surfaces.
Tip: Work in small sections to prevent standing moisture. - 5
Dry surfaces completely
Use towels to blot excess moisture, then run a dehumidifier or fan to drive humidity down. Aim for stable readings over several hours.
Tip: Keep air circulating and check corners where dampness tends to linger. - 6
Monitor and verify
Check humidity levels daily for the first week and inspect for new signs of moisture or staining. Retain a log of readings and observations.
Tip: If humidity remains high after 72 hours, reassess moisture sources. - 7
Prevent recurrence
Address root causes (leaks, poor ventilation, insulation gaps) and consider ongoing moisture monitoring. Schedule periodic inspections after weather events or renovations.
Tip: Implement a simple maintenance routine to catch problems early.
FAQ
What is Mold Guard and how does it differ from standard mold cleanup?
Mold Guard emphasizes moisture control, careful cleaning, and ongoing monitoring rather than a one-time cleanup. It aims to prevent mold from returning by addressing environmental conditions first.
Mold Guard focuses on moisture control, thorough cleaning, and ongoing checks to prevent mold from coming back.
Can Mold Guard help with existing water damage?
Yes, Mold Guard provides a framework for addressing water-damaged areas, but large or structural damage may require professional remediation. Immediate drying and moisture control are critical.
Mold Guard helps with water-damaged areas, but for big or structural damage, you should consult a pro.
Is Mold Guard safe for drywall or wood surfaces?
Yes, with proper PPE and according to cleaning guidelines. Use non-abrasive cleaners and avoid over-wetting porous materials to prevent further damage.
Yes, but be careful with drywall and wood; use gentle cleaners and avoid soaking surfaces.
How long does Mold Guard take to show results?
Visible improvements occur after thorough cleaning and drying. Long-term prevention relies on sustained moisture control and regular monitoring.
You’ll see improvements after cleaning and drying, with ongoing prevention proving most important.
Should I test for mold after applying Mold Guard?
Testing can confirm absence of active mold growth, especially after renovations or persistent issues. If symptoms or odors persist, consider professional testing.
Testing helps confirm mold status after cleanup, especially after big jobs or ongoing symptoms.
What PPE is necessary for Mold Guard cleaning?
Wear an appropriate respirator or N95, eye protection, and gloves. Ensure proper ventilation and avoid skin contact with cleaners.
Use a proper mask, goggles, and gloves, and keep the area ventilated during cleaning.
Watch Video
The Essentials
- Identify and fix moisture sources first.
- Ventilate, dry, and monitor to prevent recurrence.
- Follow a layered cleaning protocol for lasting results.
- Escalate to professionals when mold areas are large or hidden.