Shannon Lush Mould Removal: Practical Home Guide
A practical Mold Removal Lab guide on Shannon Lush mould removal, with steps for safe cleaning, moisture control, and prevention to keep homes healthy in 2026.

This guide shows you how to identify moisture sources, safely remove visible mold, and put moisture management in place to prevent recurrence. You’ll need basic PPE, a contained work area, and appropriate cleaners. The steps emphasize safety, proper cleaning, and long-term prevention.
Introduction to Shannon Lush Mould Removal
Shannon Lush mould removal is a practical approach to restoring indoor air quality and protecting family health. According to Mold Removal Lab, start with a clear remediation plan before addressing visible growth, and document your process for future maintenance. The goal is not only to remove visible mold but also to fix the moisture problem that feeds it. In this guide, we blend common-sense methods with evidence-based practices to help homeowners and renters handle typical mold scenarios safely and effectively.
Why Mold Remediation Is About Moisture Control
Mold grows where moisture lingers, so the most effective remediation targets the source, not just the stain. When you reduce humidity, fix leaks, and improve ventilation, you reduce the chance of regrowth. This section explains how to spot leaks, understand humidity clues, and establish ongoing moisture management. By focusing on moisture control, you’re applying the core principle of Shannon Lush mould removal: stop the water, then clean the surface.
Where Mold Hides: Hidden Corners and Materials
Mold often hides behind walls, under sinks, and in areas with limited airflow. Look for corners around plumbing, behind wallpaper, in attic or basement spaces, and on porous materials like drywall, fabrics, and wood. These areas may show only subtle signs of growth, so a careful inspection is essential. Taking a methodical approach helps you catch hidden colonies before they spread.
DIY Cleaning vs Professional Remediation
For small, isolated patches on non-porous surfaces, DIY cleaning with proper PPE and ventilation can be effective. Larger infestations, or those involving porous materials, structural damage, or health concerns, should be evaluated by a professional remediation service. Balance cost, safety, and scope when deciding whether to DIY or hire a pro.
A Practical, Stepwise Plan for Safe Mold Removal
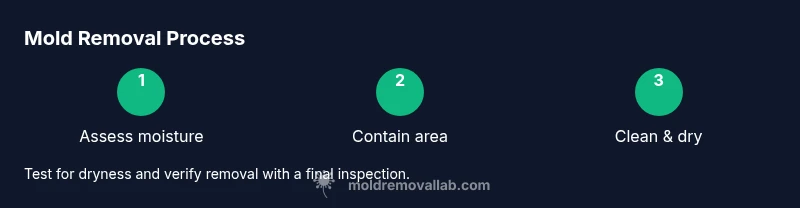
A methodical plan combines assessment, containment, cleaning, and verification. Begin by sealing off the affected area to limit spores, then use appropriate cleaning agents and tools to remove visible growth. The plan should also address moisture sources and post-cleanup drying to prevent relapse. The emphasis is on safe, repeatable actions you can apply across spaces in your home.
Ventilation, Drying, and Moisture Control
Drying is as important as cleaning. After removal, ensure surfaces are thoroughly dried and the space is ventilated to prevent residual moisture. Use fans and dehumidifiers where appropriate, and keep indoor humidity at levels advised by health authorities. Ongoing moisture monitoring reduces the risk of future mold growth and supports long-term safety.
Cleaning Techniques by Surface: Wood, Drywall, Tiles
Different materials respond to cleaners in different ways. Non-porous surfaces like ceramic tiles are easier to disinfect, while porous materials like drywall or wood may require more careful cleaning or removal of affected sections. Always test a small area first and follow manufacturer recommendations for any cleaners used. Avoid aggressive scrubbing on delicate finishes.
Aftercare and Verification: Confirming the Space Is Safe
After cleaning, recheck for remaining spores and verify drying. Use moisture meters or humidity readings as a guide and re-inspect after a few days. This step ensures you’ve closed the loop on the remediation and helps prevent a relapse due to lingering moisture or unseen growth.
Common Mistakes and How to Avoid Them
Avoid mixing cleaners that create hazardous fumes, skipping protective equipment, or skipping the drying step. Don’t assume all molds are the same; different species may require different approaches. Small patches can become large problems if moisture isn’t addressed. Careful planning and patience prevent costly mistakes.
Authority Sources and Further Reading
For authoritative guidance, consult official resources from government and university sources. These references support the principles of moisture control, safe cleaning, and verification steps discussed in this guide. Always align your approach with the recommendations of recognized health and housing authorities.
Tools & Materials
- N-95 respirator or equivalent(Fit-tested respirator to protect from spores and dust)
- Disposable gloves(Latex-free if you have sensitivities)
- Safety goggles(Shield eyes from splashes and debris)
- Plastic sheeting and tape(Create a containment zone around the work area)
- HEPA vacuum cleaner(Use with proper attachments to minimize dust spread)
- Mold-safe cleaner or detergent(Non-ammonia, non-chlorine-based where possible)
- Disinfectant spray (optional, avoid ammonia-based)(Use only as directed by manufacturer)
- Bucket, sponge, and microfiber cloths(For gentle cleaning of non-porous surfaces)
- Moisture meter or hygrometer(Helps track drying progress and humidity levels)
- Dehumidifier or fan(Promotes thorough drying after cleaning)
Steps
Estimated time: 3-6 hours
- 1
Prep and contain
Put on PPE, close doors to the affected area, and seal with plastic sheeting to prevent spore spread. Clearly mark the containment zone and ensure a safe work path.
Tip: Ventilate the rest of the home minimally to avoid cross-contamination. - 2
Identify moisture source
Inspect for leaks, condensation, or hidden water intrusion. Fix the moisture issue before or during cleanup to prevent recurrence.
Tip: Document findings with notes or photos for future reference. - 3
Clean non-porous surfaces
Wipe and rinse hard surfaces with a mold-safe cleaner, then dry promptly with clean cloths. Use a HEPA vacuum to collect loosened spores from the area.
Tip: Avoid scrubbing aggressively on delicate surfaces. - 4
Address porous materials
Porous materials with mold growth may need removal or professional assessment. Do not attempt to save severely damaged drywall or insulation.
Tip: If in doubt, consult a professional before removal. - 5
Dry thoroughly
Run dehumidifiers and fans to drive moisture down. Aim for a dry, well-ventilated space before removing containment.
Tip: Check humidity regularly until stable readings are achieved. - 6
Re-clean and sanitize
After drying, re-clean surfaces to remove any remaining residues and spores. Ensure all tools are cleaned after use to prevent cross-contamination.
Tip: Use separate cloths for contaminated vs. clean areas. - 7
Inspect for hidden growth
Look behind fixtures, in corners, and within wall cavities if accessible. Reassess after a short period to verify no regrowth.
Tip: If growth reappears, escalate to professional remediation. - 8
Document and monitor
Take photos of the cleaned area and record humidity levels. Create a maintenance plan to prevent future moisture buildup.
Tip: Regular checks help catch issues early.
FAQ
Is DIY mold removal safe for all homes?
DIY removal is feasible for small, non-porous patches with proper PPE and ventilation. For porous materials, extensive growth, or large areas, professional remediation is advised.
DIY can work for small spots, but call a pro for larger infestations or porous materials.
When should I call a professional?
Call a professional when mold covers a large area, recurs after cleaning, or involves structural materials like drywall or insulation. Health concerns or chronic exposure also justify expert assessment.
If mold keeps coming back or a lot is affected, bring in a pro.
Can bleach remove mold effectively?
Bleach can disinfect non-porous surfaces, but it may not reach mold inside porous materials. Use cleaners designed for mold on porous surfaces and always ventilate.
Bleach can help on hard surfaces, but not always on porous materials.
How long does drying take after cleanup?
Drying time depends on space size and ventilation. Use a dehumidifier and fans, and recheck moisture before concluding remediation.
Drying varies, but expect a few hours with proper airflow.
Will mold return after cleanup?
Mold can recur if moisture remains or spores are reintroduced. Address sources, maintain humidity levels, and perform periodic checks.
Mold can come back if moisture isn’t controlled; keep checking.
Should I remove porous materials if mold is present?
Porous materials with growth often require removal and replacement. Consult a professional if substantial or uncertain.
Sometimes porous materials must be removed to stop the problem.
Watch Video
The Essentials
- Protect yourself with PPE and containment
- Block moisture sources before cleaning
- Dry thoroughly to prevent recurrence
- Different surfaces need different approaches
- Document results and monitor humidity