Repair Molding Dog Chewed: A Practical Home Fix Guide
Learn how to repair molding dog chewed trim, assess moisture and mold risk, patch or replace damaged sections, and restore a clean, durable finish with practical, step-by-step guidance from Mold Removal Lab.

By following this guide, you’ll repair molding dog chewed trim, restore a clean appearance, and minimize moisture that promotes mold. You’ll assess damage, choose patch or full replacement, and complete prep, patching, sanding, and painting. This steps-based approach helps homeowners safely restore trim without unnecessary demolition.
Understanding the problem: repair molding dog chewed
Damaged baseboards or crown molding from a playful or anxious dog is more than a cosmetic issue. Chewing can leave gouges, splinters, and even micro-cracks that trap moisture behind the finish. If moisture remains, mold-friendly conditions may develop under paint or sealant. According to Mold Removal Lab, addressing both the chew damage and any moisture risk quickly reduces long-term mold potential while restoring the room’s appearance. Start by evaluating how deep the damage runs and whether the underlying wood is compromised. If you notice bowing, soft spots, or exposed drywall, plan for a larger repair.
This article uses practical, home-friendly methods to repair mold-susceptible trim while reducing mold risk. You’ll learn when to patch, when to replace, and how to seal the area for lasting protection. The goal is a durable, paint-ready surface that resists future moisture and chewing attempts.
Assessing the damage and risk
Before you pick a repair method, take a careful look at the entire affected area. If the chew is shallow and the wood is intact, a patch with wood filler or epoxy can restore the profile. For deeper gouges or structural compromise, a full replacement of the molding piece may be required. Check for signs of moisture behind the finish, such as soft paint, bubbling, or a musty odor. If you detect mold growth or water intrusion, stop and follow safety procedures—ventilate, wear a respirator, and consider contacting a mold remediation professional. Mold Removal Lab’s analysis emphasizes addressing moisture first to prevent recurring mold after repair.
Document the damage with photos for reference and planning. Measure the length and cross-section of the molding to ensure you source an accurate patch piece. If you have access to the original trim, bringing a small sample to the home improvement store helps you match profile, grain, and color more precisely.
Repair options: patch vs replace
There are two main paths: patching damaged sections or replacing the affected molding. Patching is ideal for small gouges, shallow chew marks, and intact surrounding trim. It uses wood filler or epoxy, plus careful sanding and painting to blend with the existing profile. Replacement is preferable for deeper damage, warped pieces, or when the profile cannot be matched. In both cases, sealant around the repair helps block moisture entry and reduces future mold risk. Mold Removal Lab recommends choosing materials that match the existing grain direction and finish to minimize noticeable repairs.
Key considerations:
- Patch if damage is minor and structural integrity is intact.
- Replace if the profile is damaged beyond patching or if moisture has compromised the wood.
- Use grain-matching patches and high-quality sealants to minimize visibility and moisture intrusion.
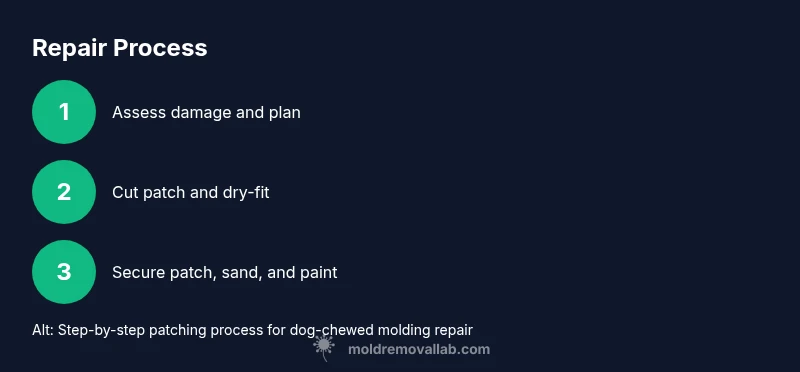
Step-by-step overview
This section outlines the main steps in the repair process. For a full, executable guide with actionable details, see the dedicated STEP-BY-STEP block below. The overview ensures you understand the sequence before you start.
- Inspect the area and decide patch or replace.
- Prepare the workspace and protect surfaces.
- Remove the damaged section cleanly with precise cuts.
- Cut and dry-fit your patch piece.
- Apply bonding material and secure the patch.
- Sand, prime, and paint to finish.
- Re-check for moisture and potential mold hotspots.
- Maintain a dry, well-ventilated environment to prevent future mold growth.
Safety and mold considerations
Working around possible mold requires careful safety practices. Always wear a respirator or dust mask, safety goggles, and gloves. Ensure adequate ventilation during sanding and painting, and clean up dust promptly to reduce inhalation exposure. If you discover visible mold growth after removing the damaged section, stop and follow mold remediation guidelines. In some cases, a professional assessment is warranted, especially when mold is extensive or the area is difficult to access. The Mold Removal Lab team emphasizes moisture control as the cornerstone of a durable repair, so address any leaks or humidity sources before finishing the job.
Maintenance and prevention to reduce future chewing and mold risk
Prevention is the best medicine after you repair molding dog chewed. Consider using bitter deterrent sprays on trim, providing sturdy chew toys, and training or redirecting your dog's attention away from trim. Install thresholds or barriers in rooms with molding to reduce access during chewing phases. Regularly inspect molding for chips, cracks, and moisture signs, especially in kitchens and bathrooms where humidity can drive mold growth. Keep humidity under control (ideally 30-50%), fix leaks promptly, and repaint with mold-resistant paints where appropriate. Routine cleaning and prompt repairs will help maintain a mold-safe, visually appealing trim line.
Authority sources
- EPA Mold Basics: https://www.epa.gov/mold
- CDC Mold: https://www.cdc.gov/mold/default.html
- OSHA Molds: https://www.osha.gov/molds
These sources provide foundational guidance on mold risks and mitigation strategies relevant to repair projects like fixing dog-chewed molding. Always cross-check local building codes and moisture management practices for your area.
Tools & Materials
- Safety gear: gloves, eye protection, and respirator(Protect skin and lungs from dust and splinters)
- Drop cloths(Protect floors and furniture from dust and spills)
- Protective mask/respirator(Prevent inhalation of dust and mold spores)
- Utility knife(Score and remove damaged sections cleanly)
- Putty knife(Spread filler and smooth joints)
- Wood filler or two-part epoxy(Choose based on depth and repair needs)
- Patch molding piece or scrap trim(Source matching profile for patch)
- Fine-grit sandpaper (120–180 grit)(Blend patch edges with surrounding surface)
- Wood glue(Adhere patch to baseboard or trim backing)
- Finish nails or brad nails(Secure patch if needed; optional for lightly anchored patches)
- Nail set(Countersink nails below surface level)
- Primer(Adhesion and even paint finish)
- Paint that matches trim(Semi-gloss or satin for durability)
- Drop cloths and painter's tape(Keep surrounding areas clean during painting)
- Caulk or silicone sealant(Seal joints to prevent moisture intrusion)
- Caulking gun(Apply sealant neatly)
Steps
Estimated time: 1-2 hours (not including drying time for paint)
- 1
Assess damage and plan
Carefully examine the chewed area to determine depth and whether underlying wood or drywall is affected. Decide if patching is sufficient or if a full replacement is necessary. Take measurements of length, profile, and thickness to guide material choices.
Tip: Document the current profile with photos for reference and ensure you have a matching patch sample. - 2
Prepare the workspace
Lay down drop cloths, remove pets from the room, and ventilate the area. Remove loose dust and debris with a soft brush. This reduces contamination and helps the repair materials adhere properly.
Tip: Protect adjacent surfaces with painter’s tape to keep your finish clean. - 3
Remove the damaged section
Using a utility knife, score along clean lines to separate the damaged portion. Cut away the chewed piece, keeping the surrounding molding intact. Use a straight edge to guide your cut for a precise seam.
Tip: Clamp the molding to prevent movement and maintain straight cuts. - 4
Cut and test the patch piece
Trace the original profile or use a scrap piece to guide cut. Cut the patch slightly larger to ensure coverage and fit. Dry-fit the patch in place before bonding.
Tip: Check grain direction and thickness alignment to avoid obvious mismatches. - 5
Apply bonding material
Spread wood glue on the patch backing and/or apply a thin coat in the joint. For deeper gouges, mix a small amount of wood filler or epoxy and press it into the gap. Smooth with a putty knife.
Tip: Epoxy works well for deep gouges but requires longer set time. - 6
Secure the patch
Attach the patch with finishing nails if needed, countersink slightly, and wipe away excess filler. If using adhesive alone, ensure a tight seal by applying gentle pressure with clamps until set.
Tip: Use a scrap block behind nails to avoid splitting the surrounding wood. - 7
Sand, prime, and blend
Once dry, sand the patch flush with the surrounding surface. Apply primer to the repaired area to improve paint adhesion. Feather the edges into the existing surface for a seamless finish.
Tip: Finish with 120-180 grit; wipe away dust between coats. - 8
Paint and seal
Paint to match the existing trim using short, even strokes. Apply a thin bead of caulk at the seam to seal against moisture. Allow the paint to cure fully before reintroducing activity in the room.
Tip: Choose a mold-resistant paint if humidity is a concern.
FAQ
Can dog-chewed molding be repaired without replacing the entire piece?
Yes, shallow chew marks and minor gouges can often be repaired with patching materials like wood filler or epoxy. If the profile is severely damaged or the wood is compromised, replacement is usually a better long-term solution. Always assess structural integrity before proceeding.
Yes. For minor damage, patching is usually enough; for severe damage, replacement may be required.
What should I do if there is hidden mold behind the molding?
If you suspect hidden mold after removing damaged hardware, stop work, ventilate, and perform a basic mold inspection. Use a moisture meter and consider a professional assessment for confirmation and safe remediation before continuing repairs.
If you see or suspect hidden mold, pause, ventilate, and consult a professional if needed.
What materials work best for patching wood molding?
Wood filler for small gaps and epoxy for deeper gouges both work well. Choose a product that dries hard and sands smoothly, then prime before painting to ensure a uniform finish.
Wood filler for small gaps; epoxy for deep gouges; prime and paint for a seamless look.
Is it safe to sand and paint after patching molding?
Yes, with proper safety gear and ventilation. Sand lightly to minimize dust, wear a respirator, and use low-VOC paints. Allow adequate curing time between coats for durability.
Yes, use a mask and good ventilation; sand gently and let paint cure fully.
When should I call a mold professional?
If you detect widespread mold, persistent moisture, or mold growth behind walls, contact a licensed mold remediation professional. They can assess, contain, and safely remove mold before repairs.
Call a professional if mold is extensive or hidden behind structures.
Watch Video
The Essentials
- Assess damage carefully before choosing repair method
- Patch for minor chewing; replace for severe damage
- Control moisture to prevent future mold
- Finish with matching color and sealant for durability