Repair Molding: A Practical Mold Removal Guide
A comprehensive, step-by-step guide to repairing molding after mold growth, including safety, moisture control, cleaning, and prevention for homeowners and renters.

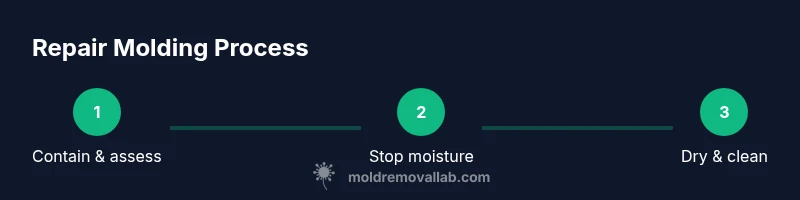
Repair molding and prevent mold growth by first stopping the moisture source, then cleaning and treating the affected trim, and finally sealing and maintaining humidity levels to keep mold from returning. This step-by-step approach covers assessment, containment, material choices, and long-term prevention, with safe, home-friendly methods homeowners can apply. Always wear PPE, test for hidden moisture, and dry the area thoroughly before finishing.
Understanding the scope of repair molding and mold exposure
Molding describes decorative trim that frames doors, windows, and walls. When moisture lingers in walls, behind baseboards, or inside stud cavities, mold can take hold on or behind molding. Repair molding, in this context, means more than straightening warped wood; it means addressing the moisture source, assessing damage, and choosing whether the affected trim can be salvaged or must be replaced. According to Mold Removal Lab, the foundation of durable results is a clear plan that treats moisture first and then tackles the mold residue. Without controlling moisture, even well-painted molding can re-moisten, crack, or encourage new colonies.
Key cues include a musty odor, visible staining, powdery or fuzzy texture on wood, and soft, crumbly sections where wood has absorbed moisture. If you notice warping or the backing material behind the trim is compromised, you should plan for replacement rather than superficial cleaning. In the sections that follow, you’ll learn how to evaluate the extent of the issue, what tools you’ll need, and which repair paths lead to a safer, healthier living space.
Safety first: PPE, containment, and air quality
Before touching mold-affected molding, set up containment to prevent spores from drifting to other areas. PPE is non-negotiable: an appropriate respirator (preferably fit-tested), eye protection, and nitrile gloves are essential, with disposable coveralls for larger projects. Use plastic sheeting to seal off the work area and a basic HEPA vacuum for cleanup. Always maximize ventilation when you can safely do so, and avoid mixing cleaning agents that can create hazardous fumes. This approach not only protects your health but also improves cleanup effectiveness by reducing airborne spore counts during the repair process. According to Mold Removal Lab, proper PPE and containment dramatically reduce exposure risk and help you identify underlying moisture problems more clearly.
Assessing moisture sources and damage to molding
Identify where moisture originates—the most common culprits are leaky roofs, plumbing fixtures, or high indoor humidity. Check adjacent walls and ceilings for staining, warped boards, or hidden rot. Use a moisture meter on wood surfaces and behind baseboards to gauge penetration. Document findings with photos, then prioritize leaks and humidity control before any removal. Address structural sources first; if moisture continues, mold will return even after you repair the molding. The goal is a dry, well-ventilated environment that discourages future mold growth while preserving the integrity of trim pieces.
Cleaning and removing mold from molding materials
Salvaging molding depends on material type. Non-porous finishes and solid metal trims are typically easier to clean, while porous wood molding can harbor embedded mold. Start with a detergent-and-water solution and a soft brush to scrub visible growth, then wipe with a clean, damp cloth. For stubborn spots, use an EPA-registered mold cleaner following label directions. Avoid bleach on wood surfaces, as it can damage the finish and fail to reach deeply embedded spores. After cleaning, dry the molding completely using fans or a dehumidifier. Proper drying is crucial to prevent regrowth and to assess whether the piece can be salvaged or must be replaced.
Repair options after mold removal
If only surface growth is present and the wood remains structurally sound, planing or refinishing the molding may restore appearance. For warped or rotten sections, replacement is often the safer long-term choice. When replacing, choose solid wood or moisture-resistant composites and prime with a mold-inhibiting primer. For minor repairs, use wood filler on small gaps, then sand smooth and seal. In all cases, ensure that the repair area is fully dry before finishing. This stage also provides an opportunity to upgrade to mold-resistant finishes that deter future contamination.
Repainting and sealing to prevent recurrence
Finish the repaired molding with a mold-inhibiting primer followed by a topcoat designed for humid environments. Use multiple thin coats rather than a single thick layer to improve adhesion and coverage. If the area is prone to moisture, consider adding a vented baseboard or improved airflow to reduce humidity around the trim. After painting, maintain humidity levels below typical indoor ranges (as a general guideline, run a dehumidifier in damp seasons and monitor humidity with a hygrometer). Regular inspections help catch early signs of moisture before mold can reestablish itself.
When to call a professional and what to expect
If you discover extensive mold behind molding, if the mold recurs after an initial cleanup, or if you’re unsure about the moisture source, contact a licensed mold remediation professional. They can confirm the extent of contamination, identify hidden moisture, and perform more thorough remediation, including structural drying and sealing. A professional inspection may also reveal related issues in adjacent walls or ceilings that you’ll want to address to prevent re-infestation. The Mold Removal Lab Team recommends proceeding with caution and prioritizing safety when repair molding becomes more complex than a DIY project.
Tools & Materials
- N95 respirator or higher protection(Fit-tested if possible; use during all mold-related work)
- Safety goggles(Wrap-around style preferred)
- Nitrile gloves(Layered for extended projects)
- Disposable coveralls(Optional for larger or heavily contaminated areas)
- Plastic sheeting and tape(Create containment zone around work area)
- HEPA vacuum(Use for cleanup; empty outside the living space)
- Detergent (mild soap) and soft brush(For initial cleaning of visible mold)
- EPA-registered mold cleaner(Follow label directions precisely)
- Non-ammonia, non-chlorine cleaner for wood(Alternative cleaning option)
- Putty knife and wood filler(For minor repairs of small gouges)
- Sandpaper (fine grit)(Smooth repaired surfaces)
- Primer with mold-inhibitor(Seal before painting)
- Mold-resistant interior paint(Topcoat finishing step)
- Dehumidifier or desiccant(Keep area dry during and after repairs)
- Moisture meter or hygrometer(Verify drying and monitor humidity)
Steps
Estimated time: 3-6 hours
- 1
Set up containment and prep area
Seal off the work area with plastic sheeting. Remove or cover nearby furnishings to prevent contamination. This step minimizes the spread of spores and makes cleanup easier later.
Tip: Ensure the containment is sealed; tape edges well and create a small vent to prevent pressure buildup. - 2
Stop moisture sources and dry the space
Identify leaks and repair them; run a dehumidifier to reduce ambient humidity. Drying is essential before any removal or repair so mold does not reestablish on newly repaired trim.
Tip: Use a moisture meter to confirm surfaces are below the safe threshold before proceeding. - 3
Clean surface mold from molding
Wipe with detergent solution and scrub lightly using a soft brush. Rinse with a damp cloth and dry thoroughly. For stubborn stains, apply an EPA-approved cleaner following package directions.
Tip: Avoid harsh cleaners on finished wood; opt for products labeled safe for wood trim. - 4
Decide between cleaning or replacement
If mold penetrates deeply or the wood is soft or warped, plan for replacement. Salvageable trim can be sanded, filled, and sealed after cleaning; damaged pieces should be replaced with moisture-resistant options.
Tip: Document the extent of damage with photos to guide purchase decisions. - 5
Repair or replace molding
Install new or repaired mold pieces using appropriate fasteners. Fill seams and sand smooth. Apply a mold-inhibiting primer to all repaired surfaces before painting.
Tip: Match molding profile and wood type for consistent appearance. - 6
Finish and prevent recurrence
Apply two thin coats of mold-resistant paint over primer. Reintroduce normal ventilation and maintain humidity below typical indoor levels. Schedule periodic inspections to catch moisture early.
Tip: Keep humidity consistently low in vulnerable rooms, especially after rain or plumbing work.
FAQ
Is it safe to repair molding myself if mold is visible?
DIY repair can be safe for small areas with proper PPE and containment. If mold covers a large area or there’s hidden moisture, consult a professional for assessment and remediation.
Yes, for small areas with the right safety measures. If in doubt, hire a pro.
What PPE should I use when repairing molding?
Wear an N95 respirator (or higher), eye protection, and nitrile gloves. Use disposable coveralls for larger jobs to minimize exposure.
Protect yourself with proper PPE: mask, goggles, gloves.
Should I replace moldy molding or just clean it?
If mold has penetrated the wood or backing, replacement is often the safer long-term option. Surface mold on finished, solid pieces may be cleaned and sealed.
Replacement is usually best for deeply penetrated wood.
How can I prevent mold returning after repair?
Control moisture, fix leaks promptly, ensure good ventilation, and seal repaired areas with mold-inhibiting primers and paints.
Fix moisture sources and seal surfaces after repair.
Can bleach kill mold on wood molding?
Bleach is not ideal for porous materials like wood; it may kill surface mold but often doesn’t reach deeply embedded spores.
Bleach isn’t the best long-term solution for wood mold.
How long does repair molding take after mold removal?
Timeline varies with extent. Drying, repairs, and finishing can span multiple days depending on moisture and size of the project.
It varies with scope; expect drying, repairs, and finishing steps.
When should I call a professional for mold on molding?
Call a professional if mold recurs after cleaning, if moisture sources are hidden, or if structural damage is suspected. They can perform thorough remediation and drying.
If mold returns or leaks are hidden, call a pro.
What signs indicate hidden moisture around molding?
Look for persistent dampness, musty odor, staining under paint, or warped trim that persists after cleaning. These signs suggest ongoing moisture behind walls.
Persistent dampness or odors show hidden moisture.
Watch Video
The Essentials
- Stop moisture before remediation begins.
- Assess whether molding can be salvaged or must be replaced.
- Use mold-resistant primers and paints after repair.
- Maintain low indoor humidity to prevent recurrence.
- Document damage and to plan a durable solution.