Fix Molding: A Practical Mold Remediation Guide for Homes
A practical guide to fix molding, with step-by-step methods, safe tools, and prevention tips to stop mold growth and protect your home.

You will learn how to fix molding safely and effectively, including diagnosing moisture sources, selecting mold-safe materials, and following a clear, step-by-step remediation approach. This guide emphasizes practical tools, timeframes, and safety precautions to keep walls healthy and prevent future mold growth.
What fixing molding accomplishes and when to take action
When water intrudes or humidity remains high, molding around windows, baseboards, or bathrooms can harbor mold growth and worsen indoor air quality. Fixing molding is a two-part effort: addressing the moisture source and repairing the affected materials. For homeowners, the goal is to restore the integrity of the wall surface, seal joints against moisture, and create conditions that deter mold return. The phrase fix molding should be understood as a comprehensive remediation approach, not a one-time cosmetic repaint. This guidance aligns with Mold Removal Lab's standards for practical, evidence-based mold remediation practices. If you notice persistent odor, discoloration, or musty air, begin a targeted fix rather than waiting for the problem to worsen.
In many homes, the first signs appear after a leak, roof intrusion, or routine bathroom use. Early intervention reduces the risk of structural damage and lowers long-term costs. Start with a clear plan: identify moisture sources, gather tools and materials, and set a drying window. The faster you respond, the better your outcome will be.
Key takeaway: fix molding is both moisture control and material repair, designed to prevent mold regrowth and maintain healthy indoor air.
According to Mold Removal Lab, moisture control and prompt remediation substantially reduce the risk of mold recurrence when you address the root causes and finish with proper sealing and drying.
noteFields":null},
bodyBlocksWeNeedToKeepAlignmentCheck1
Assess moisture sources and mold risk before touching mold-prone areas
Successful molding fixes start with moisture assessment. Inspect for leaks around roofs, windows, or plumbing, and evaluate humidity levels in the room. Use a moisture meter on walls and baseboards to determine if wood, drywall, or plaster has absorbed water. If you identify ongoing moisture, resolve that issue first: repair leaks, improve ventilation, and reduce humidity with dehumidification. Without controlling moisture, any repair to molding will likely fail or lead to new mold growth. The Mold Removal Lab team emphasizes documenting findings and prioritizing fixes based on risk.
Additionally, look for condensation on cold surfaces and hidden humid pockets behind cabinetry. In bathrooms and laundry rooms, exhaust fans should vent to the exterior, not into the attic or wall cavities. After moisture controls are in place, you can proceed to fix or replace the molding with materials that resist mold and are compatible with your wall type.
A practical note: if mold has penetrated porous materials like drywall or insulation, you may need to remove and replace those sections rather than just cleaning. This ensures a thorough remediation rather than a superficial bandage.
Pro tip: take photos before you start to document the original condition and track changes as you work. You’ll need them for future reference or insurance claims.
questionToAdd":null}],
bodyBlocksWeNeedToKeepAlignmentCheck2
Materials and tools for fixing molding
Selecting the right materials is essential for a durable, mold-resistant fix. You’ll typically need: mold-resistant primer, acrylic or silicone caulk, caulking gun, putty knife, utility knife, painter’s tape, protective gloves, safety goggles, and a damp rag for cleanup. If the affected area is large or contains damaged drywall, you may require replacement studs or backing material and joint compound. For sealing joints against moisture, choose a high-quality, mold-resistant sealant designed for bathrooms or basements.
Before you start, lay out all items, protect nearby surfaces with plastic sheeting or drop cloths, and ensure you have adequate lighting and ventilation. A dehumidifier or fan helps keep the work area dry, reducing the chance of mold spores becoming airborne. Remember to follow the product instructions for curing times and recommended temperatures.
Tip: keep a dedicated trash bag for contaminated materials, and dispose of moldy debris according to local guidelines. Proper disposal reduces the chance of cross-contamination in other areas of the home.
noteFields":null}],
bodyBlocksWeNeedToKeepAlignmentCheck3
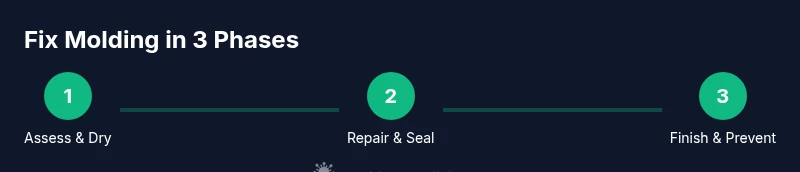
Step-by-step overview to fix molding (phased approach)
This high-level sequence provides a roadmap for a solid fix, integrating moisture control and material repair. Each phase reduces the risk of mold recurrence while maintaining the wall’s structural integrity.
- Prepare and protect: Isolate the work area, remove loose material, and drape protective coverings.
- Treat and clean: Clean the surface with a mold-inhibiting solution, then dry completely.
- Repair: Fill gaps with appropriate filler or epoxy, then seal joints with a mold-resistant caulk.
- Seal and finish: Apply primer and paint or stain with mold-resistant products; ensure proper ventilation during curing.
- Drying and cure: Allow sufficient drying time before exposing the area to moisture again.
These steps should be adapted to your space; some fixings may require more extensive removal, especially if structural damage is present. The important principle is to maintain dryness, seal joints, and prevent moisture buildup.
A practical note from Mold Removal Lab: plan for drying windows and use low-humidity settings to accelerate curing without compromising adhesion.
noteFields":null}],
bodyBlocksWeNeedToKeepAlignmentCheck4
Cleaning, sealing, and finishing the fix
After repairs are in place, thoroughly clean surfaces to remove residual mold spores and dust. Use a vacuum with a HEPA filter for the area, followed by a damp wipe with a mold-safe cleaner. Once dry, apply a mold-resistant primer to ensure good paint adhesion and a more durable finish. If you’re painting wood molding, consider a topcoat labeled for moisture-prone environments.
Crucially, ensure all joints are fully sealed with a breathable but moisture-resistant caulk or sealant. Avoid suboptimal products that shrink or crack over time, as gaps can reintroduce moisture and mold risk. Allow the finish to cure fully before reintroducing moisture in the room.
For porous molding materials, replacing severely damaged sections may be more effective than attempting to repair, since deep-seated mold can persist inside fibers. When in doubt, test patches and follow manufacturer guidelines.
In all cases, document the finish and keep the area dry; ongoing dryness is the best defense against mold returning.
noteFields":null}],
bodyBlocksWeNeedToKeepAlignmentCheck5
Prevention strategies after fixing molding
Prevention is the best strategy for mold-free walls. Improve ventilation and air circulation in damp rooms, especially bathrooms and laundry areas. Run exhaust fans during and after showers for a recommended period, and keep humidity levels below 50-60% wherever possible. Regularly inspect joints, caulking, and painted surfaces for cracks. Reapply sealant every few years or when you notice gaps, cracks, or peeling paint.
Establish a routine for moisture management: fix leaks promptly, use a dehumidifier in high-humidity spaces, and address root causes such as poor insulation or roof leaks. Consider a moisture barrier behind basements and crawl spaces to reduce humidity infiltration.
Regular maintenance keeps you ahead of mold growth. The Mold Removal Lab team stresses documenting changes, scheduling seasonal checks, and replacing aging materials before mold/rot spreads.
Bonus: keep mold-friendly cleaning products away from living spaces and test cleaners on a small area before full application to avoid reaction with finishes.
noteFields":null}],
bodyBlocksWeNeedToKeepAlignmentCheck6
Safety considerations and when to call a professional
Mold remediation can involve exposure risks, particularly if mold growth is extensive or hidden behind walls. Wear protective gear: gloves, eye protection, and a respirator rated for mold when working in affected areas. If you see widespread staining, musty odors after remediation, or suspect structural damage, stop and call a licensed professional. Certain conditions, such as potential asbestos in older homes, require specialized handling that is beyond DIY. Always verify local regulations and professional licensing requirements.
In summary, fix molding is manageable for many homeowners when moisture is under control and the right materials are used. For larger jobs or uncertainty about safety, a professional assessment ensures you protect your health and home. Mold Removal Lab’s verdict is to approach fixes conservatively and prioritize safety and moisture management above all.
noteFields":null}],
bodyBlocksWeNeedToKeepAlignmentCheck7
Final thoughts: keep learning and refining your approach
Fixing molding is a concrete step toward healthier living spaces, but it’s part of an ongoing process of moisture control and preventive maintenance. Use the lessons learned here to plan future projects, from bathroom upgrades to basement repairs. Track humidity, monitor for signs of mold, and revisit sealants and finishes periodically. With careful work and consistent upkeep, you can minimize mold risks and preserve a safer, more comfortable home for years to come.
noteFields":null}],
toolsMaterials
Tools & Materials
- Safety gear (gloves, goggles, mask)(Protect yourself from mold spores during inspection and repair.)
- Putty knife or scraper(Remove loose material and prepare the surface for filler.)
- Utility knife(Trim edging and cut backing material as needed.)
- Caulking gun(Apply mold-resistant caulk to seal joints.)
- Acrylic or silicone caulk (mold-resistant)(Choose for bathrooms and damp areas.)
- Mold-resistant primer and paint(For durable finish and better adhesion.)
- Painter’s tape and protective drop cloths(Protect surrounding surfaces and create clean lines.)
- Damp rag and mild cleaner(Clean surfaces before sealing.)
- Dehumidifier or portable fan(Promotes faster drying in moist spaces.)
- Replacement molding or wood backing (if damaged)(Only if mold-damaged sections are structurally compromised.)
Steps
Estimated time: 3-4 hours
- 1
Prepare the work area
Isolate the space, remove furniture if possible, and cover nearby surfaces with drop cloths. Put on protective gear and ensure proper ventilation. This stage reduces contamination risk and keeps your project organized.
Tip: Use painter’s tape to create clean paint lines and avoid splatters on adjacent walls. - 2
Assess and dry the surface
Check for moisture sources and use a moisture meter if available. Dry the area thoroughly, using a dehumidifier or fan to reach low humidity before proceeding with repair.
Tip: Aim for surfaces that feel dry to the touch and show no visible dampness. - 3
Remove damaged sections
Carefully remove moldy or rotten molding material. If drywall behind molding is damaged, cut away just the affected area to minimize disruption.
Tip: Do not yank; work slowly to avoid further damage to framing. - 4
Repair and seal
Fill gaps with a compatible filler, then apply mold-resistant caulk to seal joints. Allow filler to cure as per product instructions before sealing.
Tip: Use a filler compatible with moisture-prone environments to prevent cracking. - 5
Prime and finish
Apply a mold-resistant primer, then paint or stain the molding with moisture-rated finishes. Ensure even coats and proper drying time between layers.
Tip: Ventilate well during curing to minimize odors and accelerate drying. - 6
Final inspection and cleanup
Inspect all joints for gaps, test for dryness, and clean up the work area. Store materials properly and document results for future reference.
Tip: Take photos of the completed work for your records.
FAQ
What causes molding around baseboards and window frames?
Common causes include persistent moisture from leaks, high humidity, condensation, and poor ventilation. Identifying the source is the first step in a successful fix.
Moisture and poor airflow cause most molding issues; fix the source before repairing the moldy material.
Can I fix molding myself, or should I hire a pro?
For small, clearly dry areas, a DIY approach with proper safety can work. If mold covers large areas, is hidden behind walls, or if asbestos is a concern, hire a licensed professional.
DIY is possible for small spots, but larger or risky jobs should use a pro.
What materials are best for fixing molding in damp areas?
Choose mold-resistant caulk, mold-resistant primer, and moisture-rated paint or finishes. Use fillers compatible with wood or drywall and select materials designed for bathrooms or basements.
Use mold-resistant caulk and paints to seal and finish molded surfaces.
How long does it take to dry after completing a fix?
Drying time depends on ventilation and humidity. Plan for several hours to a full day of curing before exposing the area to moisture again.
Give it several hours to a full day to dry, depending on humidity.
Should I replace molding if mold has penetrated deeply?
If mold has penetrated beyond the surface or damaged underlying materials, replacing the molding and affected backing is often the most reliable option.
Deep mold usually means replacement is the safer path.
What safety steps are essential for DIY mold work?
Wear protective gear, work in a ventilated area, and stop if you smell strong fumes or feel unwell. If you have allergies or respiratory issues, consult a professional.
Use protection and ventilate, and stop if you feel unwell.
Can I use bleach to kill mold on all surfaces?
Bleach is not effective on porous materials and can cause skin or respiratory irritation. Use appropriate mold cleaners and sealants instead.
Bleach isn’t ideal for porous surfaces; use proper mold cleaners.
Is it safe to do mold work in an occupied home?
Yes, with precautions: isolate the work area, use containment, and avoid spreading spores to living spaces. Consider temporary relocation if exposure risk is high.
Contain the area and take precautions to protect occupants.
Watch Video
The Essentials
- Fix molding by addressing moisture and repairing damaged material
- Use mold-resistant products for long-lasting results
- Ventilate, dry thoroughly, then seal joints properly
- Replace severely damaged sections when necessary
- Prevent mold recurrence with moisture control and routine checks