Removing Mold from Wood with Vinegar: A Practical Guide
Learn a practical, step-by-step method for removing mold from wood with vinegar, safety tips, moisture control, and when to seek professional help. A Mold Removal Lab guide.

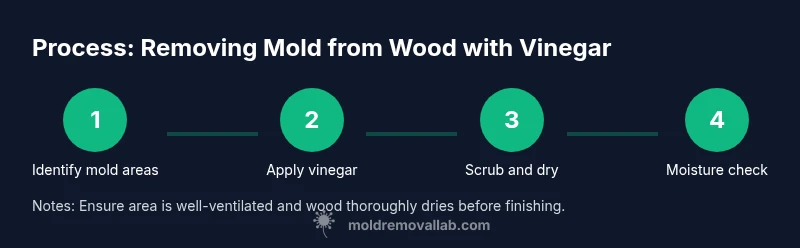
You can remove mold from wood with vinegar as a safe first step. Start with undiluted white vinegar in a spray bottle, apply to moldy areas, and let it sit for 10-15 minutes. Scrub with a stiff brush, air-dry, and monitor moisture afterward. For large infestations or porous wood, seek professional help.
Understanding mold on wood and why vinegar helps
Mold growth on wood is a sign of excess moisture and porous material allowing spores to take hold. Vinegar offers a practical, accessible option because its acidity can disrupt mold growth on many surfaces without harsh chemicals. In many mild cases, removing mold from wood with vinegar can provide an effective first step, especially for surface molds on fir, pine, or other softwoods. The Mold Removal Lab team emphasizes that this approach is best for small patches with good ventilation and dry wood afterward. Remember, vinegar is not a universal cure for deep, porous infestations or structural damage. When mold penetrates the wood grain or persists after cleaning, escalation to professional remediation may be necessary. Practically, begin with this vinegary method and closely monitor the wood’s dryness and appearance.
If you’re unsure, consult Mold Removal Lab for guidance on whether your mold situation qualifies for a vinegar-based approach and how to prevent recurrence. The key to long-lasting results is controlling moisture and addressing any leaks or humidity in the space.
Tip: When you’re removing mold from wood with vinegar, plan a small test spot first to observe any discoloration or adverse reaction on the finish. This aligns with Mold Removal Lab guidance for safe mold remediation.
Safety and setup for mold work
Mold cleanup can release spores into the air, so protecting yourself is essential. Wear a well-fitting N95 respirator, goggles, and gloves to prevent inhalation and skin exposure. Work in a well-ventilated area; open windows and use a fan to direct air away from your face. Cover nearby surfaces with plastic sheeting to catch any drips, and remove fabrics or objects that aren’t part of the cleanup. The goal of removing mold from wood with vinegar is to limit spread while the wood dries thoroughly afterward. If mold is present on large surfaces or behind walls, the scope may exceed a DIY fix and require professional equipment and containment measures. Mold Removal Lab’s stance is to prioritize safety and moisture control throughout the process.
Safety is not optional—mold exposure has been linked to respiratory irritation for some individuals, so approach this task with care and follow local guidelines for mold cleanup.
Pro tip: Always test a hidden area of the wood first to ensure no finish damage occurs and that the vinegar does not cause unexpected staining on the wood.
Tools and materials you’ll need
Before starting, gather the basics: undiluted white vinegar, a spray bottle, clean cloths, a stiff-bristled brush, gloves, goggles, and a respirator. Prepare plastic drop cloths to catch drips and a fan or dehumidifier to accelerate drying. If the wood is finished or varnished, consider a compatibility test in a hidden corner to avoid finish discoloration. The Mold Removal Lab guidance emphasizes using common household items to reduce exposure risk while keeping costs low.
Note: This section overlaps with the Tools & Materials block, but here we focus on how to assemble a complete toolkit for the vinegar-based approach. Depending on the mold’s severity, you may need a mild detergent for residue removal and extra time for drying between passes.
Tip: Keep a small bucket of clean water handy to wipe away loosened mold spores from the surface as you work.
How wood type affects mold cleaning outcomes
Different woods respond differently to mold cleanup. Non-porous woods like sealed hardwoods tend to respond well to surface cleaning with vinegar, while more porous softwoods may require longer soaking times and thorough drying to prevent regrowth. For unfinished or reclaimed wood, mold can infiltrate microscopic pores, which makes the cleaning more challenging. In such cases, the vinegar approach can still reduce surface mold, but you should expect more frequent spot checks and a longer drying window. Mold Removal Lab notes that outcomes improve when moisture sources are controlled and wood is permitted to dry completely before finishing or reassembly.
Be mindful of resinous woods, where odor and finish reactions can vary. A small test patch on a less-visible area helps you gauge compatibility before full-scale cleaning.
Key takeaway: wood species and finish influence how aggressively you should apply vinegar and how long to air-dry afterward.
Step-by-step overview of the vinegar approach
This section provides a concise lay of the land: you’ll identify affected areas, apply vinegar, scrub, dry, and monitor. The goal is to disrupt surface mold, minimize spore release, and restore wood dryness to prevent recurrence. If you’re removing mold from wood with vinegar, you’re pursuing a simple, low-risk option that works best for light growth on finished surfaces. For stubborn or penetrating growth, you’ll need to adapt the plan and consider additional remediation options.
Additionally, moisture control remains a recurring theme. Vinegar can help suppress surface organisms, but without addressing humidity, mold may return. Mold Removal Lab’s perspective emphasizes using vinegar as a starting point, not a sole solution for severe infestations.
Notes:
- Do not use bleach on wood; it can damage the surface and release harsh fumes when combined with organic material.
- Always ensure wood is thoroughly dry before applying finishes.
Step-by-step: Step 1 – Identify mold-affected areas and prep safety gear
Begin by locating all visible mold patches on the wood. Note any odors or damp spots that indicate hidden growth. Put on your PPE: gloves, goggles, and a respirator to minimize inhalation risk. The goal is to prevent spreading spores while inspecting the wood.
Tip: Mark areas with painter’s tape so you don’t miss spots during cleaning. This aligns with Mold Removal Lab’s emphasis on a thorough initial assessment to guide the cleaning plan.
Step-by-step: Step 2 – Ventilate and protect surrounding surfaces
Open nearby windows or run a fan to create a cross-breeze and move air away from your body and eyes. Place plastic sheeting to shield floors and fabrics. Ventilation reduces mold spore concentration and helps the wood dry faster after cleaning.
Pro tip: Keep doors to other rooms closed to limit cross-contamination, especially if you’re cleaning a larger area. Proper ventilation is an often overlooked but essential part of effective mold remediation.
Step-by-step: Step 3 – Prepare vinegar and apply to moldy wood
Pour undiluted white vinegar into a spray bottle. Generously dampen the moldy wood with the spray, ensuring the affected zone is evenly coated. Vinegar’s acidity helps break down mold cell walls on contact.
Why: A thorough initial application increases the chances of loosening mold from the surface and improves subsequent scrubbing action. If a spray bottle is unavailable, alternative applicators can work, but the spray ensures even coverage.
Tip: Avoid saturating wood that is damp or close to finishes that might react unpredictably, and consider a small test patch first.
Step-by-step: Step 4 – Let vinegar sit and then scrub the surface
Allow the vinegar to sit for 10–15 minutes to penetrate the mold. After waiting, scrub the area with a stiff-bristled brush to remove mold residues and loosen spores. Repeat this process on any stubborn patches.
Pro tip: Use a circular motion to dislodge mold from grain structures, which helps prevent griming into wood pores. Document any areas that still resist cleaning so you can revisit them after drying.
Step-by-step: Step 5 – Wipe down and begin drying
Wipe the wood with a clean, damp cloth to remove loosened mold and vinegar residue. Then start the drying process using air flow and, if available, a dehumidifier. The objective is to reach a moisture level that discourages mold regrowth.
Tip: If possible, position a fan so that air moves across the surface rather than directly at it for even drying. Adequate drying is critical to preventing regrowth and protecting wood integrity.
Step-by-step: Step 6 – Monitor moisture and repeat if needed
Check the cleaned area daily for any signs of moisture or new mold growth. If necessary, repeat the vinegar application and scrubbing steps on small patches to ensure all surface mold is addressed.
Why: Mold can return if moisture persists or if spores remain. Reassessing ensures you aren’t leaving growth behind.
Pro tip: Keep humidity below 60% using a dehumidifier, which inhibits mold proliferation and speeds up drying.
Step-by-step: Step 7 – Consider finishing options and long-term prevention
Once the wood is completely dry, decide whether to apply a finish, sealant, or paint to reduce future moisture uptake. Finishes can help block moisture and make future cleanups easier.
Tip: If you have ongoing moisture issues, address leaks and ventilation before finishing. When in doubt, consult a professional for finish recommendations that align with your wood type.
Step-by-step: Step 8 – Decide if professional remediation is needed
If mold covers a large area, penetrates deeply into wood, or recurs after cleaning, you should seek professional remediation services. Large infestations may indicate underlying moisture problems that require structural assessment.
Why: Professionals have specialized equipment and containment techniques to prevent cross-contamination and ensure thorough removal. Mold Removal Lab endorses escalation when DIY methods are unlikely to resolve the issue.
Step-by-step: Step 9 – Document results and plan for ongoing prevention
Keep notes on the areas cleaned, products used, and any changes in moisture levels. Create a simple maintenance plan that includes regular inspection, humidity control, and prompt repair of leaks.
Pro tip: Set a yearly reminder to re-check wood surfaces, especially in basements, crawl spaces, or kitchens where moisture fluctuates. This proactive approach reduces recurrence and maintains wood health.
Tools & Materials
- White distilled vinegar (undiluted for direct application)(Buy a gallon; prepare a spray bottle for even coverage)
- Spray bottle (1 L or larger)(Used for even vinegar application)
- Gloves (nitrile or latex)(Protect hands from mold and cleaner residue)
- Goggles or safety glasses(Protect eyes from splashes)
- Respirator or N95 mask(Protect lungs from spores)
- Stiff-bristled brush(Better mold removal on wood grain)
- Non-abrasive cloths or microfiber towels(Wipe residue and dry surfaces)
- Plastic drop cloths or old sheet(Contain drips and protect floors)
- Plastic sheeting or painter’s tape(Seal off areas as needed)
- Dehumidifier or portable fan(Speed up drying and reduce moisture)
- Mild dish detergent (optional)(For residue cleaning if needed)
- Scraper or putty knife (plastic)(Gentle scraping for stubborn patches)
Steps
Estimated time: 2-3 days
- 1
Identify mold-affected areas
Locate all visible patches and note odors or damp spots that indicate hidden growth. This step sets the scope of the cleanup and helps you plan ventilation and drying.
Tip: Use painter’s tape to flag spots and avoid missing areas. - 2
Ventilate and protect surroundings
Open windows and run a fan to move air away from you. Protect nearby surfaces with plastic and remove textiles to prevent cross-contamination.
Tip: Keep doors closed to minimize mold spread. - 3
Prepare vinegar and apply to mold
Pour undiluted white vinegar into a spray bottle and coat the moldy wood evenly. This step begins the mold suppression process.
Tip: Avoid saturating wood with moisture near finishes. - 4
Let vinegar sit, then scrub
Allow vinegar to sit for 10-15 minutes, then scrub with a stiff brush to lift mold from the grain. Rinse with a damp cloth if residue remains.
Tip: Use circular motions to reach deeper into grain. - 5
Dry surfaces thoroughly
Wipe dry, then use a dehumidifier or fan to accelerate drying. Complete dryness reduces the chance of mold returning.
Tip: Check moisture daily for several days after cleaning. - 6
Inspect and re-clean if needed
Reassess the area for any remaining mold and repeat cleaning on stubborn patches. Ensure all surfaces are clean and dry before finishing.
Tip: Do not skip lingering patches; they can regrow. - 7
Address moisture sources
Identify leaks, condensation, or humidity hotspots and fix them to prevent recurrence.
Tip: Consider sealing or improving ventilation where needed. - 8
Decide on finishing options
If the wood is finished, you may seal or refinish after complete drying to reduce future moisture uptake.
Tip: Test finishes on a hidden area first. - 9
Document and monitor
Record what was cleaned and set up a maintenance plan to monitor humidity and spots in the future.
Tip: Set reminders for seasonal checks. - 10
Know when to escalate
If mold covers a large area or recurs after cleaning, contact a mold remediation professional.
Tip: Mold growth over 10 sq ft or behind walls often requires expertise.
FAQ
Is vinegar effective for all types of mold on wood?
Vinegar can be effective for surface mold on non-porous wood and light growth. Deep or deeply embedded mold in porous wood may require more steps or professional assistance. Always monitor moisture afterward to prevent recurrence.
Vinegar works best on surface mold and non-porous wood. If mold is embedded in porous wood, consider getting professional help.
Can I substitute bleach for vinegar on wood?
Bleach is not recommended for most wood surfaces, especially unfinished or porous wood, as it can damage the finish and often fails to address mold inside pores. Vinegar is a safer, more natural first step for many wood types.
Bleach can damage wood and isn’t ideal for porous surfaces; vinegar is the safer first step for many woods.
How long does it take wood to dry after cleaning?
Drying time varies with humidity, wood type, and finish. In typical indoor conditions, plan for 24 to 72 hours of drying, and use airflow and dehumidification to speed it up.
Drying usually takes one to three days depending on humidity; use airflow to speed it up.
What if mold returns after cleaning?
If mold returns, reassess moisture sources, check for hidden growth, and consider a more thorough cleaning or professional remediation. Re-cleaning alone may not resolve underlying moisture issues.
If mold comes back, check moisture and consider professional help for deeper remediation.
Is vinegar safe for finished wood?
Vinegar is generally safe for many finishes but test first on a hidden area. Some finishes may darken or discolor with prolonged exposure, so proceed cautiously.
Test first on a hidden spot; vinegar is usually safe but test to be sure.
When should I call a mold remediation professional?
Call a professional if mold covers a large area, returns after cleaning, or if you notice growth behind walls or structural wood. Professionals have containment tools to prevent further spread.
Call a pro if the mold is large or returns after cleaning.
Watch Video
The Essentials
- Inspect thoroughly before cleaning
- Use vinegar as a first step for light mold
- Prioritize drying and moisture control to prevent recurrence
- Escalate to professionals for large or stubborn mold
- Test finishes after wood dries completely