Remove Mold Ceiling: Step-by-Step Guide
Learn to safely remove mold from ceilings with practical steps: inspection, containment, cleaning, drying, and prevention. Trusted guidance from Mold Removal Lab.

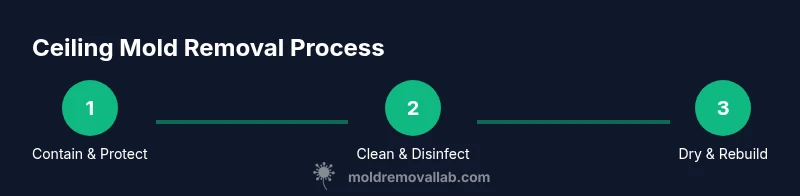
You will learn how to safely remove mold from ceilings and restore a healthy living space. This guide covers containment, cleaning, drying, and moisture control, plus when to call a pro. You’ll need PPE, plastic containment, cleaning solutions, a ladder, and tools to repair or replace damaged ceiling sections. It emphasizes safety, proper drying, and assessing underlying leaks.
Understanding Ceiling Mold and Why It Happens
Ceiling mold is more than a cosmetic blemish; it signals a moisture problem that should be addressed at the source. Mold growth on ceilings can start in high-humidity rooms like kitchens or bathrooms, or near leaks from roofs, plumbing, or condensation-rich areas. The Mold Removal Lab team emphasizes that mold on ceilings often results from ongoing moisture rather than a one-time spill, and simply scrubbing won’t prevent recurrence. According to Mold Removal Lab, ceiling mold is typically driven by moisture that stays present long enough to support fungal growth, then spread via airflow and surface contact. Recognizing early signs—discoloration under paint, a musty odor, bubbling paint, or soft spots in drywall—helps homeowners plan effective remediation. The goal is not just to remove visible mold but to halt moisture and improve ventilation to avoid future outbreaks. If structural materials are compromised or if mold is extensive, professional guidance should be sought to prevent exposure and damage.
Understanding the science behind ceiling mold helps homeowners connect symptoms to a moisture problem. The Mold Removal Lab Team notes that addressing hidden sources is essential for lasting results. The phrase remove mold ceiling is a reminder that the cure must reach the root cause, not just the surface.
This section lays the groundwork for safe remediation and highlights how quickly mold can rebound if moisture remains unchecked.
Tools & Materials
- N95 respirator or higher(Fit-tested if possible; avoid loose-fitting masks for mold exposure)
- Safety goggles(Protect eyes from splashes and dust)
- Disposable gloves(Nitrile recommended; consider disposable coveralls for larger jobs)
- Plastic sheeting (6 mil) and painter's tape(Create a containment zone to prevent spore spread)
- Drop cloths(Place under work area to protect floors)
- HEPA vacuum(For cleanup and debris collection; avoid standard vacuums)
- Soft-bristled brush and microfiber cloths(Gentle scrubbing to minimize surface damage)
- Detergent solution or EPA-registered cleaner(Mild detergent and water is often sufficient; avoid abrasive cleaners)
- Hydrogen peroxide 3% or white vinegar(Use cautiously; avoid mixing with bleach)
- Spray bottle(For even application of cleaners)
- Putty knife or scraper(Needed if removing loose, damaged material)
- Drying equipment (dehumidifier and fans)(Critical to prevent regrowth after cleaning)
- Paint, primer, and mold-resistant sealant(Apply after drying to seal the surface)
- Ladder or stable platform(Ensure safe access to the ceiling)
- Moisture meter (optional)(Helpful to confirm dryness before repaint)
Steps
Estimated time: 3-6 hours
- 1
Set up containment and safety gear
Move people and pets out of the room, close doors, and cover nearby furniture with plastic. Put on an N95 respirator, goggles, and gloves before touching any surface. This step reduces exposure to spores and protects indoor air quality.
Tip: Double-check that power sources near the ceiling are off if you’ll use water-based cleaners. - 2
Identify and stop the moisture source
Inspect for roof leaks, plumbing drips, or high humidity causing condensation. Fix the source if possible before thorough cleaning to prevent re-contamination. If the source is hidden, document it so a professional can assess later.
Tip: Temporary moisture control (dehumidifier on high) can help while you work on the source. - 3
Create a clean work zone
Seal off the area with plastic sheeting, tape seams, and vent it minimally to avoid spreading spores to adjacent rooms. Use a HEPA vacuum to clean up any dust from nearby surfaces before you start cleaning the ceiling.
Tip: Keep a damp rag ready to wipe surfaces as you go to reduce airborne dust. - 4
Remove loose material if necessary
If the ceiling material is swollen, soft, or crumbling, gently remove the damaged sections with a putty knife or scraper. Do not force intact plaster to crumble; remove only compromised portions and bag them for disposal.
Tip: Bag and seal debris in a labeled plastic bag to prevent cross-contamination. - 5
Clean and disinfect affected surfaces
Wipe non-porous areas with a detergent solution, then apply hydrogen peroxide or vinegar to kill residual mold. For porous ceilings, use a light scrub with a microfiber cloth instead of aggressive abrasion to avoid further damage.
Tip: Always apply cleaners from top to bottom to catch drips. - 6
Rinse and dry thoroughly
Rinse surfaces with clean water if using cleaners, then dry immediately with towels and air movers. Use a dehumidifier to maintain low humidity and speed drying; aim to reach a stable moisture level before repaint.
Tip: Do not leave damp areas overnight; mold growth accelerates in moist air. - 7
Repair and patch as needed
Replace damaged drywall or ceiling panels if necessary. Use patching compounds and sand smooth once dry. Ensure the repaired area is completely dry before continuing.
Tip: Test patches with a moisture meter to confirm dryness prior to painting. - 8
Prime, seal, and repaint
Apply a mold-resistant primer, then a ceiling paint with mold inhibitors. A light coat after drying helps seal the surface before applying final finish.
Tip: Choose low-VOC paints for better indoor air quality. - 9
Verify dryness and monitor for recurrence
Reassess humidity and moisture control after cleaning. Use a moisture meter if available and schedule periodic checks to ensure no new mold appears.
Tip: Document conditions with photos for future reference.
FAQ
Can ceiling mold be dangerous to health?
Yes. Mold can trigger allergic reactions, asthma symptoms, and respiratory irritation, especially for sensitive individuals. Ventilation and protective gear reduce risk during cleanup, but large or pervasive growth may require professional assessment.
Yes. Ceiling mold can affect health, particularly for sensitive people. Improve ventilation and wear protective gear; seek professional help for extensive growth.
Should I use bleach to remove mold from ceilings?
Bleach is not always effective on porous ceiling materials and can create toxic fumes in enclosed spaces. Use detergent, hydrogen peroxide, or vinegar for porous surfaces, and save bleach for non-porous materials if necessary.
Bleach isn’t always effective and can be dangerous in enclosed spaces. Use gentler cleaners for ceilings and only use bleach on non-porous areas if needed.
Do I need to test for mold before cleaning?
Testing can confirm mold presence and help identify the type for specific cleaners, but it isn’t always required for small, surface-level growth. If you suspect hidden growth or health concerns, testing and a professional assessment are wise.
Testing isn’t always required for small patches, but it can guide cleaners and confirm there’s no hidden growth. Consider testing if you’re unsure.
Can I remove mold ceiling myself or should I hire a pro?
Small, surface mold with intact structural materials may be manageable for a careful DIY cleanup. Extensive growth, hidden moisture, or structural damage warrants a licensed professional.
You can handle small, surface mold if you’re careful, but call a pro for larger problems or if structural damage is suspected.
How long does it take to dry after cleaning?
Drying time depends on humidity, ventilation, and surface material. In many cases, drying can take 24 to 72 hours with proper dehumidification and airflow.
Drying typically takes about a day or two with good airflow and dehumidification.
What signs indicate underlying water damage?
Look for persistent damp spots, staining, peeling paint, warping, or a musty odor. These signs suggest ongoing moisture problems that need fixing beyond surface cleaning.
If you see damp spots, peeling paint, or a musty smell, there may be hidden water damage requiring further investigation.
The Essentials
- Identify moisture sources before cleaning to prevent recurrence.
- Use proper PPE and containment to protect air quality.
- Dry and ventilate thoroughly after cleaning to discourage regrowth.
- Repair damaged materials and seal surfaces with mold-resistant finishes.
- Consult a professional if mold covers large areas or structural components.