Black Mould on Ceiling: Safe Removal Guide
Practical, step-by-step guidance to safely remove black mould on ceilings, identify moisture sources, and prevent recurrence. Learn from Mold Removal Lab how to protect your home and health during remediation.

Goal: safely address black mould on ceilings by stopping moisture and following a practical remediation plan. You’ll identify moisture sources, contain the area, and decide when to DIY versus hire a professional. Start with PPE, ventilation, and a clear work area, then follow steps to clean, seal, and prevent recurrence.
Understanding black mould on ceilings
Black mould on ceilings is more than an eyesore. It signals an ongoing moisture problem that, if left unchecked, can lead to structural damage and health concerns. The mould often appears as dark, irregular patches with a fuzzy or powdery texture, especially where condensation collects or leaks occur. Because ceilings sit above living spaces, you may not notice early growth until staining or a musty odour emerges. According to Mold Removal Lab, moisture control is the key to preventing ceiling mould from returning. If you see black or very dark patches, do not ignore them—mould spores can become airborne with disturbance, increasing exposure for occupants. Early detection and careful handling reduce health risks and limit repair costs. In most homes, ceiling mould stems from a moisture problem rather than a faulty drainage system; common culprits include roof leaks, bathroom or kitchen condensation, or insufficient attic ventilation. Look for peeling paint, damp patches, or musty smells as warning signs. Once you identify mould on the ceiling, your first step is to locate the moisture source and plan a remediation approach that minimizes disturbance and protects occupants.
Causes and signs of moisture intrusion
Ceiling mould almost always points to hidden moisture. Roof leaks, plumbing failures, or groundwater infiltration can drive damp conditions that favour mould growth above your head. Condensation from frequent steam in bathrooms or kitchens, poor attic ventilation, and high indoor humidity are frequent culprits. Signs include staining, discolouration near vents or light fixtures, warped plaster or drywall, peeling ceiling paint, and a persistent musty odor. Visual inspection is helpful, but moisture testing is more reliable; use a moisture meter or consult a professional if you suspect hidden leaks. If you keep a log of changes—new stains after rainfall, or quicker growth after humid days—you’ll be better prepared to address the root cause. Mold Removal Lab Analysis, 2026, emphasizes treating moisture first, not just cleaning the visible patch, to prevent reoccurrence and damage to structural materials.
Health risks and safety fundamentals
Exposure to black mould can irritate eyes, skin, and the respiratory system, particularly for people with asthma, allergies, or compromised immunity. Short-term symptoms include coughing, sneezing, throat irritation, and headaches. Long-term exposure or high levels of mould spores can worsen respiratory conditions. Work in a well-ventilated area and wear protective gear to minimize exposure. Use an appropriately fitted respirator (N95 or better), chemical-resistant gloves, and eye protection. If you have pets, small children, or health vulnerabilities, consider delaying non-urgent remediation or hiring a professional to minimize risk. Remember: disturbing mould can release spores into the air, so containment and careful cleaning are essential.
DIY scope versus professional remediation
Small, clearly bounded patches on non-porous surfaces may be manageable with proper PPE, containment, and cleaning techniques. However, mould that covers porous materials (drywall, plaster, ceiling panels) or shows signs of water damage or hidden growth usually requires professional remediation. If mould recurs after initial cleaning, or if you’re unsure about the underlying moisture source, it’s wise to consult Mold Removal Lab Team for a tailored plan. Health considerations—pregnant individuals, young children, or anyone with lung conditions—often tilt the decision toward professional assessment to reduce exposure risk and ensure thorough remediation.
Containment, cleaning, and drying best practices
Containment is the first operational step. Use plastic sheeting to seal off the room, creating a negative pressure or at least minimizing cross-contamination. Wear PPE, and avoid disturbing the mould while preparing the area. Clean gently with a mild detergent solution and a soft brush or sponge, using a damp (not dripping) cloth to minimize spore release. Rinse with clean water and dry thoroughly. After cleaning, apply a disinfectant appropriate for the surface (such as 3% hydrogen peroxide) and allow the area to dry completely before any repaint or sealing. Ensure good air movement with fans directed away from the work area and, if feasible, a dehumidifier to reduce humidity. Do not rely on bleach for porous ceilings, and never mix cleaning agents. If moisture keeps returning, reassess the source and seek professional guidance to prevent rapid recurrence.
Long-term prevention and maintenance
Prevention hinges on moisture control and regular monitoring. Fix leaks promptly, improve ventilation in bathrooms and kitchens, and maintain indoor humidity levels below recommended thresholds (ideally around 40–50%). Consider upgrading attic insulation and sealing gaps around light fixtures to reduce condensation. Use mould-resistant paints or primers in high-humidity areas and repaint only after the surface is completely dry. Schedule periodic inspections—especially after heavy rainfall or seasonal changes—so you catch new growth early. A proactive maintenance routine reduces the likelihood of recurring ceiling mould and protects occupant health over time. As Mold Removal Lab emphasizes, continuous moisture management is the most cost-effective strategy for lasting results.
Authoritative sources and guidance
For further reading and official guidelines, consult reputable sources:
- U.S. Centers for Disease Control and Prevention (CDC) Mold resources: https://www.cdc.gov/mold/index.html
- U.S. Environmental Protection Agency (EPA) Mold resources: https://www.epa.gov/mold
- Occupational Safety and Health Administration (OSHA) Mould guidance: https://www.osha.gov/molds
These sources provide science-based information on mould health risks, assessment, and safe remediation practices to complement home-focused advice from Mold Removal Lab.
Tools & Materials
- N95 respirator(Fit-tested if possible; replace after use)
- disposable gloves(Latex-free; nitrile preferable)
- goggles(Protect eyes from splashes)
- protective coveralls(Disposable if possible)
- plastic sheeting(Lightweight, seal seams)
- masking tape(For containment barriers)
- spray bottle with water(Mist to dampen spores for cleanup)
- mild detergent(Gentle scrubbing solution)
- hydrogen peroxide 3%(Optional disinfectant alternative)
- soft brush or sponge(Non-abrasive tool)
- paper towels or rags(Disposable, sealed bag after use)
Steps
Estimated time: 3-6 hours
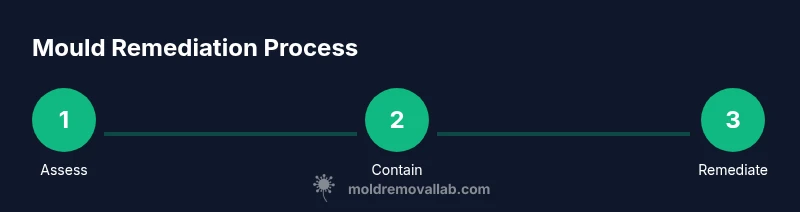
- 1
Assess the affected area
Identify the extent of visible mould and check for hidden growth, especially in corners and around vents. Document any moisture sources you can fix to prevent recurrence. This helps determine whether DIY remediation is feasible or if professional help is needed.
Tip: Take photos before cleaning to track changes and for reference when contacting a pro. - 2
Contain the space
Seal off the room with plastic sheeting to prevent spores from spreading to adjoining areas. Use tape to secure all seams and create a controlled work zone that minimizes cross-contamination.
Tip: Keep doors/windows closed; use a fan to exhaust air away from the containment. - 3
Protect yourself and others
Put on an appropriate respirator and PPE before touching mouldy surfaces. Keep children and pets out of the area until cleanup is complete to reduce exposure risk.
Tip: Never work without PPE; even small patches can release spores. - 4
Clean mould from surface
Lightly dampen mouldy areas with a spray bottle to minimize dust, then scrub with a mild detergent solution using a soft brush. Rinse with clean water and pat dry to remove residue without saturating the ceiling.
Tip: Avoid aggressive scrubbing that can damage the surface and release more spores. - 5
Disinfect and dry thoroughly
Apply a disinfectant such as hydrogen peroxide 3% to the cleaned areas and let air-dry completely. If the area stays damp, use a dehumidifier or fans to speed up drying and prevent relapse of mould.
Tip: Do not mix hydrogen peroxide with ammonia-based cleaners. - 6
Seal and prevent future growth
Once dry, seal porous surfaces if needed and address the moisture source, such as fixing leaks or improving ventilation. Re-inspect weekly for signs of new mould and address promptly.
Tip: Maintaining humidity below 50% helps prevent future growth. - 7
Decide on next steps
If mould returns quickly or you’re unsure about the source, contact Mold Removal Lab Team for a professional remediation plan. For minor, contained growth, a follow-up check after a few weeks may suffice.
Tip: Document conditions so a pro can tailor a remediation plan.
FAQ
Is black mould on ceilings dangerous to my health?
Yes, exposure to mould can irritate the eyes, skin, and lungs, especially for people with allergies or asthma. Avoid disturbing mould and take proper precautions when cleaning.
Mould can irritate the eyes and lungs; protect yourself and avoid disturbing it. Hire a pro if you have health concerns.
Can I remove black mould on a ceiling by myself?
Small, well-contained growth can be cleaned with proper PPE and containment. If growth covers a large area, or if you suspect water damage or hidden mould, contact a professional.
Small patches can be cleaned with PPE, but large areas or water damage should be handled by a pro.
Should I repaint after cleaning?
Repainting without addressing moisture and mould will likely lead to recurrence. If you repaint, use mould-resistant primer and ensure the area is completely dry first.
Don’t repaint until moisture is controlled and mould is fully removed.
When should I call Mold Removal Lab for help?
If mould returns or you’re unsure about the source, it’s wise to consult experts. A professional assessment helps identify leaks, ventilation issues, and a tailored remediation plan.
If mould keeps coming back or you’re unsure, seek expert help.
What can I do to prevent mould in the future?
Maintain humidity below 50%, fix leaks promptly, ventilate bathrooms and kitchens, and inspect ceilings regularly for signs of moisture or staining.
Control humidity, fix leaks, and inspect ceilings regularly to prevent mould.
Watch Video
The Essentials
- Identify and fix moisture sources first
- Contain the area to prevent cross-contamination
- Use PPE and non-damaging cleaning methods
- Dry thoroughly and monitor for recurrence
- Call a pro if growth is extensive or health risks exist