Cleaning Mould Off Ceiling: Safe DIY Remediation Guide
Learn to safely remove mould from ceilings, prevent recurrence, and protect your home's health with practical steps, PPE, containment, and moisture control from Mold Removal Lab.

You will learn how to safely remove mould from ceilings, control moisture, and prevent recurrence. This guide covers safety gear, containment, effective cleaners, and step-by-step actions you can perform in a typical home. If mould covers a large area or shows water damage, consult a professional. Following these practices reduces spillover risk and keeps inhabitants safe.
Understanding mould on ceilings
Ceiling mould is a common problem in homes with higher humidity or water intrusion. Understanding how mould forms on ceilings helps you choose effective cleaning strategies without spreading spores. When you see dark spots or a musty odor, you may be dealing with active growth. Cleaning mould off ceiling safely requires attention to moisture sources and a containment plan. According to Mold Removal Lab, addressing moisture is the first and most important step, because moisture drives mould growth and recurrence. This guide explains practical methods that homeowners can use to tackle routine ceiling mould while minimizing health risks for occupants. It also covers signs that mould has penetrated beyond the surface and when to escalate remediation.
Health risks and signs of water damage
Mould growth in ceilings can indicate persistent moisture problems. Exposure to mould spores may irritate eyes, nose, and throat and can worsen allergies or asthma in sensitive individuals. Visible signs include staining, peeling paint, or bubbling plaster, often accompanying damp or musty odours. Water intrusion behind the ceiling is a common driver of growth, so identifying leaks or condensation is essential. If you notice ongoing dampness after cleaning, treat the moisture source first and reassess for residual mould.
Safety gear and containment
Before you begin, assemble PPE and containment. Nitrile gloves, protective eyewear, and a respirator rated for particulates offer basic protection. Use plastic sheeting to seal off the work area and prevent spores from spreading to adjacent rooms. Tape edges securely and keep doors closed. Proper containment reduces contamination risk and keeps other occupants safe during the cleaning process. If anyone in the home has respiratory issues, plan work when they can be away from the area.
Choosing cleaners: natural vs chemical
There are several safe options for ceiling mould cleanup. Mild dish soap in warm water can work for light growth, while hydrogen peroxide (3%) or white vinegar are popular natural alternatives for tougher spots. Do not mix cleaners, particularly ammonia and bleach, as toxic fumes can form. Test any cleaner on a small, inconspicuous area first to ensure it does not damage paint or drywall. The choice depends on surface material and mould severity. If mould persists after cleaning, consider stronger remediation steps.
Cleaning technique: non-bleach methods
Apply your cleaner to the mouldy area using a spray bottle and let it sit for a few minutes to break the mould bonds. Gently scrub with a soft brush or sponge to avoid damaging the ceiling surface. Rinse with clean water and blot dry with towels. Avoid saturating ceilings, which can worsen moisture problems. Work from the outer edge toward the center to minimize spreading mould spores. For textured ceilings, use a softer brush and lighter pressure to preserve texture while cleaning.
Rinsing and drying: finishing steps
Rinse the area with clean water to remove cleaner residues, then blot thoroughly to remove moisture. Use a fan or dehumidifier to accelerate drying, especially in humid climates. Do not allow the ceiling to remain damp, as lingering moisture invites regrowth. Check for any paint blistering or damage that may need touch-up after the mould has been removed. Keep humidity low for 24–48 hours after cleaning and monitor the area for signs of moisture return.
Preventing future mould growth: moisture control
Long-term success depends on moisture control. Repair leaks promptly, improve ventilation in high-humidity rooms, and consider a dehumidifier in damp spaces. Regularly inspect ceilings for signs of moisture and address condensation hotspots around bathrooms and kitchens. Prompt action here reduces the need for repeat cleanups and protects indoor air quality. Maintenance routines, such as cleaning bathroom exhaust fans and ensuring warm-air vents aren’t blocked, support mould prevention.
When to hire a professional
If mould covers a large area (for example, more than a small patch across a ceiling), there is visible water damage, or mould returns after cleaning, professional remediation may be necessary. Pros have specialized equipment to perform containment, moisture control, and structural repairs safely. They can assess hidden mould growth in insulation or behind wall cavities and provide documentation for remediation.
Common mistakes to avoid
Avoiding common mistakes is key to a successful cleanup. Don’t rush cleaning, don’t over-wet the ceiling, and don’t skip drying time. Using the wrong cleaners or failing to address the moisture source will lead to rapid reruns of mould growth. When in doubt, pause and seek professional guidance rather than risking health or structural damage.
Tools & Materials
- Nitrile gloves(Choose snug fit and chemical resistant)
- Safety goggles(ANSI Z87.1 compatible)
- N95/P100 respirator(For particulate protection)
- Plastic sheeting (6-8 mil)(To seal off the area)
- Painter's tape(For containment edges)
- Drop cloths or old towels(Protect floors and furniture)
- Mild dish soap(Detergent solution base)
- Spray bottle(For applying cleaner)
- Soft-bristled brush or sponge(Gentle scrubbing)
- Bucket of warm water(Rinse solution)
- Hydrogen peroxide 3%(Optional cleaner alternative)
- White vinegar(Optional cleaner alternative)
- HEPA vacuum (optional)(For spores after cleaning)
- Ladder or stable stool(Safe ceiling access)
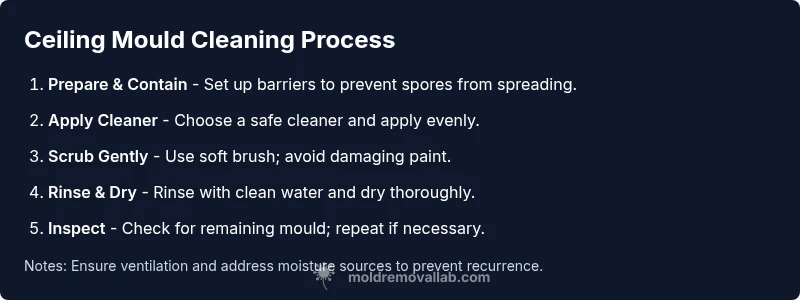
Steps
Estimated time: 3-6 hours total (including drying)
- 1
Prepare the area and safety gear
Clear the space beneath the ceiling and remove movable items. Set up plastic sheeting to catch any drips and seal room doors. Don your PPE and ensure you have adequate ventilation before starting.
Tip: Place a plastic barrier under the work area to catch falling mould and keep floors dry. - 2
Put on PPE
Put on nitrile gloves, safety goggles, and a respirator. This minimizes inhalation and skin exposure to mould spores during cleaning.
Tip: Double-check the respirator fit and replace filters if you’ve had previous exposure to mould. - 3
Contain the area
Hang plastic sheeting from ceiling to walls and secure with painter’s tape. This creates a contained zone that limits spore dispersal during cleaning.
Tip: Keep doors and vents closed to maintain containment until the job is finished. - 4
Apply cleaner to mouldy areas
Lightly mist the mouldy area with your chosen cleaner (detergent solution, vinegar, or hydrogen peroxide). Let it dwell for 5–10 minutes to soften residues.
Tip: Do not saturate the ceiling; a light, even mist is sufficient. - 5
Scrub mould away
Gently scrub the mould using a soft-bristled brush or sponge. Work from the outer edges toward the centre to minimize spreading spores.
Tip: Use minimal pressure to avoid damaging paint or texture. - 6
Rinse the area
Wipe away loosened mould and cleaner with clean water. Rinse cloths frequently to prevent reapplying mould residue.
Tip: Blot dry rather than rubbing vigorously to protect the surface. - 7
Dry thoroughly
Use fans or a dehumidifier to dry the ceiling completely. Do not reoccupy the space until the surface is fully dry to discourage regrowth.
Tip: Aim for low humidity in the room for at least 24–48 hours. - 8
Inspect and plan prevention
Check the cleaned area for any remaining mould and note moisture sources. Implement moisture controls to prevent recurrence (ventilation, leak repairs, dehumidification).
Tip: Document any fixes (leaks repaired, fans installed) for future reference.
FAQ
Is it safe to clean mould off ceiling myself?
For small, surface mould with no active leaks, DIY cleaning is usually safe if you use proper PPE and containment. Large areas, visible water damage, or mould returning after cleaning should prompt professional remediation.
DIY cleaning is often safe for small spots, but watch for leaks and persistent growth.
Can I use bleach to clean mould off ceiling?
Bleach is not ideal for porous ceiling materials and can damage paint. It can also leave moisture behind. Safer options are hydrogen peroxide or white vinegar, and always test first.
Bleach isn’t usually the best choice for ceilings; try hydrogen peroxide or vinegar instead.
What if mould returns after cleaning?
Recurring mould usually means ongoing moisture. Recheck for leaks or condensation, improve ventilation, and re-clean after addressing moisture sources.
If mould comes back, the problem is moisture—fix that first, then reassess.
How long does it take to dry after cleaning?
Drying time depends on room humidity and airflow. In most cases, expect 24–48 hours of drying with active ventilation; re-check before reoccupying.
Drying typically takes a day or two with good airflow.
When should I remove ceiling material to treat mould?
If mould penetrates drywall or insulation, removal and replacement may be necessary. Consult a professional for assessment and safe removal.
If mould has penetrated the ceiling material, replacement may be needed.
Do I need to hire a professional for ceiling mould?
For large areas, persistent mould, or evidence of water damage, professional remediation is recommended. Pros have equipment and training for safe containment and moisture control.
For big or stubborn mould, hire a pro for safe, thorough remediation.
The Essentials
- Contain the area to prevent spore spread.
- Use gentle cleaners and non-abrasive scrubbing.
- Dry completely and monitor humidity.
- Fix underlying moisture sources promptly.
- Consider professional help for large or stubborn mould.