Remove Home Mold: A Practical Step-by-Step Guide
A practical, step-by-step guide to remove home mold safely, focusing on moisture control, cleaning methods, drying, and prevention to keep your home healthy.

You will learn a safe, step-by-step method to remove home mold. This guide covers moisture assessment, proper PPE, cleaning methods, thorough drying, and ongoing prevention. We emphasize working in a ventilated area, testing for damp spots, and documenting progress. Expect practical tips you can implement today with common household supplies.
What is home mold and why it matters
Mold is a type of fungus that thrives in damp conditions and reproduces through spores. In most homes, common indoor molds include Aspergillus, Cladosporium, and Penicillium. These organisms can trigger allergic reactions, respiratory irritation, and, in some cases, worsen asthma. The primary driver is moisture—leaks, plumbing issues, condensation, or high humidity create the perfect environment for growth. Visible colonies may appear as black, green, or white patches on walls, ceilings, or behind wallpaper. A musty odor can also indicate hidden growth. Not every mold requires demolition; some non-porous surfaces can be cleaned, while porous materials like drywall may need removal. According to Mold Removal Lab, prompt action reduces exposure and limits damage. This guide helps homeowners safely identify, contain, and remove mold while addressing underlying moisture problems to prevent recurrence.
Before you start: safety and planning
Safety is non-negotiable when removing home mold. Always wear protective gear, ensure good ventilation, and isolate the affected area to prevent spores from spreading. Create a containment plan that includes plastic sheeting, negative air considerations if available, and clear access to exit routes. The Mold Removal Lab Team emphasizes starting with a written plan and safety checklist to minimize exposure and protect vulnerable household members. Document the growth pattern with photos and note moisture sources (leaks, condensation, or humidifiers) to guide remediation. If you have respiratory issues or mold covers a large area, consider pausing work and seeking professional advice.
Tools and materials you’ll need
Having the right tools keeps cleanup effective and safe. Essential items include PPE (N95 respirator, disposable gloves, eye protection), disposable bags, plastic sheeting for containment, brushes or scrub sponges, a non-ammonia detergent, a bucket or spray bottle, and a HEPA vacuum if available. For porous materials that are heavily saturated, plan for removal and replacement rather than cleaning. Store cleaners in a labeled container and never mix chemicals. Mold Removal Lab recommends preparing a dedicated work surface and cleanup area to prevent cross-contamination.
Step-by-step overview
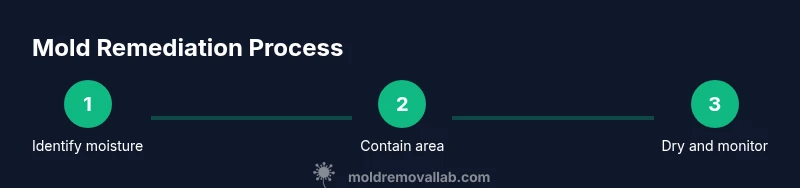
Remediation proceeds in stages: identify moisture sources, contain the area, clean surfaces, dry thoroughly, and verify nothing remains. This overview prepares you for the detailed steps that follow and emphasizes safety, documentation, and moisture control as the foundation of a lasting solution. Always remember that addressing the moisture problem is as important as removing visible mold, or the growth will recur.
Cleaning methods by surface type
Non-porous surfaces (glass, metal, hard plastics) are cleaned with detergent and water, followed by a disinfectant if appropriate for the material. Porous surfaces (drywall, insulation, ceiling tiles) that have absorbed moisture or show persistent growth are often best removed and replaced. For cleaned-on surfaces, avoid bleach on porous materials and never mix cleaners. Always test a small inconspicuous area first to confirm colorfastness and material integrity. The goal is to remove spores and residues while preserving structural safety.
Drying, humidity control, and prevention of recurrence
After cleaning, thorough drying is critical. Use fans, dehumidifiers, and open windows where weather allows, aiming to reduce relative humidity below 50-60% if possible. Mold can return quickly if dampness recurs, so run dehumidification for 24-72 hours after cleaning and monitor humidity levels with a hygrometer. Repair the moisture source (leaks, improper ventilation, or poor insulation) promptly and implement ongoing moisture management strategies such as bathroom exhaust fans, better attic ventilation, and gutter maintenance. Routine checks after rain or heavy humidity help catch issues early, reducing the chance of re-growth.
When to call a professional and how to choose one
If mold covers a large area, if you have health concerns, if you suspect fungal contamination in hidden spaces, or if there’s structural damage, professional remediation is advised. A qualified mold remediation contractor can assess moisture sources, contain the area, and perform safe, compliant removal. When choosing a pro, ask for licensing where required, read reviews, request a written plan detailing containment, cleanup methods, and post-remediation verification, and verify references. The Mold Removal Lab team emphasizes choosing a provider who explains who is responsible for moisture repair and who will verify that the space is safe to inhabit again.
Tools & Materials
- N95 respirator mask(Fit securely; replace if damaged or soiled)
- Disposable gloves(Nitrile preferred; use double-layer if heavily contaminated)
- Safety goggles or eye protection(Wraparound style recommended)
- Plastic sheeting(For containment; seal edges with tape)
- Drop cloths or old towels(Protect floors and furniture in the area)
- Non-ammonia detergent(Mild cleaner for initial scrubbing)
- Scrub brushes and sponges(Use separate brushes for porous vs non-porous surfaces)
- Bucket and spray bottle(For mixing cleaners and applying solution)
- HEPA vacuum (optional)(Useful for capturing fine spores after cleanup)
- Dehumidifier or fans(Promotes fast drying and reduces moisture)
Steps
Estimated time: 90-150 minutes
- 1
Identify moisture sources
Walk through the area and locate leaks, condensation points, or high humidity zones. Document with photos to guide repairs and track progress.
Tip: Address moisture first—without fixing the source, mold returns after cleanup. - 2
Prepare the work area
Seal off the space with plastic sheeting and establish a cleanup zone. Ensure good ventilation and power supply for fans.
Tip: Keep children and pets out of the work zone to minimize exposure. - 3
Put on PPE
Wear an N95 mask, gloves, and eye protection before touching moldy surfaces or materials.
Tip: Inspect PPE fit before starting; replace if it becomes damp or compromised. - 4
Remove contaminated materials
Safely bag and dispose of porous materials that are mold-damaged and beyond cleaning.
Tip: Label bags clearly and dispose of them in outdoor trash immediately after sealing. - 5
Clean non-porous surfaces
Scrub hard surfaces with detergent and water; use a brush for stubborn spots. Rinse with clean water and repeat if necessary.
Tip: Avoid mixing cleaners; never use ammonia-based products with bleach. - 6
Disinfect and protect
Apply a mold-inhibiting product suitable for the surface if recommended by the cleaner’s label; allow to dry completely.
Tip: Read labels to confirm compatibility with surfaces and finishes. - 7
Dry and monitor
Run dehumidifiers and fans to achieve low humidity. Recheck the area over the next days for signs of moisture or regrowth.
Tip: Use a hygrometer to verify humidity stays below 50-60% during the drying phase.
FAQ
Is DIY mold removal safe for a typical home?
DIY removal can be safe for small, well-contained areas with proper PPE and ventilation. If growth is extensive or affects HVAC, or if you have health issues, consult a professional.
DIY mold removal can be safe for small, contained areas when you wear PPE and ventilate. If it’s extensive or affects your health, consider a professional.
How long does it take to remediate mold yourself?
DIY remediation depends on space size and moisture control. Most small projects can be completed in a few hours, with drying and monitoring extending the total timeline.
Time depends on space size. Small projects may take a few hours; drying and follow-up checks can extend the timeline.
Can bleach alone remove mold from all surfaces?
Bleach can remove surface mold on non-porous surfaces but is not effective for deeply embedded mold in porous materials. Use proper cleaners and dry thoroughly.
Bleach may remove surface mold on hard surfaces, but porous materials often need removal and replacement. Dry thoroughly after cleaning.
Should I repaint after mold cleanup?
Yes, but only after the area is completely dry and mold-free. Use mold-resistant primer and paint, and consider addressing the moisture source first.
Paint after drying and mold removal, with mold-resistant primer to help prevent recurrence.
What if mold comes back after cleaning?
If mold recurs, re-evaluate moisture sources and extend cleaning to affected areas. Persistent growth may require professional assessment and remediation.
If it recurs, check moisture, extend cleaning, and consider professional help if it persists.
When should I call a professional?
Call a professional when mold covers a large area, when health symptoms are present, or when you suspect hidden growth behind walls or in HVAC.
Call a professional if growth is large, health concerns exist, or you suspect hidden mold behind walls.
Watch Video
The Essentials
- Identify moisture sources before cleaning
- Contain the area to prevent spread
- Use proper PPE and safe cleaners
- Dry thoroughly and monitor humidity
- Consider professional help for large or risky mold