Orange Mold on Wood: Practical Removal Guide
Learn how orange mold on wood appears, the health risks, and practical steps for safe removal and prevention. A Mold Removal Lab guide to protect your home from moisture-related mold problems.

Orange mold on wood indicates a moisture problem. This guide helps you identify, assess, and safely remove mold while stopping recurrence. Start with PPE, containment, and thorough drying. For larger or hidden infestations, consider professional remediation. The goal is to restore a safe, moisture-controlled environment.
What orange mold on wood is and why it appears
Orange mold on wood is a pigment-rich fungus that appears when moisture levels stay high and wood remains damp. In homes, this often follows leaks, condensation, or poor ventilation. According to Mold Removal Lab, orange mold on wood is usually the result of prolonged moisture exposure and inadequate airflow, which create the perfect environment for mold to colonize wood fibers. The color can vary from bright orange to orange-brown depending on species, surface moisture, and cleaning history. The key takeaway: color alone isn't a reliable indicator of severity; you must assess moisture sources and extent.
Visible mold on wood should be treated promptly; porous wood absorbs moisture and mold spores can spread behind finishes. Different species produce orange pigment, including Penicillium and Aspergillus; these molds release spores that can trigger allergic reactions. If you have existing respiratory issues, you should be extra cautious. Early containment reduces the chance that mold will spread to adjacent materials like drywall or framing.
This problem is more likely in damp basements, crawl spaces, kitchens with leaks, or rooms with poor ventilation. A proactive moisture plan—monitoring humidity, fixing leaks, and improving airflow—helps prevent future outbreaks. Remember, addressing only the visible mold without treating the moisture source is a common reason mold returns.
Health risks and who is at risk
Exposure to orange mold on wood can trigger allergic reactions, coughing, sneezing, and irritated eyes for sensitive individuals. People with asthma, compromised immune systems, or chronic lung conditions are more likely to experience symptoms from mold exposure. The indoor air quality impact depends on the extent of contamination and the duration of exposure. Even small patches can release spores that travel through living spaces via air currents.
Mold spores and fragments can settle on other surfaces, including fabrics and stored goods, potentially compounding exposure. Children and older adults are particularly vulnerable due to developing or weakened immune defenses. While not every instance of orange mold on wood will contain dangerous toxins, it’s prudent to treat mold growth seriously and maintain good humidity control and cleaning routines to minimize health risks.
In all cases, if you notice persistent musty odors, headaches, or worsening allergy symptoms around infested areas, consult a healthcare professional and consider a professional mold assessment. Mold Removal Lab suggests that addressing moisture sources is the most impactful step for health and safety in the long term.
Common sources of moisture that feed orange mold on wood
Moisture is the fuel for mold growth on wood. Common sources include leaks from roofs, pipes, or appliances; condensation from poor ventilation; and high relative humidity, especially in basements, bathrooms, and laundry rooms. Wood is porous, so water penetrates its fibers and creates the damp environment mold loves. In many homes, inconsistent humidity due to seasonal changes or inadequate dehumidification drives orange mold on wood.
To prevent recurrence, identify and fix the moisture source first. Check for roof leaks, plumbing drips, and sealing around windows. Improve ventilation in moisture-prone rooms by running exhaust fans during showers and cooking, and consider a dehumidifier set to keep indoor humidity around 30–50%. Regularly inspect stored wood products for signs of moisture and mold growth.
Along with moisture, temperature plays a role: mold grows fastest around room temperatures (roughly 60–80°F). Keeping rooms cooler in extreme heat and ensuring air movement helps slow growth. Remember, moisture management is more important than cleaning alone when it comes to orange mold on wood.
Safety first: protective steps before you start cleaning
Before any cleaning, protect yourself and nearby belongings. Put on an N95 respirator, protective gloves, and safety goggles to prevent inhalation and skin contact with spores. Isolate the affected area with plastic sheeting to prevent spores from drifting to other rooms. Turn off HVAC or run a portable air purifier equipped with a HEPA filter to minimize airborne spores during cleanup.
Move or cover items nearby to protect them from cleaning solutions and debris. If mold growth is extensive, or if the area includes insulation, drywall, or structural wood, plan for containment and longer-term remediation. Proper protection minimizes exposure risks and reduces cross-contamination during the process.
Mold Tips from Mold Removal Lab emphasize starting slowly and avoiding aggressive actions that release spores into the air. Take photos for records and note the extent of growth before you begin cleaning. A cautious approach improves outcomes and safety.
Assessing the extent and testing when needed
Start with a visual assessment: note the size of the affected area, surface texture, and whether the mold has penetrated wood pores. For larger areas (roughly more than 10 square feet) or when mold is suspected behind finishes, professional assessment is advised to verify extent and health risks.
DIY moisture meters and humidity readings help gauge drying needs, but they don’t measure mold presence behind sealed finishes. If you decide to test, use a reputable indoor air quality kit to sample settled dust or air for mold spores, and compare with local health guidelines. Complex cases often require accredited lab analysis to determine species and concentration for targeted remediation.
Mold Removal Lab notes that moisture and air quality assessments provide the most actionable information. A comprehensive approach combines visual inspection, moisture evaluation, and, if needed, professional testing for peace of mind and effective remediation.
Cleaning methods: what works on wood and what to avoid
For wood surfaces affected by orange mold, start with a gentle cleaning approach. Use a solution of mild detergent or dish soap with warm water and scrub with a stiff-bristled brush to dislodge mold from wood fibers. Rinse with clean water and dry thoroughly to prevent quick re-growth. White vinegar (undiluted) or a 3% hydrogen peroxide solution can be effective sanitizers on non-porous wood finishes, but test a hidden area first to avoid discoloration.
Do not rely on bleach as a primary solution for wood. Porous wood can absorb bleach, and it may not reach mold hidden in pores or behind finishes. Bleach can also damage finishes and create harmful fumes if not used with proper ventilation. If mold remains after initial cleaning, replace damaged wood or consult a professional for deeper remediation. Always allow the wood to dry completely before finishing or sealing.
This step-by-step cleaning approach aligns with general best practices and minimizes disruption to your living space. If you are uncertain about the wood type or finish, test in a small inconspicuous area first and proceed with caution. For large surfaces or extensive harm, seek professional guidance.
Drying and preventing recurrence: moisture control and maintenance
Drying thoroughly is essential to prevent mold from returning. Use a combination of air movement, heat, and dehumidification to maintain a relative humidity level between 30–50%. Run fans and a dehumidifier in the affected area until the wood feels completely dry to the touch and no condensation forms on surfaces.
After drying, monitor for signs of moisture intrusion. Reassess humidity weekly for the first month, especially during humid seasons. Seal cracks, repaint with mold-resistant finishes, and ensure proper sealing around windows and plumbing. Regular inspections help catch moisture issues early, preventing orange mold on wood from re-establishing a strong foothold.
Mold Removal Lab recommends documenting moisture levels and remediation steps to track progress and protect family health. A proactive maintenance plan reduces long-term risk and keeps indoor air safer for all occupants.
When to hire a professional and what to expect
If the infestation covers a large area, involves structural wood, or recurs after cleaning, professional remediation is advised. A licensed contractor can contain the area, remove damaged wood, and use HEPA filtration to prevent cross-contamination. They will also address underlying moisture problems to prevent re-growth. Expect a written moisture assessment and a remediation plan with timelines.
Even for smaller areas, if you are unsure about the wood type, finish, or underlying moisture source, seeking professional guidance is prudent. Professionals have specialized tools, knowledge, and safety protocols that improve outcomes and reduce health risks. Mold Removal Lab notes that early, professional intervention can prevent costly structural damage and repeated remediation.
A practical prevention plan for lasting results in your home
Create a moisture-control routine to prevent orange mold on wood from returning. Fix leaks promptly, maintain 30–50% humidity, use exhaust fans during moisture-generating activities, and inspect areas prone to dampness at least quarterly. Store wood products in dry areas off the floor and away from potential moisture sources. Consider using mold-resistant paints or finishes on vulnerable surfaces.
Regular cleaning with a mild cleaner, prompt attention to spills, and good air circulation are simple, effective steps. Maintain a household moisture dashboard—record humidity levels, cleaning dates, and areas inspected—to stay proactive. The Mold Removal Lab team emphasizes that prevention is easier and more cost-effective than repeated remediation, especially in water-prone rooms.
Tools & Materials
- N95 respirator mask(Ensure proper fit and seal)
- Protective gloves (nitrile)(Chemical-resistant gloves)
- Safety goggles(Eye protection during cleaning)
- Soap and water(Mild detergent for initial cleaning)
- White vinegar(Antimicrobial alternative; test on wood first)
- Hydrogen peroxide 3%(Alternative sanitizing rinse; test on wood first)
- Mild detergent or dish soap(Cleaning solution for wood surfaces)
- Scrub brush, stiff-bristled(For textured wood surfaces)
- Microfiber cloths(Drying and wiping surfaces without lint)
- Spray bottle(Apply cleaners evenly)
- Plastic sheeting or drop cloths(Contain debris and protect area)
- Disposable bags(Seal and discard contaminated materials)
- Moisture meter or hygrometer(Helpful to track humidity)
- Dehumidifier or fans(Assist drying and air movement)
- Wood filler or epoxy (if needed)(Repair damaged wood after cleaning)
Steps
Estimated time: 2-6 hours
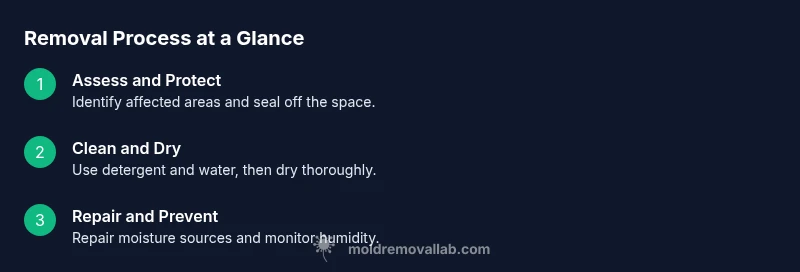
- 1
Inspect the affected area
Begin with a thorough visual check of all surfaces showing discoloration or dampness. Note the extent, take photos for records, and mark any hidden areas that may require a closer look. Understanding the scope informs your cleanup plan.
Tip: Document the area with notes and photos before starting. - 2
Protect yourself and the space
Put on PPE, seal off the area with plastic sheeting, and turn off nearby HVAC for containment. This minimizes the spread of spores to other rooms and protects your family.
Tip: Ensure a proper seal at doorways; avoid venting spores into living spaces. - 3
Prepare the space and remove loose material
Clear items from the area and cover remaining furniture with plastic. Remove loose paint chips or finishes that could harbor mold spores in porous surfaces.
Tip: Contain debris in disposable bags for safe disposal. - 4
Clean with an appropriate solution
Mix or apply a mild detergent solution and scrub the wood to remove visible mold. Avoid saturating wood; use a damp—not soaking—tool to minimize moisture absorption.
Tip: Test a small hidden area first to check finish compatibility. - 5
Rinse and dry thoroughly
Rinse with clean water and dry surfaces completely using microfiber cloths and air movement. Moisture must be removed to prevent regrowth.
Tip: If moisture remains, increase air flow and use a dehumidifier. - 6
Dehumidify and monitor moisture
Continue drying with fans and a dehumidifier. Monitor humidity levels and ensure no condensation returns. This step is crucial to prevent a fresh mold cycle.
Tip: Aim for 30–50% relative humidity. - 7
Repair and prevent recurrence
Repair any moisture sources (leaks, improper sealing) and consider finishing or sealing wood to reduce future absorption. Establish a maintenance routine to monitor humidity and signs of dampness.
Tip: Keep records of repairs and humidity readings.
FAQ
Is orange mold on wood dangerous to health?
Mold exposure can trigger allergies and respiratory symptoms in sensitive people. Health risks vary with duration and extent of exposure. If you have symptoms or a large infestation, consult a professional and consider a mold assessment.
Mold exposure can cause allergy-like symptoms; seek professional advice for persistent or large mold problems.
Can I remove orange mold on wood myself?
Small, surface mold on non-porous finishes can often be cleaned safely with proper PPE and a mild cleaner. For porous wood or large areas, or if the mold recurs, professional remediation is advised.
Yes for small areas with the right precautions; larger or persistent mold should be handled by a pro.
Should I use bleach on mold on wood?
Bleach is often ineffective on porous wood and can damage finishes. It won’t reach mold embedded in wood fibers. Safer options include detergent, vinegar, and hydrogen peroxide, tested on an inconspicuous area first.
Bleach isn’t ideal for wood; test safe alternatives first.
How long does it take wood to dry after cleanup?
Drying time depends on humidity, air flow, and wood type. In many spaces, 24–72 hours is typical with active drying. Always confirm dryness before finishing.
Drying usually takes a day or two with good airflow and controlled humidity.
What if mold returns after cleaning?
If mold returns, re-evaluate moisture sources, fix leaks, and re-clean with attention to drying. Recurrent growth may require professional assessment and remediation.
If mold comes back, check moisture and consider a pro for thorough remediation.
When should I replace damaged wood instead of cleaning?
Replace wood that is soft, crumbly, warped, or deeply penetrated by mold. Cleaning won’t restore structural integrity in such cases. A professional can advise on the extent of replacement.
If wood is seriously damaged, replacement is usually best.
Watch Video
The Essentials
- Contain mold quickly to limit spread
- Address moisture sources before cleaning
- Dry thoroughly to prevent regrowth
- Don’t rely on bleach for porous wood
- Call a professional for large areas or recurrent mold