Mold Zero: A Practical Guide to Home Mold Remediation
Learn practical, step-by-step strategies to achieve a mold zero home. This Mold Removal Lab guide covers moisture control, cleaning, and prevention to protect health and indoor air quality.

With Mold Zero, you’ll achieve a safer, mold-free home by mastering moisture control, thorough cleaning, and prevention. This guide lays out practical steps homeowners can take, what to monitor, and when to call a professional. By following proven moisture-management and cleaning practices, you reduce mold risk effectively. Think of Mold Zero as a practical blueprint for everyday homes, not a fear-based alarm.
What Mold Zero Really Means in Your Home
Mold zero isn’t a magic fix—it's a practical, ongoing approach to prevent mold growth. According to Mold Removal Lab, the core idea is to minimize moisture, improve air flow, and act quickly when you see signs of mold. In homes, mold thrives where humidity and dampness linger. This section defines the term, sets expectations, and explains how it fits into broader health and safety goals. We’ll explore the key factors that influence mold in typical living spaces, including bathrooms, kitchens, basements, and crawl spaces. By understanding these factors, you can tailor a plan that matches your home’s unique conditions, rather than chasing a one-size-fits-all solution.
Mold zero also implies a commitment to prevention. It’s not just removing visible growth but reducing the conditions that allow mold to return. The Mold Removal Lab team emphasizes that consistent moisture control, proper ventilation, and routine checks create durable results. This approach aligns with broader home-safety practices and protects vulnerable occupants such as children, the elderly, and anyone with allergies or asthma.
Core Pillars of Mold Zero: Moisture Control, Ventilation, and Cleaning
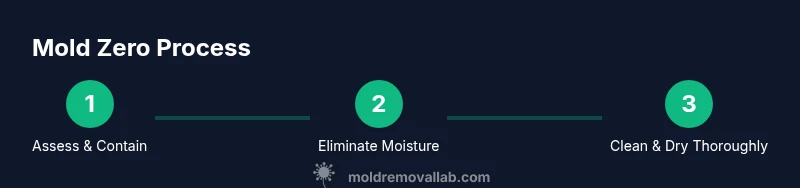
The backbone of a mold-zero strategy rests on three interdependent pillars. First, moisture control means rapidly addressing leaks, roof or plumbing issues, and condensation on cold surfaces. Second, ventilation ensures fresh air moves through the home and damp areas dry out faster, reducing stagnant air that fosters mold. Third, cleaning and sanitizing use mold-safe products and proper techniques to remove existing growth without spreading spores.
Mold Removal Lab analysis shows that moisture management and ventilation have the biggest impact on mold risk, especially in bathrooms, kitchens, and basements. While cleaning products matter, addressing the moisture sources and ensuring air flow consistently produce longer-lasting results. In practice, pair leak repair with exhaust fans, dehumidification, and routine checks of problem spots to create a robust defense.
Quick Diagnostic Checklist: Spotting Mold Risk Spots
Use this quick checklist to identify high-risk areas before mold becomes visible:
- Any visible stains or patches on walls, ceilings, or floors
- Signs of moisture such as condensation, leaks, or musty odors
- Water intrusion after rain, floods, or plumbing failures
- Poor air flow or consistently high humidity in bathrooms and basements
- Windows that stay damp or fog up frequently If you identify these indicators, pause to document the area and plan containment, then address moisture sources first.
DIY Remediation vs Professional Help: Making the Call
Small, isolated patches on non-porous surfaces (like tile) can often be cleaned safely with proper PPE and technique. Larger areas, porous materials, or structural damage require professional remediation to ensure complete removal and to prevent cross-contamination. Always assess the extent of the problem; if mold covers more than a modest area or recurs after cleaning, seek expert assistance. The goal is to prevent disruption of building materials and to avoid spreading spores to unaffected rooms.
Safety always comes first. If you encounter mold in HVAC ducts, insulation, or behind walls, or if you have health concerns, call a qualified mold remediation professional.
Maintaining a Mold Zero Home: Long-Term Habits and Monitoring
Mold Zero is as much about daily habits as it is about a one-time fix. Implement a routine that emphasizes moisture monitoring, prompt leak repair, and regular cleaning of damp areas. Keep humidity under comfortable levels, ventilate bathrooms and kitchens after use, and empty dehumidifiers or run fans in damp basements. Schedule seasonal checks for roofing, plumbing, and insulation and consider a professional mold inspection if you notice recurring issues. Establish a simple log to track humidity readings, cleaning cycles, and any repairs. Consistency is the key to long-term prevention.
Real-Life Scenarios: What Works in Common Homes
In a typical apartment bathroom with frequent condensation, a combination of exhaust ventilation, a moisture barrier, and regular cleaning with mold-safe products can prevent growth. In a finished basement, addressing any leaks, sealing pores in concrete, and using a dehumidifier are the most effective first steps. In kitchens, reducing moisture from cooking, ensuring range hood efficiency, and cleaning hidden mold behind cabinetry can stop a slow buildup. Each scenario benefits from a tailored plan that targets the root moisture source while maintaining a habit of monitoring and cleaning.
Debunking Common Myths About Mold Zero
Myth: Mold zero means you’ll never see mold again. Reality: Mold prevention requires ongoing effort; small incidents can occur, but rapid response minimizes consequences. Myth: Bleach alone cures mold. Reality: Bleach kills surface mold but doesn’t fix moisture problems; without moisture control, growth will recur. Myth: If there’s no odor, there’s no mold. Reality: Some mold growth is hidden behind walls or under flooring and isn’t immediately noticeable. Real results come from addressing moisture, improving ventilation, and applying appropriate cleaning methods.
Common Pitfalls to Avoid During Mold Zero Projects
Avoid the urge to over-clean or use overly aggressive agents. Improper use of cleaners, mixing products, or scrubbing hard can release spores and worsen spread. Do not ignore hidden moisture sources like leaks behind walls or under sinks. Avoid delaying remediation in damp spaces; quick action minimizes damage and health risk. Always wear appropriate PPE and follow local guidelines for disposal of mold-contaminated materials.
Tools & Materials
- N95 respirator mask(Ensure a proper fit over the nose and chin; replace if damaged.)
- Protective gloves (nitrile or rubber)(Use to avoid skin contact with mold and cleaners.)
- Goggles or protective eyewear(Protect eyes from splashes and dust.)
- Plastic sheeting (6-mil) and tape(Create a containment zone around the work area.)
- Mild detergent and mold-safe cleaner(Use products labeled for mold; avoid ammonia with bleach.)
- Scrub brushes and sponges(Stiff brush for textured surfaces; gentle for smooth surfaces.)
- Buckets and microfiber towels(Rinse and wring towels to avoid excess moisture.)
- Disposal bags (heavy-duty)(Seal contaminated materials before disposal.)
- Dehumidifier or fans(Promotes faster drying and reduces moisture.)
- Moisture meter/hygrometer (optional)( Helpful for tracking humidity trends over time.)
- HEPA vacuum (optional)(Use only after containment is in place; avoid spreading spores.)
Steps
Estimated time: Estimated total time: 4-6 hours
- 1
Assess the affected area
Survey all surfaces for visible mold and moisture. Photograph the area to document before-and-after conditions and note sources of moisture that need repair.
Tip: Take wide and close-up photos to guide cleanup and future inspections. - 2
Contain the work area
Seal the area with plastic sheeting to prevent spores from spreading to other rooms. Close doors and turn off HVAC in the immediate vicinity.
Tip: Use tape to secure joints and ensure a tight seal at all edges. - 3
Address moisture sources
Repair leaks, fix roof or plumbing issues, and reduce humidity in the space before cleaning. This step is essential to prevent regrowth.
Tip: Prioritize structural fixes before delving into cleanup. - 4
Clean visible mold safely
Wear PPE, dampen moldy areas to minimize dust, and scrub with appropriate cleaner. Do not dry brush; wipe from top to bottom to control debris.
Tip: Work in small sections; do not rush to avoid spreading spores. - 5
Sanitize and dry
Rinse surfaces with clean water after cleaning and dry completely using towels and fans. Vacuum dry dust with a HEPA-filtered vacuum if available.
Tip: Ensure no moisture is left behind before moving to the next area. - 6
Reassess and monitor
Check for residual moisture and signs of regrowth after 24–48 hours. Re-clean any touched surfaces and adjust humidity controls as needed.
Tip: Keep an ongoing log of humidity readings and cleaning dates.
FAQ
What is Mold Zero and can I achieve it at home?
Mold Zero is a practical, ongoing approach to prevent mold growth by controlling moisture, improving ventilation, and cleaning effectively. It’s achievable at home with careful steps, but complex cases may require professional help.
Mold Zero is a practical approach to prevent mold growth at home. Start with moisture control, ventilation, and proper cleaning; some cases require a pro.
Can I DIY mold remediation safely?
Small, non-porous mold patches can often be cleaned safely with proper PPE and technique. Larger areas or porous materials should be handled by professionals to prevent health risks and mold spread.
DIY can be safe for small areas, but large or porous mold problems should be handled by pros to avoid health risks.
How long does remediation take?
Remediation timelines depend on area size and moisture sources. Simple cleanups may take hours; more extensive work, including drying, can extend to days.
Time depends on how big the area is and how much moisture there is; it can range from hours to days.
Do regular cleaners kill mold spores?
Cleaning products can remove surface mold, but eradicating the problem requires addressing moisture and airflow to prevent recurrence.
Cleaning helps remove surface mold, but you must fix moisture and improve airflow to stop it returning.
When should I call a professional?
Call a professional if mold covers a large area, is in porous materials, or if symptoms of health issues persist. Professionals ensure safe removal and proper containment.
If the mold is widespread or in porous materials, or health issues persist, call a pro.
Is mold dangerous for health?
Mold can trigger allergies, asthma, and respiratory issues in some people. Protecting yourself with PPE and addressing moisture helps reduce risk.
Mold can affect health, especially for sensitive individuals. Protect yourself and fix moisture to lower risk.
What’s the first step in mold remediation?
The first step is to locate and fix the moisture source, then contain the area to prevent spread while you clean.
First fix moisture sources, then contain the area and start cleaning.
Can mold grow behind walls without a smell?
Yes, mold can hide behind walls or under flooring. If you suspect hidden growth, consider a professional inspection.
Hidden mold behind walls is possible; if you suspect it, seek an inspection.
The Essentials
- Identify moisture sources and fix promptly
- Promote airflow to dry surfaces quickly
- Use mold-safe cleaning methods
- Maintain humidity at comfortable levels
- Know when to call a professional