Mold Mould Remediation: A Homeowner's Step-by-Step Guide
A practical, safety-focused guide to identifying, cleaning, and preventing mold mould in homes, with step-by-step methods and expert tips from Mold Removal Lab.

By the end, you'll know when to DIY and when to call a pro, what tools and cleaners to use, and how to monitor humidity to keep your home safe. This quick answer prepares you for a full step-by-step remediation plan from Mold Removal Lab. It also emphasizes safety, proper ventilation, and documentation to track progress.
Understanding Mold Mould in Homes
Mold mould is a common indoor fungus that thrives in moist environments. It can affect air quality and may trigger allergies or respiratory symptoms in sensitive people. According to Mold Removal Lab, mold mould growth is driven primarily by moisture rather than the amount of visible mold itself, so addressing humidity and leaks is the foundation of any remediation effort. Homeowners should treat mold mould as a sign of hidden moisture problems—often behind walls, under sinks, or in basements. Early detection reduces the scope of cleanup and minimizes health risks. In this guide, we'll cover practical steps for identifying moisture, selecting safe cleaning methods, and preventing recurrence while keeping you and your family safe.
Identifying Common Moisture Triggers You Should Inspect
Mold mould needs moisture to grow. Look for sources such as leaking roofs, burst pipes, condensation on windows, high humidity, or poor drainage around the foundation. Tools like a hygrometer and infrared moisture detector can help locate damp spots behind walls. Remember that even small leaks can create a breeding ground for mold mould if left unchecked. Regular inspections of bathrooms, kitchens, basements, and laundry rooms help you catch problems early and reduce remediation costs.
Safety First: Gear, PPE, and Ventilation
Before you start any cleanup, assemble appropriate PPE: a respirator rated for particulates, chemical goggles, and a disposable coverall. Nitrile gloves protect your hands from cleaners and mold spores. Ventilate the area but avoid spreading spores to unaffected living spaces. Use a dedicated fan with a HEPA-filtered exhaust if possible, and keep doors closed to contain dust.
DIY vs Professional Remediation: When It's Wise
Small, isolated patches on non-porous surfaces may be manageable with proper PPE and cleaning, but larger areas, porous materials, or growth within HVAC systems require professional remediation. If you see recurring moisture, extensive staining, or if occupants have persistent respiratory symptoms, contact a licensed mold remediation contractor. Engaging a pro protects your health, ensures containment, and helps address underlying moisture problems.
Planning a Remediation Project: Scoping and Documentation
Start with a scope: identify affected materials, measure area size, and determine whether mold is on hard surfaces or porous materials. Document with photos for reference and insurance purposes. Create a containment plan, including barriers, negative pressure, and turn-off of HVAC in the affected zone. Inventory tools and cleaners, and establish a cleanup timeline. Good planning reduces recontamination risk and clarifies roles.
Cleaning Methods and Surface-Specific Guidance
Non-porous surfaces: wash with soap and water or a mild detergent, then rinse and dry. Porous materials (drywall, insulation) may need to be removed and discarded if saturated. Avoid bleach on porous materials unless recommended by product guidelines; when using bleach, follow manufacturer instructions and never mix with ammonia. For sealed surfaces and some non-porous items, EPA-registered mold cleaners can be effective. Always test a small area first.
Containment: Stopping the Spread and Protecting Indoor Climate
Set up physical barriers with plastic sheeting, seal vents, and use negative pressure if available. Move contaminated materials to sealable bags inside a contained area. Use a dedicated cleaning zone with its own tools to prevent cross-contamination. After cleanup, remove barriers carefully and dispose of waste according to local regulations.
Drying, Monitoring, and Re-Inspection
Mold mould remediation is only complete after the area reaches baseline moisture levels. Use dehumidifiers and fans to dry the space while monitoring humidity with a hygrometer. Re-inspect after 24-48 hours to ensure there are no hidden damp spots and that moisture levels have stabilized. Consider a follow-up assessment to verify that moisture sources were fixed and that mold spores have not reappeared.
Prevention: Long-Term Mold Prevention Strategies
Address leaks promptly, improve ventilation in high-moisture rooms, and maintain indoor humidity generally below 50-60% (adjust for climate). Regularly clean and inspect areas prone to dampness, and install vapor barriers where needed. Consider using mold-resistant products in bathroom and basement renovations to reduce future growth.
Authority Sources and Additional Reading
For authoritative guidance on mold mould, consult federal and academic resources. The EPA provides basics on mold and moisture control, the CDC offers home mold safety information, and OSHA discusses worker safety during mold remediation. These sources complement this guide and help you plan a safe, effective remediation.
Tools & Materials
- N95 respirator(NIOSH-approved, fit-tested for particulate protection)
- Protective gloves(Disposable nitrile or rubber gloves)
- Safety goggles(Wraparound style for splash protection)
- Disposable coveralls(Full-body suit if working with damp or porous materials)
- HEPA vacuum(Vacuum with sealed system or HEPA exhaust)
- Plastic sheeting(6 mil or thicker to create containment barriers)
- Painter’s tape(To seal barriers and mark zones)
- Soap and water / mild detergent(First-line cleaners for non-porous surfaces)
- EPA-registered mold cleaner(Follow label directions; optional but recommended)
- Non-ammonia cleaner(Safer alternative for cleaning; avoid mixing with bleach)
- Bleach (optional)(Only on non-porous surfaces if recommended by guidelines; never mix with ammonia)
- Scrub brushes(Stiff-bristled for firm scrubbing on hard surfaces)
- Waste bags (heavy-duty)(Seal and dispose of contaminated materials securely)
- Moisture meter/hygrometer(Helpful but not mandatory to track humidity)
- Dehumidifier(Pairs with fans to drive down humidity)
- Protective footwear(Slip-resistant boots or shoe covers)
- Notebook/phone for photos(Document condition and progress)
Steps
Estimated time: 2-5 hours
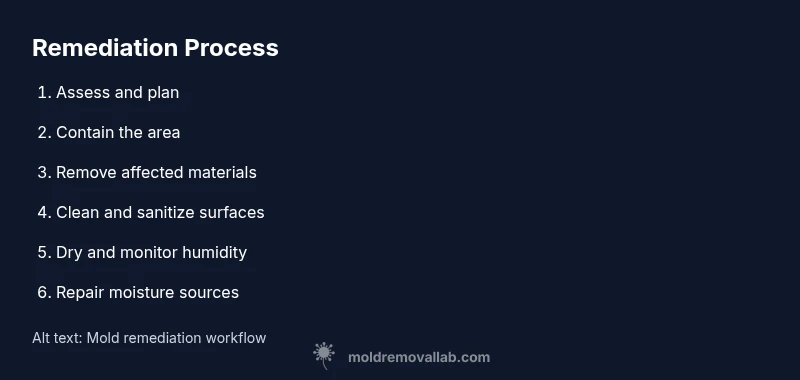
- 1
Assess the area and plan
Walk the space with a flashlight and note visible mold, stains, and water damage. Identify porous materials that may need removal and plan containment to prevent spreading spores. Establish a cleanup timeline and assign roles so everyone knows their task.
Tip: Document initial conditions with photos before disturbing any material. - 2
Set up containment
Install plastic barriers to isolate the affected zone. Seal doorways, vents, and any HVAC return vents if possible. Use tape to secure seams and create a negative pressure environment to limit dust migration.
Tip: Keep the rest of the home off-limits to minimize cross-contamination. - 3
Power down HVAC and protect nearby spaces
Turn off central heating/cooling in the affected area to prevent air from circulating spores. Place a clear notation on doors to remind household members not to bypass the containment.
Tip: If the area includes a dryer or clothes washer vent, seal it off temporarily. - 4
Remove clearly contaminated materials
Carefully remove porous materials that are visibly soaked or structurally compromised, such as drywall or insulation. Place them in sealable bags before removal to minimize dust release.
Tip: Avoid crushing material; bag and seal before moving. - 5
Clean and sanitize non-porous surfaces
Wash hard, non-porous surfaces with soap and water or a mild cleaner. Rinse thoroughly and dry with a clean cloth or towel. For tougher residues, use an EPA-registered cleaner according to the label.
Tip: Do not mix cleaners; follow product guidelines. - 6
Address remaining mold growth
If small spots remain, scrub with a brush and re-clean the area. Repeat cleaning as needed until visible mold is removed and the surface remains dry.
Tip: Stop if you notice spreading growth; reassess containment. - 7
Drying and humidity control
Run a dehumidifier and provide good air circulation to reach moisture equilibrium. Monitor humidity regularly and extend drying time if surfaces still feel damp.
Tip: Aim for a stable humidity level suitable for your climate. - 8
Repair moisture sources
Fix leaks, improve ventilation, and ensure drainage directs water away from the home. Replace removed materials with mold-resistant alternatives where possible.
Tip: Blocking moisture is essential to prevent recurrence. - 9
Re-inspect and verify cleanliness
Conduct a final visual check and confirm there are no lingering odors or visible growth. Use a moisture meter if available to verify dryness.
Tip: Incorporate a brief follow-up check after a few weeks. - 10
Documentation and maintenance
Document the remediation process with photos and notes. Schedule periodic checks to maintain humidity control and address issues early if moisture returns.
Tip: Keep a moisture-control plan as part of home maintenance.
FAQ
What are the common signs of mold in a home?
Look for visible growth, musty odors, water stains, and staining on walls or ceilings. Suspected mold near plumbing, bathrooms, basements, or dank areas should be investigated promptly. If you have persistent symptoms like coughing or allergies, check for hidden moisture and mold.
Common signs include visible growth, a musty smell, and water stains. If you notice persistent symptoms, inspect damp areas and consider professional testing if needed.
Is bleach effective for mold mould removal?
Bleach can kill surface mold on non-porous surfaces, but it is not a cure-all. It may not reach mold hidden within porous materials and can create harsh fumes. Always follow label directions and avoid mixing with ammonia.
Bleach can help on hard, non-porous surfaces, but it won’t fix moisture problems or reach hidden mold.
Can DIY mold cleanup be dangerous?
Yes. Disturbing mold can release spores into the air, potentially irritating eyes, skin, and lungs. Use proper PPE, contain the area, and know when to stop and call a professional for larger jobs or uncertain areas.
Cleaning mold can release spores. Wear PPE, contain the space, and seek professional help for large areas or if you’re unsure.
How long does it take to dry after remediation?
Drying times vary by space and climate but typically range from 24 to 72 hours with proper dehumidification and ventilation. Monitor humidity levels and inspect for dampness before concluding cleanup.
Usually 1 to 3 days with dehumidifiers and good airflow, but it depends on the space and weather.
When should I hire a professional?
Consider hiring a professional if mold covers a large area, returns after cleaning, involves porous materials, or if growth is near HVAC systems. A licensed pro can ensure proper containment and remediation.
If the mold is extensive or keeps returning, a licensed remediation professional is the safer choice.
Will mold come back after cleaning?
Mold can recur if the underlying moisture problem isn’t fixed. After cleanup, address leaks, humidity, and ventilation to reduce the chance of regrowth.
Mold can come back if moisture isn’t controlled; fix leaks and maintain humidity to prevent it.
The Essentials
- Identify and limit moisture sources first
- Use proper PPE and containment to prevent spread
- Clean and dry thoroughly before removing moisture sources
- Document remediation with photos and notes
- Maintain indoor humidity to prevent recurrence