Mold without Moisture: A Practical Remediation Guide
Learn how mold can grow without obvious moisture, identify hidden sources, and safely remediate with homeowner-friendly steps. Includes tips, tools, and when to call a pro.

You will learn how mold can appear even when surfaces feel dry, why hidden moisture supports mold growth, and the safest, homeowner-friendly steps to address it. This guide covers detection of unseen moisture sources, practical cleaning methods, and when to seek professional help. Mold Removal Lab shares practical strategies to reduce risks and protect your home and health.
What is mold without moisture?
Mold without moisture refers to mold growth in indoor environments where visible wetness isn’t present, yet microscopic moisture exists. This can come from humidity, condensation, or hidden leaks. The mold may thrive behind walls, under flooring, or in crawl spaces, feeding on tiny amounts of water that you can’t see or feel. According to Mold Removal Lab, many homes host mold growth in hidden pockets long before you notice discoloration or musty odors. In 2026 Mold Removal Lab Analysis shows that moisture can travel via capillary action through porous materials and building assemblies, enabling mold colonies to establish themselves in places you wouldn’t suspect. Recognizing this possibility is the first step to effective remediation and prevention.
Key takeaways:
- Hidden moisture can sustain mold growth even when surfaces seem dry.
- Porous materials like drywall, wood, and insulation are common reservoirs.
- Early detection reduces costly repairs and health risks.
Common triggers of moisture unseen by the naked eye
Even when a space feels dry, subtle moisture sources can exist. High humidity levels in bathrooms or kitchens, poor ventilation, or seasonal temperature swings can cause condensation that promotes mold growth over time. Spills or leaks that are quickly dried can still leave microscopic moisture trapped in porous materials. The Mold Removal Lab team emphasizes that routine checks for humidity and hidden leaks are essential, especially in basements, attics, and wall cavities. Monitoring with a humidity gauge helps you catch trends before they become visible mold.
Practical signals to watch for:
- Musty odors in sealed rooms
- Discoloration behind wallpaper or baseboards
- Condensation on windows after short periods of activity
- Warping or soft spots in wood framing or drywall
Hidden moisture sources to check in common problem areas
To tackle mold without moisture effectively, inspect likely hidden sources. Look behind sinks and toilets for slow leaks, check roof joints for hidden water intrusion, and inspect aroundHVAC ducts for condensation. Basements and crawl spaces are particularly prone to moisture accumulation due to poor drainage or ventilation. In many cases, the moisture sits in wall cavities or beneath flooring, so paneling or finishing materials can shield the issue from plain sight. The goal is to map potential moisture flow paths and prioritize testing where air can circulate moisture without obvious dampness. Remember, even a small amount of hidden moisture can sustain mold growth if left unchecked.
How to confirm mold presence when you can’t see moisture
Confirmation involves a combination of observations and basic testing. Start with a visual check for staining or fuzzy growth on surfaces; use a moisture meter to gauge relative humidity in suspected materials. An infrared camera can reveal temperature differences signaling moisture pockets behind walls. For visible surfaces, use a mild cleaning solution and a soft brush to assess whether staining repels or reappears. If you observe persistent musty odors, dark spots that reappear after cleaning, or suspect hidden leaks, it’s wise to document findings and consult an expert. Mold Removal Lab recommends documenting areas with photos and notes to inform any subsequent remediation plan.
Safe remediation steps you can take now (homeowner-friendly)
This section outlines practical, non-specialist steps you can start today while planning a full remediation. First, isolate the area with plastic sheeting to prevent spores from spreading. Wear proper PPE: N95 mask, gloves, and eye protection. Clean nonporous surfaces with a non-ammonia cleaner; for porous materials, do not scrub aggressively—use containment and replace if saturated. Ensure adequate ventilation but avoid creating airflow that spreads spores to other areas. After cleaning, use a dehumidifier or air conditioner to lower relative humidity, aiming for 40–50% if possible. Finally, address the moisture source—repair leaks, improve ventilation, and consider a continuous humidity monitor to prevent recurrence. The goal is to reduce moisture, remove visible growth safely, and prevent future colonization.
When to call a professional and what to expect
Not all mold situations are safe for DIY remediation. If the affected area is larger than about 10 square feet, if there is extensive mold behind walls, or if you have preexisting health concerns (asthma, allergies, or immunocompromised status), contact a licensed mold remediation professional. A pro can perform advanced testing, contain the area effectively, and ensure restoration is completed to code. Expect an assessment, a containment plan, and a post-remediation verification step to confirm the mold has been removed and humidity is controlled.
Preventing future mold growth: a practical maintenance plan
Prevention focuses on moisture control and routine inspections. Use exhaust fans in bathrooms and kitchens, repair roof leaks promptly, and ensure crawl spaces are well ventilated. A dehumidifier is often a wise investment in damp environments. Regularly check for signs of moisture around windows, pipes, and HVAC equipment. By combining moisture control with proactive maintenance, you can reduce the likelihood of mold returning after remediation. The Mold Removal Lab team emphasizes that prevention is more cost-effective than repeated cleanups and minimizes health risks over time.
Quick homeowner checklist for mold without moisture (single-page reference)
- Measure humidity and keep levels between 40–50%
- Inspect hidden areas (behind walls, under sinks, around vents)
- Use PPE and containment during cleanup
- Clean nonporous surfaces with approved cleaners; replace saturated porous materials
- Fix moisture sources promptly and monitor with a humidity meter
- Document findings with photos for reference
Authoritative sources and further reading
- Centers for Disease Control and Prevention (CDC): https://www.cdc.gov/mold/dampness_facts.htm
- Environmental Protection Agency (EPA): https://www.epa.gov/mold
- Occupational Safety and Health Administration (OSHA): https://www.osha.gov/molds
Tools & Materials
- Nitrile gloves(Disposable, powder-free; use once per area)
- N95 respirator(Particulate respirator; ensure proper fit)
- Safety goggles or eye shield(Protect eyes from spray and spores)
- Plastic sheeting for containment(Seal off area to prevent spread)
- HEPA vacuum with appropriate filters(For cleanup and debris collection)
- Soft brush or sponge(Gentle agitation; avoid damaging surfaces)
- Non-ammonia cleaner or soap(Use on nonporous surfaces)
- Disinfectant appropriate for mold(Only on nonporous surfaces; follow label directions)
- Trash bags (heavy-duty)(Seal and dispose of contaminated materials)
- Moisture meter or hygrometer(Track humidity levels in remediation area)
- Dehumidifier or desiccant packs(Reduce ambient moisture to target levels)
- Infrared camera or moisture detector (optional)(Helpful for locating hidden pockets)
Steps
Estimated time: 3-6 hours total
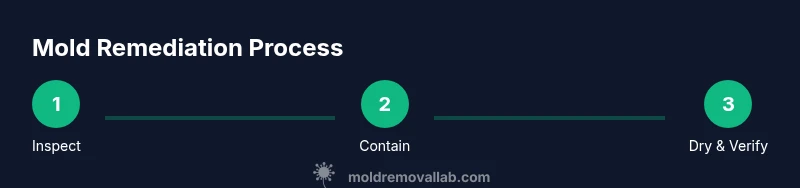
- 1
Inspect and document
Survey the space for visible growth and signs of moisture. Photograph affected areas from multiple angles and note locations that appear to be hidden behind walls or under fixtures.
Tip: Create a simple map of affected zones to guide containment and remediation. - 2
Contain the area
Seal off the space with plastic sheeting, creating a dedicated work zone to prevent spores from spreading. Close doors and seal any gaps around ducts or vents.
Tip: Keep doors to the work area closed during cleanup and avoid cross-traffic through living spaces. - 3
Stop the moisture source
Repair leaks, fix roof or plumbing issues, and improve ventilation to prevent ongoing moisture. If testing reveals high humidity, run dehumidification to bring RH into the 40–50% range.
Tip: Address all potential sources; unresolved moisture undermines remediation efforts. - 4
Clean nonporous surfaces
Wipe down hard, nonporous surfaces with a non-ammonia cleaner or soap and water. Dry thoroughly with clean cloths to prevent recolonization.
Tip: Do not mix cleaners; avoid steam cleaning porous materials which can drive spores deeper. - 5
Treat porous materials with care
Porous materials with mold should be removed and discarded if saturated. If salvage is possible, use containment and allow for thorough drying after cleaning.
Tip: When in doubt, replace saturated drywall or insulation rather than attempting salvage. - 6
Dry the area completely
Operate a dehumidifier and ensure airflow to dry out all affected zones. Recheck moisture levels to confirm RH remains in recommended range after remediation.
Tip: Set up continuous monitoring to catch moisture rebound quickly. - 7
Verify and restore
Once dry, re-inspect for any remaining growth or moisture pockets. Restore the space with proper finishes and ensure proper ongoing ventilation.
Tip: Keep records of the remediation process and post-work humidity readings.
FAQ
Can mold grow without visible moisture?
Yes. Mold can thrive with hidden moisture from humidity, condensation, or unseen leaks, especially in porous materials. Regular checks help catch problems early.
Yes, mold can grow without visible moisture, especially in hidden pockets behind walls or inside porous materials. Regular checks help catch issues early.
What are common hidden moisture sources?
Hidden moisture sources include leaks behind walls, condensation on cold surfaces, high indoor humidity, and moisture in crawl spaces or basements. These require testing to confirm presence.
Hidden moisture sources include leaks behind walls and high indoor humidity. Testing helps confirm where moisture resides.
Is bleach effective on mold in porous materials?
Bleach is often not effective on porous materials like drywall because it can kill surface mold but not penetrate deeply. Porous materials may require removal and replacement.
Bleach often doesn’t fully reach mold inside porous materials; removal and replacement may be needed for porous surfaces.
How long does remediation take?
Durations vary by area and severity. Small, contained areas may be cleaned in a few hours, while larger or hidden mold may take longer with professional help.
Remediation time varies; smaller areas may take a few hours, larger jobs can take longer and may require specialists.
Should I call a professional for mold problems?
If the problem is extensive, involves HVAC systems, or if you have health concerns, a professional remediation service is recommended. They can ensure proper containment and verification.
For large areas, complex systems, or health concerns, call a mold remediation pro to ensure safe and complete cleanup.
Is mold dangerous to health?
Certain mold exposures can impact health, especially for sensitive individuals. Reducing moisture and cleaning contaminated areas lowers risks.
Mold exposure can affect health, particularly for sensitive people. Controlling moisture and cleaning properly lowers risk.
Watch Video
The Essentials
- Identify hidden moisture sources before cleaning
- Contain and protect against cross-contamination
- Dry thoroughly and monitor humidity after remediation
- Call a professional for large areas or health risks