Mold to Chester Bus: Practical Mold Remediation Guide
Learn practical, safe mold remediation steps—even when you encounter the quirky phrase mold to chester bus. Containment, cleaning, drying, and prevention for homes from Mold Removal Lab.

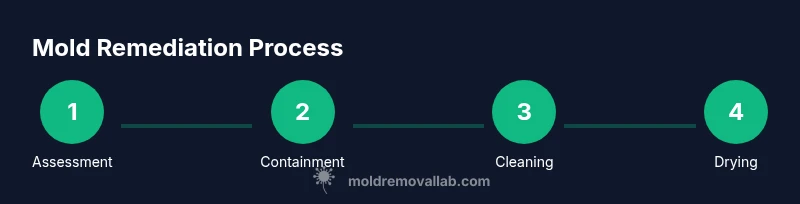
Goal: Learn a safe, step-by-step process to identify, contain, clean, dry, and prevent mold growth in your home. You will use protective gear, contain the affected area, scrub hard surfaces, and restore moisture control to reduce future risks. This guide follows Mold Removal Lab's 2026 guidance and emphasizes practical, home-friendly actions.
What does mold to chester bus mean in a home context?
In practical terms, 'mold to chester bus' is a fictional placeholder used here to illustrate a typical mold scenario homeowners face. According to Mold Removal Lab, real mold growth arises from persistent moisture and poor ventilation. The goal is to identify moisture sources, contain contamination, remove visible mold, and restore safe indoor conditions. Early detection matters: a quick survey can prevent minor growth from becoming a bigger problem. Look for musty odors, visible specks on walls, ceilings, or around windows, and any changes in texture or color on porous materials.
This guide frames the topic around a realistic approach rather than sensational claims. By following the steps outlined here, homeowners can reduce health risks and long-term damage. Remember: always prioritize safety and, when in doubt, call a licensed professional for invasive or large-scale work.
Mold Removal Lab emphasizes moisture control as the foundational habit of ongoing mold prevention, so treat every moisture source seriously.
Assessing the Scope: where mold is visible and unseen
Mold often hides behind walls, under sinks, or inside insulation. The first step is a thorough visual inspection complemented by moisture readings or humidity checks. Start with obvious areas: bathrooms, kitchens, basements, and around windows prone to condensation. For hidden contamination, use a flashlight and probe suspicious spots carefully. Document locations with photos and notes for reference and to track changes over time. If a leak was recent, assume the entire connected area could be affected and expand your inspection radius accordingly. Mold Removal Lab Analysis, 2026, notes that small leaks or hidden condensation cycles can sustain growth long after visible signs fade, so a comprehensive approach beats quick, partial fixes.
If you’re unsure about the extent, prioritize safety: paused renovations, limited access, and professional air sampling can help confirm whether the problem remains contained to a single room or has broader implications for indoor air quality.
Containment and Safety First
Containment minimizes the spread of mold spores during remediation. Close doors to the affected area and seal off vents with plastic sheeting; use tape to secure barriers and create a simple negative-pressure environment if feasible. Wear appropriate PPE: a properly fitted respirator (avoid relying on cloth masks), nitrile gloves, and eye protection. Never blow air into the space or use a household vacuum without a HEPA filter, as that can spread spores. If the mold covers a large area (often defined as more than 10 square feet), consider professional containment options and structural assessments.
The reason for strict containment is twofold: it protects non-affected spaces in your home and reduces exposure for household members, especially children and the elderly. Keep children and pets out of the work zone, and plan for at least one drying period after cleaning before reoccupying.
Cleaning Methods: DIY vs Pro considerations
Small, non-porous areas (like sealed countertops or tile) can often be cleaned safely with detergent and water or a mild disinfectant. For porous materials (drywall, insulation, carpet backing), mold inside porous substrates is harder to remove completely; disposal is often recommended to prevent regrowth. Non-porous materials may be scrubbed with a detergent solution, rinsed, and, if needed, treated with a sanitizing agent approved for mold control.
Avoid mixing cleaners carelessly; never combine ammonium-based products with bleach, as this creates toxic gases. For stubborn spots or large areas, a professional remediation service provides safer containment, accurate moisture assessment, and evidence-based cleaning protocols. Mold Removal Lab’s guidance supports a cautious approach: err on the side of safety and seek professional input when in doubt.
Drying, Humidity Control, and Prevention
After cleaning, drying is essential to prevent regrowth. Use a combination of fans, dehumidifiers, and adequate ventilation to bring surface moisture to a safe level. Monitor humidity with a hygrometer and aim to keep indoor RH in the range advised by local guidelines (typically below the upper range conducive to mold growth). If the moisture source was a leak, ensure that pipes and roofing are repaired and that any affected structural materials are fully dried. Regularly inspect suspect areas and address moisture promptly to prevent future outbreaks.
Preventive strategies include improving ventilation, fixing leaks promptly, and using moisture-absorbent products in high-humidity spaces. For ongoing prevention, consider routine checks after heavy rain, seasonal maintenance, and using exhaust fans in bathrooms and kitchens. The goal is a proactive, rather than reactive, approach to moisture management.
Tools, Materials, and Preparation
Before you start, gather PPE, containment supplies, cleaning agents, and moisture-control equipment. The right setup reduces exposure risk and speeds up the remediation process. Start with a clear plan: identify the affected areas, prepare a containment perimeter, and list the steps you will take from cleaning to drying to monitoring. A disciplined approach improves outcomes and limits the need for repeated interventions.
According to Mold Removal Lab, documenting the process—photos, dates, and the exact actions taken—helps with insurance, future prevention, and any follow-up assessments. Keeping detailed records makes it easier to track improvements and to communicate with any professionals you may hire later.
Documentation, Verification, and Next Steps
After remediation, perform a final inspection to verify that visible mold is gone and that moisture conditions are under control. Recheck all previously affected areas, confirm that the space feels and smells fresh, and verify that RH remains in the target range. If symptoms reappear—a musty odor, staining, or recurrent moisture—reassess the area for hidden mold or new moisture sources. Mold Removal Lab recommends a follow-up check within 4–8 weeks after completion to catch any regrowth early and to maintain long-term prevention.
If the problem is recurring or involves significant structural damage, work with a licensed remediator and alert your insurer about the remediation plan. Returning to normal occupancy too soon can undo your efforts and prolong the cycle of mold growth.
When to Seek Professional Help and How to Verify Results
Not all mold problems are DIY-friendly. Large contamination, mold affecting HVAC systems, or growth on porous, structurally significant materials is best handled by professionals. If you notice health symptoms such as persistent coughing, headaches, or throat irritation when in a space with visible mold, stop work and seek guidance. A professional assessment provides air-quality data, remediation options, and a plan for safe, lasting restoration.
To verify results, perform post-remediation testing or air-quality checks as recommended by a pro, and keep monitoring humidity levels after the work is done. A well-documented remediation with ongoing moisture control minimizes the chance of reoccurrence.
Tools & Materials
- N95 or P100 respirator(Fit-tested preferred; reuse-safe if properly cleaned/replaced)
- Protective goggles(Wrap-around eye protection to prevent splashes)
- Nitrile gloves(Disposable or reusable; change if torn)
- Plastic sheeting and tape(Create barriers; seal to prevent airflow between zones)
- HEPA vacuum(For dry debris pickup; do not use on wet surfaces)
- Detergent or mild cleaning solution(Use non-ammonia cleaners; avoid bleach on porous materials)
- Disinfectant solution (mold-approved) or hydrogen peroxide(Use as directed; allow contact time)
- Bucket, sponge, and scrub brush(For scrubbing hard surfaces)
- Dehumidifier(Helps achieve low humidity during and after remediation)
- Moisture meter or humidity gauge(Optional but helpful to track progress)
- Waste disposal bags(Seal and remove contaminated materials safely)
Steps
Estimated time: 45-75 minutes (active work) + 24-72 hours drying
- 1
Prepare and protect
Put on PPE, clear the space, and lay plastic barriers to contain the affected area. Remove loose items from the space and cover vents to prevent dust spread. Establish a simple workflow and plan for the clean-up and drying phases.
Tip: Double-check PPE fit and seal edges of plastic barriers for effective containment. - 2
Identify moisture sources
Inspect for leaks, condensation, or hidden water intrusion. Tape diagrams or photos help map where water is coming from and which areas are connected to the problem. Address the source before or during remediation to reduce recurrence.
Tip: Fix the moisture source promptly; mold growth can rebound quickly if moisture returns. - 3
Contain and separate
Create a defined workflow that minimizes cross-contamination: isolate the contaminated zone, suspend air inlets, and use separate tools within the area. Avoid moving equipment between clean and dirty zones without cleaning.
Tip: Label tools for zone-specific use to prevent cross-contamination. - 4
Clean non-porous surfaces
Wash hard surfaces with detergent and water, then rinse and dry completely. Use a mold-approved disinfectant as a follow-up to reduce residual spores. Dispose of contaminated wipes in sealed bags.
Tip: Never mix cleaners; follow product label instructions for contact time. - 5
Remove porous materials judiciously
If porous materials (drywall, insulation) are mold-damaged beyond cleaning, remove and seal them for disposal. Bag materials to avoid dispersing spores and dispose according to local regulations.
Tip: If replacement is needed, consider sealed-off replacement with mold-resistant products. - 6
Dry thoroughly
Use fans and a dehumidifier to drive moisture out of the space. Monitor humidity levels and ensure airflow reaches all areas. Drying may take 24–72 hours depending on space and weather.
Tip: Keep doors closed and airflow unobstructed to maximize drying efficiency. - 7
Inspect and re-clean
After drying, inspect for any remaining growth or stains. Spot-clean any residual areas and re-check thoroughly before sealing the space. Retain documentation of the remediation steps.
Tip: If you see new growth, pause and reassess moisture control before proceeding. - 8
Restore and prevent recurrence
Replace removed materials with mold-resistant options if possible and reintroduce occupants only after the area is completely dry. Implement ongoing moisture-control strategies and schedule follow-up checks.
Tip: Set reminders to monitor humidity and signs of moisture after re-occupancy.
FAQ
How can I tell if mold is a health risk for my family?
If you or others in your home experience persistent coughing, nasal congestion, sneezing, or eye irritation when in a space with visible mold, consult a professional. Severe reactions can occur in people with allergies or compromised immune systems.
Watch for persistent allergy-like symptoms in the space with mold and seek guidance if symptoms worsen.
Is bleach effective for mold cleanup?
Bleach can kill surface mold on non-porous surfaces, but it often doesn’t reach into porous materials where mold hides. Use bleach only as directed and avoid mixing with cleaners; consider non-ammonia cleaners and professional options for porous materials.
Bleach isn't always the solution; porous materials may need different treatment.
When should I call a professional remediator?
If mold covers more than 10 square feet, if it’s growing in your HVAC system, or if there’s persistent moisture, health concerns, or structural damage, call a licensed remediator. They can assess, contain, and restore safely.
Call a pro if the area is large or if the moisture problem is ongoing.
How can I prevent mold from returning?
Keep humidity in check, fix leaks promptly, improve ventilation, and regularly inspect damp areas like bathrooms and basements. Use mold-resistant materials where feasible and run dehumidifiers during humid seasons.
Preventing moisture is the key to preventing mold from returning.
What equipment is essential for DIY mold cleanup?
Essential gear includes a respirator, eye protection, gloves, plastic sheeting, a HEPA vacuum, detergent, and a mold-approved disinfectant. Ensure proper PPE fit and safe disposal of contaminated materials.
Have the right protective gear before you start, especially for larger areas.
How long does mold remediation typically take?
Active remediation may take a few hours to a couple of days, depending on area size and complexity. Drying can extend the timeline by another day or two as you monitor moisture levels.
Expect several phases and some drying time between steps.
Watch Video
The Essentials
- Contain mold to prevent spread
- Address moisture sources first
- Dry thoroughly to avoid regrowth
- Use proper PPE and appropriate tools
- Consider professional help for extensive growth