How to Use a Mold Stain Remover: A Practical Guide
Learn how to choose and use a mold stain remover safely. This guide covers surface types, safety, testing, and prevention to keep your home healthy.

With the right mold stain remover, you can safely lift mildew and staining from walls, grout, fabric, and soft surfaces. This quick guide covers how to select a remover, test compatibility, apply safely, and follow up with prevention. You’ll learn when to DIY and when to call a pro, plus essential safety steps.
What mold stain remover is and when to use it
mold stain remover products are formulated to lift mildew and mold stains from various surfaces while inhibiting regrowth when used correctly. They come in sprays, foams, gels, and paste forms, and vary in active ingredients such as hydrogen peroxide, sodium carbonate, or enzyme-based cleaners. When used on porous materials like drywall, fabrics, or wood, the effect may differ and may require gentler formulations or professional assessment. According to Mold Removal Lab, selecting a product that is labeled for your target surface and following the manufacturer's instructions reduces risk and improves outcomes. Before you begin, identify the stain size, the substrate, and whether there is active moisture behind the stain. If moisture is ongoing, address it first; a remover alone cannot fix a moisture problem. This mold stain remover approach prioritizes surface compatibility and moisture control to prevent recurrence.
Types of mold stain removers: pros, cons, and when to use
There are several categories of mold stain removers, each with its own strengths and limitations. Hydrogen peroxide solutions are popular for painted and non-porous surfaces because they break down organic stains without harsh fumes. Enzymatic cleaners excel on organic residues like fabrics or carpets but may require longer dwell times. Sodium carbonate-based cleaners (often marketed as borax blends) can help deodorize and inhibit regrowth on porous materials. Commercial products labeled for specific surfaces (tile, grout, drywall, upholstery) provide targeted efficacy. For delicate materials like wallpaper or natural fibers, test a small area first and consider professional products designed for porous substrates. Always follow label directions and avoid mixing cleaners, which can create harmful gases or reactions. Based on Mold Removal Lab analysis, surface compatibility and product labeling are critical to effective results.
Surface compatibility and testing
Surface testing is a practical first step to avoid damage and ensure effectiveness. On painted walls, test on an inconspicuous corner by applying a small amount of remover and waiting 5–10 minutes to observe colorfastness and any adverse reaction. For grout and ceramic tiles, apply a small amount along the grout line and scrub with a soft brush to test abrasion and color change. On fabrics, perform a spot test in an inside seam or hem where wear is minimal. Porous materials like drywall or wood may require gentler cleaners or professional remediation if stains are deeply embedded or spreading underlying moisture. If you notice ongoing moisture or a musty odor after testing, address moisture sources before continuing.
Safety and PPE
Personal protective equipment (PPE) is non-negotiable when dealing with mold stains. Wear nitrile gloves, eye protection, and a mask (N95 or better) to guard against splashes and airborne particles. Ventilate the area well by opening windows and using fans pointed away from the work zone. Remove children and pets from the area during treatment. If you have allergies or asthma, consider a respirator with appropriate filters and limit exposure. Store cleaners safely, away from heat sources and food areas. Mold growth often indicates moisture intrusion, so tackling the moisture problem is essential for lasting results.
Cleaning strategies by surface
Walls and painted surfaces: apply remover in a narrow band from the outside edge toward the center, allow to dwell per label, then wipe with a damp cloth and dry thoroughly. Tiles and grout: use a soft brush to agitate the cleaner into the grout and rinse with clean water; dry completely to prevent regrowth. Fabrics and upholstery: test colorfastness, apply to stain, and avoid soaking; after treatment, air dry away from direct sunlight to prevent fading. Wood surfaces: apply sparingly to avoid saturating the wood; wipe excess and dry promptly. Always finish by drying the area completely and checking for residual staining after it dries.
DIY vs professional remediation: when to escalate
Small, contained stains on non-porous surfaces without a moisture problem are often manageable DIY projects. If stains cover large areas (for example, more than 10 square feet), if growth is spreading behind walls, or if moisture sources persist, professional remediation is advised. Professionals can assess hidden moisture, use remediation-grade cleaners, and help seal surfaces to prevent recurrence. If you’re unsure about substrate type or the potential for structural damage, err on the side of professional guidance. Mold Removal Lab emphasizes that proper moisture control is the cornerstone of effective mold removal and prevention.
Prevention and maintenance
Preventing mold regrowth is easier with a proactive maintenance routine. Address moisture sources such as leaks, condensation, and poor ventilation. Use exhaust fans in kitchens and bathrooms, repair leaks promptly, and keep indoor relative humidity below 50% where possible. Regular inspections of crawlspaces, basements, and attics help catch problems early. Consider mold-resistant primers and paints in high-humidity areas. Finally, use a dedicated mold stain remover only when stains reappear after cleaning and moisture is under control.
Troubleshooting common issues
If staining recurs after cleaning, the issue is almost always ongoing moisture or an absorbent substrate that retains moisture. For non-porous surfaces, check for residue from cleaners and wipe with clean water to remove any film that might attract dirt. If discoloration remains obscure or bleeds through, re-evaluate the stain depth and surface condition; sometimes repainting with a mold-resistant primer is necessary after thorough drying. In rare cases, persistent mold indicates structural moisture or hidden growth; a professional assessment is warranted to prevent health risks.
Quick-start checklist
- Identify stain type and surface
- Gather PPE and chosen mold stain remover
- Test on a hidden area
- Ventilate and protect surroundings
- Apply cleaner and dwell as directed
- Rinse, dry, and inspect for remaining stain
- Address moisture sources to prevent recurrence
Tools & Materials
- Mold stain remover product (surface-specific)(Choose a product compatible with the surface; follow label directions)
- Protective gloves(Nitrile preferred; avoid latex if you have sensitivities)
- Safety goggles(Protect eyes from splashes)
- Mask or respirator (NIOSH-approved, or at least N95)(Protect lungs from mold spores and cleaner fumes)
- Ventilation (open windows, fans)(Promotes air exchange and faster drying)
- Soft-bristle brush(For scrubbing grout and textured surfaces)
- Non-abrasive sponge or microfiber cloth(For applying and wiping residues)
- Bucket and clean water(Rinse steps and reduce residue)
- Drying towels or microfiber cloths(Absorb moisture to prevent regrowth)
- Plastic sheeting or drop cloth(Protect nearby floors and furnishings)
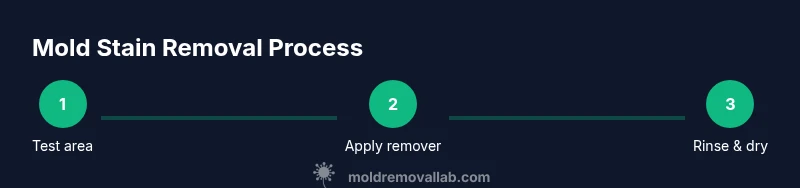
Steps
Estimated time: 30-60 minutes (plus drying time)
- 1
Test a small area first
Apply a small amount of remover to an inconspicuous spot to check colorfastness and surface reaction. If there is no adverse change after 5–10 minutes, you can proceed. This minimizes damage and avoids surprises.
Tip: If color shifts or material absorbs the cleaner aggressively, stop and choose a gentler option. - 2
Ventilate and protect the work area
Open nearby windows, turn on an exhaust fan, and keep pets and children away. This lowers inhalation exposure and speeds drying. Lay down a protective barrier to catch drips.
Tip: Work from the outer edge of the stain inward to avoid spreading it. - 3
Apply the remover to the stain
Following the label, apply a thin, even layer over the stained area. Avoid oversaturation on porous materials. Use a brush or cloth to ensure coverage without pooling.
Tip: Do not mix cleaners; separate products if more than one type is recommended. - 4
Let the cleaner dwell
Allow the product to work for the recommended dwell time, typically 5–10 minutes on non-porous surfaces. Do not let it dry completely before wiping. This step helps loosen embedded staining.
Tip: If in doubt, test a shorter dwell time first and reassess staining. - 5
Rinse or wipe away and dry
Rinse with clean water if the product requires it, or wipe thoroughly with a damp cloth. Dry the area completely with towels and, if possible, use a fan to speed drying. Inspect for any remaining stain.
Tip: Ensure no moisture remains behind baseboards, seams, or grout lines. - 6
Reassess and decide on next steps
After drying, check if the stain is gone. If not, you may reapply once more or consider professional remediation for stubborn stains or deep-set mold on porous substrates.
Tip: Persistent staining often indicates moisture problems that require addressing at the source.
FAQ
Is a mold stain remover safe for kids and pets?
Yes, when used with PPE, in a well-ventilated area, and kept out of reach of children and animals. Always follow the product label. If exposure is a concern, delay cleaning until pets or children are removed from the space.
Yes—use PPE, ventilate, and keep kids and pets away during cleaning.
Can I use bleach to remove mold stains?
Bleach can help with certain non-porous surfaces, but it does not address mold growing deeply in porous materials. It may also damage some finishes. Use surface-specific products and follow label directions.
Bleach may lighten stains on non-porous surfaces but isn't always effective for mold in porous materials.
How long does it take for mold stain remover to work?
Dwell times vary by product and surface, typically from 5 to 10 minutes on non-porous surfaces. For porous materials, you may need longer dwell times or repeat applications. Always follow the label for accurate timing.
Most removers work in minutes, but porous surfaces may require longer dwell times or repeats.
When should I call a professional?
If mold covers a large area, is spreading behind walls, or moisture keeps returning, professional remediation is advised. A pro can identify hidden moisture, treat the source, and prevent regrowth.
Call a professional if the mold is spreading, moisture returns, or the area is large.
Should I repaint after removing mold stains?
Yes, after the area is completely dry and the mold is removed. Use a mold-resistant primer and paint to help prevent future staining.
Repaint only after drying; use mold-resistant primer and paint.
The Essentials
- Assess the stain and surface before choosing a remover.
- Test a small area to prevent damage.
- Ventilate and use PPE for safety.
- Follow dwell times and rinse thoroughly.
- Dry completely and monitor for regrowth.
- Address moisture sources to prevent recurrence.