Mold Spray Wood: Safe and Effective Mold Remediation for Wood Surfaces
Learn how to safely use mold spray wood products to remove mold from wood surfaces, prevent regrowth, and protect health with practical, step-by-step guidance.

This guide shows how to safely treat mold on wood with appropriate mold spray products, select the right formula for wooden surfaces, and prevent recurrence. You’ll learn prep steps, safe application techniques, drying times, and follow-up maintenance. By following these steps, homeowners and renters can restore wood, reduce health risks, and keep mold from returning.
Understanding mold on wood
According to Mold Removal Lab Team, mold on wood appears most often where moisture persists and wood remains damp. Wood is porous and can trap moisture, creating a food source for mold spores. Distinguishing surface mold from embedded mold matters because the cleanup approach differs. In homes, leaks, humidity, and poor ventilation create prime conditions. You’ll learn how improved airflow, moisture control, and careful cleaning reduce the chance of regrowth. Expect to see fewer stains, a clearer odor profile, and drier wood after proper treatment.
How mold sprays work on wood
Mold sprays for wood typically combine surfactants that help loosen attachment of mold to porous surfaces with antimicrobial agents that reduce viable mold spores. On wood, the product must both contact the surface and penetrate the grain to be effective, all while avoiding damage to finishes. Proper use relies on following label directions, including dwell times and ventilation. While sprays can reduce visible growth and odors, they do not fix moisture problems; without addressing leaks or humidity, mold is likely to return. The Mold Removal Lab Team emphasizes testing a small area first to ensure no adverse reaction with the wood finish.
Choosing the right mold spray for wood
Choose products labeled safe for wood and porous surfaces, with clear instructions for use on wood finishes. Compare active ingredient types (e.g., hydrogen peroxide, quaternary ammonium compounds) and check for compatibility with varnishes, stains, or paints. Avoid solvent-heavy formulas on delicate finishes, and prefer products that specify non-bleach options for woods where discoloration is a risk. Always read the label for surface suitability and ventilation requirements. Mold Removal Lab Analysis, 2026 notes that labeling clarity and wood-appropriate guidance are strong predictors of successful outcomes.
Prep and safety precautions
Before you begin, put on PPE: nitrile gloves, safety goggles, and an appropriately rated mask. Ventilate the area with open windows or a box fan, and protect floors with a drop cloth. Remove nearby items that could be damaged by drips or mist. Test the product on a hidden spot first to check for any color change or finish damage. If wood is heavily damp or mold growth is extensive, prioritize drying the area and addressing moisture sources before treating visible mold.
Application considerations by wood type
Finished or sealed wood (painted or varnished) often tolerates a gentle spray and light wiping if the finish is compatible. Unfinished or porous wood (softwoods or bare plywood) can absorb cleaners more quickly, so apply sparingly and monitor for finish dissolution or staining. For painted or stained wood, avoid aggressive scrubbing that can lift flakes; opt for light agitation and a gentle wipe. In all cases, ensure the moisture source is controlled and avoid saturating wood, which can trap moisture and encourage regrowth.
Cleaning, drying and storing treated wood
After treatment, wipe away excess moisture and residue with clean, lint-free cloths. Allow wood to dry completely in a well-ventilated space before returning items or applying a sealant. If moisture returns or wood remains damp to touch after several hours, re-evaluate humidity control and potential leaks. Store leftover spray in a cool, dry place away from children and pets, and label any opened containers.
Preventing future mold on wood
Prevention hinges on moisture control: fix leaks promptly, improve ventilation, and run a dehumidifier in damp spaces. Consider applying a wood sealant or finish after the treatment to reduce future moisture absorption. Regular inspections of basements, crawl spaces, kitchens, and bathrooms help catch problems early. Keep wood surfaces relatively dry and clean to minimize mold food sources, and maintain a routine cleaning schedule focusing on high-humidity areas.
When to call a professional
If mold covers a large area, appears embedded deep within the wood, or you suspect structural damage, professional remediation is advisable. A licensed contractor can assess moisture sources, replace compromised wood, and ensure proper containment to prevent cross-contamination. If you or household members have allergies or asthma, or if the infestation recurs after DIY treatment, seek expert help promptly.
Common myths and facts
Myth: Bleach alone cures mold on wood. Fact: Bleach can kill surface mold but often does not penetrate porous wood and can damage finishes. Myth: Mold means wood is ruined forever. Fact: With proper remediation and moisture control, wood can be saved; severe decay may require replacement. Myth: Any spray labeled for mold works on wood. Fact: Wood-specific guidance is important to avoid finish damage and ineffective treatment.
Tools & Materials
- Mold spray wood product (wood-safe)(Select a product labeled safe for wood and porous surfaces)
- Spray bottle or trigger bottle(For even application)
- Soft-bristle brush(Gently agitate mold from grain without scratching)
- Lint-free cloths(Wipe and dry surfaces)
- Nitrile gloves(Protection from irritants)
- Safety goggles(Eye protection)
- N95 respirator(Respiratory protection in enclosed spaces)
- Plastic drop cloth or plastic sheeting(Protect surrounding areas)
- Box fan or dehumidifier (optional but recommended)(Improve airflow and drying)
- Dish soap(Initial light cleaning if surface dirt is present)
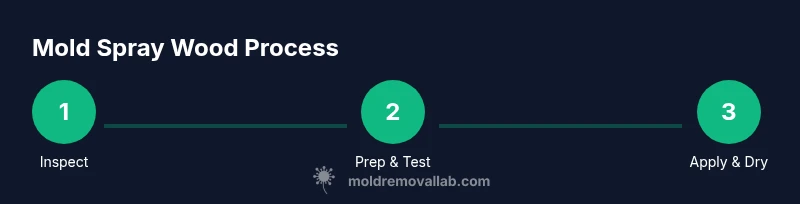
Steps
Estimated time: 30-60 minutes
- 1
Inspect area and protect surroundings
Identify all mold-affected wood and outline a protected workspace with drop cloths. Remove nearby items and open ventilation. This minimizes contamination and keeps other surfaces dry.
Tip: Move delicate items to a dry, safe area before starting. - 2
Test product on a hidden spot
Apply a small amount of the mold spray to a inconspicuous area to confirm it won’t discolor or damage the finish.
Tip: If there’s any color change, choose a different wood-safe product. - 3
Apply mold spray to affected wood
Spray lightly over the mold-affected areas, ensuring even coverage. Do not oversaturate unfinished wood.
Tip: Keep a light mist and avoid soaking the grain. - 4
Wait for the dwell time
Let the product sit for the manufacturer-recommended time to allow contact with mold spores.
Tip: Do not wipe immediately; proper contact improves effectiveness. - 5
Gently scrub and lift mold
Using a soft-bristle brush, gently lift mold from the surface without damaging the wood finish.
Tip: Work with the grain and avoid aggressive scrubbing on delicate finishes. - 6
Wipe and dry the wood
Wipe away residue with a clean cloth and allow the wood to dry completely in a ventilated area.
Tip: If odor lingers, increase airflow until the area is completely dry. - 7
Seal or refinish if needed
Apply a protective sealant or appropriate finish after the wood is fully dry to reduce future moisture absorption.
Tip: Choose a sealant compatible with the existing finish.
FAQ
Can I use bleach on mold on wood?
Bleach may kill surface mold but often does not penetrate porous wood and can damage finishes. For wood, look for products labeled safe for wood and follow the label's directions.
Bleach on wood is usually not enough; pick a wood-safe mold spray and follow the label for best results.
Is mold on wood dangerous?
Mold exposure can affect health, especially for sensitive individuals. Reducing moisture and removing mold growth promptly helps minimize risks.
Mold can affect health, particularly for sensitive people, so address it promptly and safely.
How long should wood dry after spraying?
Drying times vary with humidity and ventilation, but plan for several hours to a full day in a well-ventilated space before re-coating or reoccupying the area.
Dry wood fully in a ventilated area, which may take several hours to a day depending on moisture levels.
Will mold return after treatment?
If moisture sources are not addressed, mold can return. Combine treatment with moisture control to reduce recurrence.
Only if humidity and leaks persist; fix the source and monitor the area.
Can I stain or finish wood after treatment?
Yes, but ensure wood is completely dry and compatible with the finish. Test a hidden spot again before full application.
Yes—you can finish after it’s completely dry, but test first on a hidden patch.
When should I call a professional?
Call a professional if mold covers a large area, recurs after treatment, or if you suspect structural damage or ongoing leaks.
If it’s widespread or keeps coming back, bring in a professional.
Watch Video
The Essentials
- Inspect moisture sources before treating wood.
- Choose wood-safe mold sprays with proper labeling.
- Apply with minimal saturation; follow dwell times.
- Dry thoroughly and consider sealing after treatment.
- Maintain humidity control to prevent reoccurrence.