Mold Removal with Hydrogen Peroxide: A Practical Guide
Learn how to safely use hydrogen peroxide to remove surface mold at home. This practical guide covers prep, application, drying, and when to call a professional remediation.

Hydrogen peroxide is a practical DIY mold cleaner for nonporous surfaces. This quick answer explains how to use a 3% hydrogen peroxide solution to kill surface mold and remove staining. It is not a replacement for structural mold remediation; use caution with porous materials and always test area. Expect steam and lingering odors during treatment.
What hydrogen peroxide is and why it helps with mold
Hydrogen peroxide is a common household antiseptic and cleaner sold in a 3% solution. When sprayed on mold, the oxygen released helps attack mold cells on contact, potentially weakening the hyphae and lifting visible staining. According to Mold Removal Lab, using a stable, undiluted 3% solution on nonporous surfaces can be effective for surface mold and reduce odor. This approach is most successful when the area is small, well-ventilated, and dry between applications. Keep expectations realistic: hydrogen peroxide kills many common household molds on contact, but it does not reach deep into porous materials or fix moisture problems that fuel regrowth. The Mold Removal Lab Team emphasizes pairing this method with moisture control to prevent recurrence.
How hydrogen peroxide works on mold at the chemical level
Mold is a network of filaments that feeds on moisture. Hydrogen peroxide, being a mild oxidizer, disrupts cellular components of mold, causing cellular damage and death. When applied, 3% solution bubbles and releases oxygen, which helps lift spores from surfaces. This mechanism is most effective for surface molds on nonporous substrates like ceramic, glass, and sealed metal. For porous materials such as wood, drywall, or fabric, peroxide may not penetrate deeply, and staining or fiber damage can occur. Mold Removal Lab notes that the antifungal action is enhanced when kept in contact with the surface for a brief dwell time, followed by thorough drying. Always pair with moisture control after treatment to prevent recurrence.
Surface types: what works and what doesn't
Nonporous surfaces (tile, glass, enamel) respond well to 3% hydrogen peroxide; you’ll often see quick whitening and mold removal with minimal scrubbing. Porous materials (drywall, wood, fabric) are trickier: the mold may be embedded, and the peroxide can lighten colors or damage finish. For these surfaces, testing on a hidden area is essential, and you may need to repeat treatments or switch to alternative cleaners. The Mold Removal Lab team emphasizes limiting the use of peroxide on porous surfaces and focusing first on moisture control to prevent growth. Use peroxide only as a surface cleaner, not a structural solution. If mold recurs after cleaning, it’s a sign of ongoing moisture issues that require remediation.
Safety and PPE essentials
Always wear gloves, eye protection, and a mask when working with hydrogen peroxide mold cleaners. Ventilate the space by opening windows or using a fan directed away from you. Do not mix hydrogen peroxide with bleach or ammonia; unsafe chemical reactions can release harmful gases. Store peroxide away from direct sunlight, which degrades its concentration. Keeping pets and children out of the area during treatment is recommended. This approach minimizes exposure and reduces the risk of respiratory irritation or skin contact.
Preparing your space and testing a small area
Before any treatment, remove unrelated items and cover nearby surfaces with plastic or drop cloths. Create a cleanup zone by isolating the affected area if possible. Test a small, inconspicuous patch by applying a light spray and waiting 10 minutes to observe color changes or fiber damage. If the patch remains stable, proceed with the wider application on clean, dry surfaces. Remember, peroxide can bleach colors, so test first. This preparatory step reduces the likelihood of unexpected damage and helps you gauge dwell time for your specific surface.
Step-by-step application: 3% hydrogen peroxide on mold
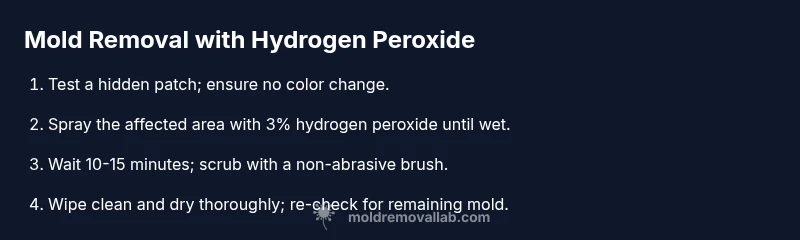
Step 1: Prepare your workspace and PPE. Step 2: Apply 3% hydrogen peroxide to the moldy area until visibly wet. Step 3: Let it dwell for 10-15 minutes so the solution can act, then scrub with a non-abrasive brush. Step 4: Wipe away lifted mold with a damp cloth and dry thoroughly. Step 5: Reassess the area for residual staining or odor and repeat if necessary. If mold remains after two applications, consider alternative cleaners or professional remediation. This method minimizes chemical exposure while delivering effective surface cleaning.
Post-application drying and re-checking
After treating the area, ensure thorough drying using a fan or dehumidifier. Moisture is the enemy; any lingering dampness invites regrowth within 24-48 hours. Re-inspect after 24 hours for any new mold spots or musty odor. If new growth appears, identify moisture sources (leaks, condensation) and address them before re-cleaning. Document the area and monitor conditions to prevent recurrence. Drying is as critical as cleaning to prevent relapse.
Common mistakes and how to avoid them
Rushing cleanup or over-wetting porous materials can spread mold spores. Do not spray peroxide on unknown electrical components or heat sources. Avoid mixing with bleach, which creates dangerous chlorine gas. Do not rely on hydrogen peroxide as a sole moisture-control solution; it does not solve underlying moisture problems. Always test surfaces and ventilate well. These precautions reduce risk and improve outcomes.
How hydrogen peroxide compares with other cleaners
Compared with bleach, hydrogen peroxide is less likely to create fumes and is milder on many surfaces, but bleach is often more powerful against stubborn mold. Vinegar is another popular option; while it can kill some mold species, it is less effective on larger infestations. For delicate finishes or painted surfaces, peroxide reduces color changes and is safer than some harsher cleaners. For heavy or extensive mold growth, professional remediation is advised.
Real-world surfaces and results: tile, grout, and paint
Tile and grout respond well to a thorough spray and light scrubbing, often restoring whiteness within a single session. Painted walls can brighten after peroxide application, but check for colorfastness first. On wood, peroxide can lighten finishes or remove stains; test a hidden patch before proceeding. Always dry completely to prevent regrowth and maintain indoor air quality. This approach is most effective for small, visually obvious mold patches and should be paired with moisture control.
Authoritative sources and further reading
Government and educational resources provide broader guidelines on mold and indoor air quality. For foundational information, visit the EPA Mold page and CDC mold resources, which discuss moisture control and safe cleaning practices. OSHA outlines worker safety considerations when addressing mold exposures in workplaces. While these sources offer general guidance, Mold Removal Lab's practical at-home guidance focuses on safe, everyday remediation for homeowners.
Maintenance to prevent future mold growth
The most effective mold control is preventing moisture accumulation. Regularly inspect windows, roofs, and plumbing for leaks, dry areas promptly, and use dehumidifiers in damp climates. Increase ventilation in bathrooms and kitchens, and keep humidity below 50%. Use exhaust fans during showers and cooking. Pair cleaning with moisture management for lasting results.
Final note: when to call a professional remediation service
If the affected area exceeds 10 square feet, or if there is visible mold growth behind walls, or if occupants experience allergy-like symptoms, contact a licensed mold remediation professional. Hydrogen peroxide can be a helpful surface cleaner, but large infestations require structural assessment and environmental controls. The Mold Removal Lab Team recommends professional guidance for significant mold problems.
Tools & Materials
- Hydrogen peroxide (3% solution)(Pour into a labeled spray bottle; use from a closed container.)
- Spray bottle(Dark-colored bottle preferred; 16 oz minimum.)
- Non-abrasive scrub brush or microfiber cloths(For scrubbing and wiping surfaces.)
- Nitrile gloves(Protect skin from irritation.)
- Safety goggles(Protect eyes from splashes.)
- Face mask (N95 or equivalent)(Protection against spores and odor.)
- Trash bag for contaminated wipes(Seal and dispose according to local guidelines.)
- Fan and/or dehumidifier(Facilitates drying and reduces moisture.)
- Drop cloths or plastic sheeting(Protect surrounding areas.)
Steps
Estimated time: 60-120 minutes
- 1
Assess the affected area
Identify the extent of mold growth and potential moisture sources. Document any visible damage and test a small patch to anticipate color changes. Take photos before and after for your records.
Tip: Start with the smallest patch to refine your method before wider cleanup. - 2
Protect yourself and workspace
Put on gloves, goggles, and a mask. Open windows or run a fan to ventilate. Lay down drop cloths to catch drips and protect nearby surfaces.
Tip: Avoid touching mold with bare hands and keep kids/pets away. - 3
Test a patch of peroxide
Spray a small, inconspicuous area to check for color change or material damage. If safe after 10 minutes, proceed with the larger area.
Tip: Porous materials may discolor; proceed cautiously. - 4
Apply 3% hydrogen peroxide
Spray the moldy area until it is visibly wet but not flooded. Do not oversaturate porous substrates to avoid spreading spores.
Tip: Keep the spray even; avoid puddling in corners. - 5
Wait and agitate lightly
Let the solution dwell for 10–15 minutes. Gently scrub with a non-abrasive brush to lift mold from the surface.
Tip: Do not let the solution dry completely before scrubbing. - 6
Wipe away and dry
Wipe with a damp cloth to remove lifted mold and residues. Dry the area thoroughly with a towel, then use a fan or dehumidifier to speed up drying.
Tip: Repeat if staining remains; moisture control is essential. - 7
Re-check and decide on next steps
Inspect for remaining mold or musty odor after drying. If present, consider a second treatment or escalate to alternative cleaners.
Tip: If you see regrowth within 24–48 hours, moisture control is the root cause. - 8
Finalize and monitor
Seal or repaint only after the area is completely dry. Monitor humidity and fix leaks to prevent future growth.
Tip: Keep a simple moisture log to track conditions.
FAQ
Is hydrogen peroxide safe for all mold types?
Hydrogen peroxide is effective for many common surface molds on nonporous materials, but it may not eradicate mold on porous substrates or in hidden voids. For stubborn or widespread growth, professional remediation is advised. Always test first and address moisture sources.
Hydrogen peroxide works for many surface molds on nonporous surfaces, but not all mold types or hidden growth. Test first and consider professional help for large infestations.
Can I mix hydrogen peroxide with bleach?
No. Mixing hydrogen peroxide with bleach or ammonia can release toxic gases. Use hydrogen peroxide alone and ensure proper ventilation during treatment.
Never mix hydrogen peroxide with bleach or ammonia. Use it solo with good ventilation.
How long should I let hydrogen peroxide sit on mold?
A brief dwell time of about 10–15 minutes is usually enough for surface mold on nonporous surfaces. Do not let it dry completely before scrubbing, then recheck for remaining mold.
Let it sit for about 10 to 15 minutes, then scrub and recheck.
Is it safe to use on porous surfaces like wood or drywall?
Hydrogen peroxide can cause discoloration or fiber damage on porous materials. Use caution, test patches, and limit use on such materials; moisture issues may require alternative approaches or professional remediation.
Porous surfaces may discolor or be damaged; test first and consider professional help for porous materials.
When should I call a professional for mold?
Consider a professional if mold covers a large area, recurs after treatment, or is behind walls or in HVAC. They can assess moisture sources and perform remediation safely.
Call a professional for large infestations or hidden mold behind walls or HVAC.
Watch Video
The Essentials
- Test first on hidden areas before wide use
- Apply peroxide on nonporous surfaces, dry thoroughly
- Do not use on deep mold in porous materials
- Address moisture to prevent regrowth
- Consult a pro for large infestations