Mold Removal Cincinnati: A Practical Home Guide
A comprehensive, step-by-step mold removal guide tailored for Cincinnati homes. Learn how to identify mold, safely remove it, dry living spaces, and prevent future outbreaks with practical tips from Mold Removal Lab.

This guide helps homeowners in Cincinnati identify mold, decide when to DIY vs. hire a pro, and follow safe remediation steps. You’ll learn practical, city-specific considerations, essential safety gear, and a clear, step-by-step plan to reduce moisture, remove mold, and prevent future growth. Mold Removal Lab supports practical, health-first methods for homes in Cincinnati.
Understanding mold in Cincinnati homes
Mold growth in the Cincinnati area often stems from indoor moisture and humidity, which can be exacerbated by seasonal rain, basement dampness, or poorly ventilated bathrooms. In many Cincinnati homes, mold isn’t a single event but a recurring issue tied to condensation, roof leaks, or plumbing leaks that create moist, dark spaces. According to Mold Removal Lab, recognizing the early signs—musty odors, dark stains on walls or ceilings, and visible colonies behind tiles or in basements—helps homeowners act quickly to minimize damage. This local context matters because climate, building practices, and aging infrastructure can influence how mold appears and how it should be treated. A Cincinnati-focused remediation plan emphasizes moisture control, safe cleaning, and ongoing monitoring to prevent reoccurrence.
From crawl spaces to laundry rooms, mold tends to thrive where moisture meets organic materials. In older Cincinnati homes with wood framing and drywall, hidden mold behind baseboards or subfloors can quietly undermine indoor air quality if left unaddressed. The Mold Removal Lab team emphasizes that early detection, proper containment, and timely intervention are essential to protect occupants while reducing repair costs over time.
Safety first: PPE and protective measures
Before you touch any mold-affected surfaces, prepare with proper PPE: an NIOSH-approved respirator (N95 or higher), chemical-resistant gloves, and eye protection. If you’re cleaning in a damp basement or attic, wear a lightweight hood or disposable coveralls to minimize skin exposure. Ventilation is important, but avoid blasting air directly from outside into the work area, which can spread spores. Use a HEPA-equipped vacuum for cleanup and ensure waste is sealed in heavy-duty bags before disposal. The goal is to minimize exposure for you and others in the home while controlling the spread of spores to clean, dry areas.
The Mold Removal Lab guidance highlights that a well-fitted respirator dramatically reduces inhalation exposure, and gloves protect skin from irritants in common cleaning agents. If anyone in the home has asthma or a mold sensitivity, consider delaying work or consulting a professional to reduce health risks.
Containment and moisture control in Cincinnati homes
Containment is critical to stop spores from migrating to other rooms. Use heavy-duty polyethylene sheeting to seal off the affected zone, and create a small negative pressure environment by exhausting air to the outside with a fan and filtering intake air through a HEPA filter. Simultaneously address moisture sources: fix leaks quickly, run dehumidifiers in damp spaces, and improve airflow with exhaust fans or venting. In Cincinnati’s humid climate, ongoing moisture management is a key defense against recurring mold growth. A well-contained area makes subsequent cleaning safer and more effective.
Cleaning methods: what works and what to avoid
For many surfaces, a detergent-and-water scrub is a good first step to remove visible mold. Porous materials such as drywall or insulation that are mold-impacted beyond salvage should be removed and replaced. Non-porous surfaces (tile, glass, sealed countertops) can be cleaned with a dilute cleaning solution and a scrub brush, followed by thorough drying. Avoid mixing household cleaners; never combine bleach with ammonia, and never spray cleaners directly into electrical outlets or wiring. Always test a small area first to ensure finish integrity. After cleaning, reduce moisture and improve ventilation to slow future growth.
Drying and preventing recurrence in Cincinnati
Thorough drying is essential to prevent regrowth. Use dehumidifiers and fans to accelerate moisture evaporation, and re-check the area within 24–48 hours to ensure there is no lingering dampness. After drying, inspect for hidden moisture behind walls or under flooring; consider using a moisture meter or infrared camera to identify cooler, damp spots. Ongoing prevention centers on addressing root causes: repair leaks promptly, maintain gutters and downspouts to direct water away from the home, and keep indoor humidity in check with proper ventilation.
When to hire a professional for mold removal in Cincinnati
Some situations call for professional remediation, especially when mold covers large areas, involves invasive growth behind walls, or accompanies health issues. Licensed mold remediation specialists in Cincinnati can perform containment, remediation, and post-remediation verification using professional-grade equipment. If you notice persistent moisture problems, suspect black mold, or have preexisting health concerns, hiring a pro can reduce risk and ensure thorough cleaning and drying. The Mold Removal Lab Team recommends evaluating the size of the affected area, the types of materials involved, and the potential for hidden mold when deciding whether to DIY or hire a pro.
After cleanup: documentation and long-term prevention
Document the remediation process, including before-and-after photos, the dates of work, and any materials removed. Use this record to schedule regular inspections and to verify that moisture problems have been resolved. Implement ongoing prevention strategies: fix leaks promptly, maintain HVAC and bathroom ventilation, and monitor humidity in moisture-prone zones. Consider a routine seasonal check of basements, crawl spaces, kitchens, and laundry rooms to catch issues early and protect your home’s indoor air quality.
Common myths and practical truths about mold in Cincinnati
Many homeowners underestimate mold because it appears to be just a surface issue. In reality, mold can penetrate porous materials and spread through hidden channels. The safe, practical approach is to treat mold as a moisture problem first: identify the source, fix it, and then clean and dry thoroughly. Don’t rely on quick fixes like painting over mold or using bleaching agents as a single solution. Those steps may mask the problem or fail to address underlying moisture—allowing mold to return.
Tools & Materials
- NIOSH-approved respirator (N95 or higher)(Fit-tested; replace filters if you feel discomfort or during extended work)
- Chemical-resistant gloves(Use multiple pairs for long projects; avoid latex if you have sensitivities)
- Safety goggles or protective face shield(Goggles should seal around eyes; consider a full-face shield for splash risks)
- Disposable coveralls or protective clothing(Choose breathable fabric; avoid bringing dirt into clean areas)
- HEPA vacuum with proper attachments(Use only on dry surfaces; do not use on wet materials)
- Detergent or mild cleaner(General purpose cleaner for initial mold removal)
- Plastic sheeting (6 mil or thicker) and tape(For creating containment barriers around affected areas)
- Dehumidifier and several fans(Placement should maximize airflow through the affected zone)
- Moisture meter or infrared camera(Helpful for identifying hidden damp spots during remediation)
Steps
Estimated time: 6-12 hours
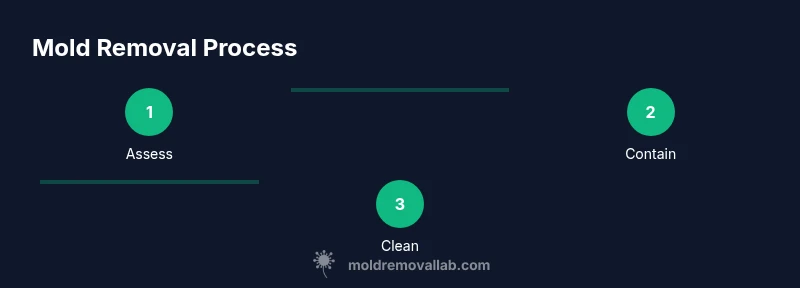
- 1
Assess and plan
Begin with a clear assessment of the affected area. Identify mold growth extent, possible moisture sources, and materials involved. Create a containment plan that minimizes disruption to the rest of the home and protects occupants.
Tip: Document initial conditions with photos and notes before you start. - 2
Contain the work area
Seal the space with heavy-duty plastic sheeting and tape to prevent cross-contamination. Set up a simple negative pressure system if possible and ensure negative airflow away from living spaces.
Tip: Keep doors and vents sealed; post signs to avoid accidental entry. - 3
Protect yourself and the area
Don PPE before touching mold. Establish a safe workspace by removing furniture and covering nearby surfaces. Turn off HVAC in the affected zone to prevent spore spread.
Tip: Do not wear outdoor clothes inside the containment area; store soiled gear separately. - 4
Remove non-salvageable materials
Carefully remove porous materials that are mold-damaged beyond salvage, such as affected drywall or insulation. Place removed items in sealed bags for disposal.
Tip: Label bags to indicate contents and risk level for waste disposal workers. - 5
Clean and disinfect surfaces
Clean non-porous surfaces with a detergent solution, scrub away visible mold, and apply a disinfectant approved for mold remediation. Rinse and dry thoroughly.
Tip: Avoid mixing cleaners; use one cleaning product at a time and follow label directions. - 6
Dry the area completely
Run dehumidifiers and fans to promote fast drying. Check moisture levels regularly and continue drying until readings are stable across all inspected points.
Tip: Redirect airflow to damp zones and avoid creating cold spots where moisture could condense. - 7
Verify remediation and restore
Reassess the area for signs of remaining moisture or mold. Replace removed materials with new ones and seal seams to prevent future moisture entry. Schedule a follow-up inspection if symptoms persist.
Tip: Keep copies of inspection notes and photos for future reference.
FAQ
What makes mold removal in Cincinnati different from other regions?
Regional climate, humidity, and housing stock influence mold behavior and remediation approaches. In Cincinnati, moisture control and effective ventilation are particularly important due to seasonal humidity patterns. Always tailor eradication steps to the specific home conditions.
Regional climate matters. In Cincinnati, focus on moisture control and ventilation to prevent mold from returning.
When should I DIY mold removal versus hiring a professional in Cincinnati?
For small, isolated mold growth on non-porous surfaces, DIY with proper PPE and containment may be feasible. For larger areas, porous materials, growth behind walls, or occupants with mold sensitivities, a licensed mold remediation specialist is recommended.
Tiny mold spots might be DIY, but bigger problems or hidden growth require a professional.
What safety steps are essential during remediation?
Always wear protective gear, seal the work area, ventilate carefully, and avoid disturbing mold to prevent spore spread. Dispose of contaminated materials in sealed bags and clean tools after use.
Protect yourself with PPE, seal the area, and dispose of contaminated materials properly.
How long does remediation typically take in a Cincinnati home?
Duration depends on the extent of contamination, moisture control success, and whether materials must be removed. Simple cases may complete in a day; larger projects can take several days, especially if drying times are needed.
Time varies; basic jobs finish quickly, larger ones may take multiple days.
What should I do to prevent mold from returning after cleanup?
Fix sources of moisture, improve ventilation, use dehumidification in damp areas, and inspect regularly for leaks. Maintain clean, dry surfaces and monitor humidity-sensitive zones.
Prevent moisture, ventilate well, and inspect regularly to keep mold away.
Can household products fully replace professional remediation?
Household cleaners can treat minor surface mold, but professional remediation is often needed for extensive growth or porous materials to ensure thorough removal and proper drying.
For widespread mold or porous materials, a pro is usually the safer choice.
Is mold growth covered by homeowners insurance in Cincinnati?
Coverage varies by policy and cause. Some mold-related damages may be excluded if caused by long-term moisture or maintenance issues. Review your policy or consult your insurer for specifics.
Check your policy; mold coverage depends on the cause and your terms.
Watch Video
The Essentials
- Identify moisture sources before cleaning.
- Contain the area to prevent spread.
- Use proper PPE and avoid mixing cleaners.
- Dry thoroughly to prevent recurrence.