Mold Removal Charlotte: A Practical, Safe Guide for Homes
Comprehensive, safe mold removal guidance for Charlotte homeowners. Learn to assess moisture sources, contain contamination, clean effectively, and prevent recurrence with expert tips from Mold Removal Lab.

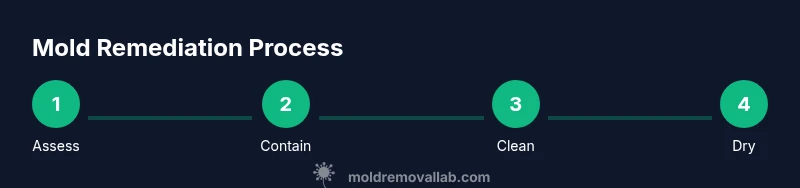
By following this guide, you’ll learn how to remove mold in Charlotte homes safely and effectively. You’ll assess moisture sources, contain the area, perform cleaning with appropriate PPE, and dry the space to prevent recurrence. This approach emphasizes practical steps homeowners can take before deciding if professional remediation is needed, and explains when to escalate to a licensed mold specialist.
Understanding Mold in Charlotte Homes
Mold problems in Charlotte are influenced by the region’s humid subtropical climate, frequent rainfall, and occasional indoor moisture buildup. In many homes, condensation on windows, humid basements, or roof leaks create ideal conditions for mold growth on walls, ceilings, and hidden surfaces behind cabinetry. This guide focuses on practical, safe steps for homeowners to identify, contain, and remediate common mold scenarios while avoiding unnecessary exposure. According to Mold Removal Lab, moisture control is the single most effective preventive measure. Early detection, paired with proper PPE and containment, minimizes the spread of spores and reduces the chance of recurring growth. By understanding local moisture drivers and building-specific weaknesses, you can tailor remediation to your space.
Health and Safety Considerations
Mold exposure can affect people differently. Some individuals experience allergic reactions, coughing, wheezing, or nasal irritation, especially those with asthma, compromised immune systems, or mold sensitivities. When handling mold, prioritize safety: wear an appropriate respirator (at least an N95), gloves, and eye protection. Work in a well-ventilated area and avoid disturbing mold in porous materials like drywall that may release spores when disturbed. If you notice extensive growth (larger than a few square feet), or if the mold appears to be accompanied by persistent moisture from a leak, risk to occupants increases, and professional remediation becomes advisable. Mold Removal Lab emphasizes moisture control and safe handling as foundational steps for any remediation plan.
Tools and Techniques for Safe Cleanup
A practical cleanup uses a combination of cleaning agents suitable for different surface types, scrubbing tools, and a vacuum with a HEPA filter to capture spores. For nonporous surfaces (glass, metal, finished surfaces), plain detergent and water followed by a disinfectant can be effective. Porous materials (drywall, insulation, carpeting) often cannot be fully sterilized and may require removal and replacement. Containment is crucial: seal off the area with plastic sheeting, create negative pressure if possible, and avoid cross-contamination by changing PPE between rooms. Drying is essential: moisture must be removed from the space promptly to prevent regrowth. This is where dehumidifiers and fans play a pivotal role in returning humidity to safe levels. The Charlotte climate makes consistent moisture management essential, especially after storms or high-humidity periods.
Step-by-Step Approach to Containment and Cleaning
Containment minimizes the spread of mold spores to adjacent spaces. Start by closing doors and using plastic sheeting to seal off the work area. Set up a dedicated disposal bag for contaminated materials and avoid bringing contaminated items through living spaces. When cleaning, attack mold from top to bottom, ensuring you don’t smear spores to clean areas. Use a detergent solution on nonporous surfaces, rinse, and dry. For porous materials that are visibly moldy, consider removal and replacement under proper disposal guidelines. If the initial cleanup reveals extensive growth or hidden mold behind structural components, pause and reassess the need for professional remediation. Documentation (photos and notes) helps track progress and supports insurance considerations if applicable.
Moisture Control and Prevention for a Humid Climate
Effective moisture control is the cornerstone of mold prevention in Charlotte homes. Fix leaks promptly, improve ventilation in kitchens and bathrooms, and use exhaust fans during high-humidity activities like cooking and showering. Consider upgrading insulation and sealing exterior walls to reduce condensation. Regularly inspect gutters and downspouts to ensure proper drainage away from the foundation. After remediation, maintain indoor humidity between roughly 30% and 50% using dehumidifiers or HVAC controls. Mold thrives where moisture remains, so ongoing monitoring is essential. The goal is not only to remove visible mold but to address the underlying moisture sources that sustain it.
DIY vs Pro: When to Hire a Mold Specialist in Charlotte
Small, clearly contained mold growth on hard, nonporous surfaces can sometimes be addressed by a careful homeowner following safety protocols. However, many scenarios warrant professional remediation: growth that covers more than a few square feet, mold behind walls, persistent leaks, or contamination in HVAC systems. Licensed professionals understand containment, moisture control, and specialized cleaning methods, and they can perform post-remediation verification. In Charlotte, opting for a pro when in doubt reduces health risks and helps ensure the underlying moisture issues are resolved. Mold Removal Lab recommends assessing the complexity of the job and prioritizing safety when deciding to DIY or hire an expert.
Surface-Specific Cleaning: What Works and What Doesn’t
Different surfaces require different approaches. Nonporous surfaces (glass, metal, sealed countertops) respond well to detergent and disinfectant, followed by thorough drying. Porous materials (drywall, carpet, ceiling tiles) can trap mold and may need removal and disposal. For wood, you may scrub with a cleaner and apply a protective treatment after drying. Always test a small area first to verify colorfastness or finish integrity. Avoid over-aggressive scrubbing that could release spores; instead, use gentle, repeated cleaning passes. If you encounter materials that crumble or release a strong musty odor, stop and consider professional assessment. Visual checks alone are insufficient; odor, moisture levels, and material condition determine the best remediation path.
Real-World Charlotte Case Studies and Resources
No two mold scenarios are identical. Local case studies illustrate how moisture events—like heavy rains, roof leaks, or rising groundwater—can lead to hidden mold growth behind walls or under floors. Look for recurring dampness after rain, musty smells, or visible discoloration. Use this guide alongside local resources to tailor remediation strategies to your home’s design and climate. For homeowners seeking additional guidance, national guidelines from EPA and other authorities offer a framework you can adapt to your situation.
Removing Contaminated Materials and Waste Disposal
Contaminated porous materials—like drywall, insulation, or carpeting—are often not salvageable after mold exposure. Place these materials in sealed bags and dispose of them according to local regulations. Cleaning nonporous items can be effective, but do not reuse contaminated tools, PPE, or materials that have come into contact with mold. After removal, clean surrounding areas with detergent and disinfectant, then dry thoroughly. Waste management is an important part of the remediation process to prevent cross-contamination and reinfection.
Charlotte-Specific Resources and Codes
Some local enforcement and housing codes require proper disposal of mold-infested materials and proper permits for significant renovations. When in doubt, contact your city’s housing department or a licensed mold professional for guidance. Municipal programs may offer inspection services or guidance on moisture control in multifamily buildings. Maintaining a documented remediation plan and following best practices helps ensure compliance with regulations and improves the likelihood of a successful, lasting cure.
Tools & Materials
- Protective gear: N95 respirator, disposable gloves, and eye protection(Ensure a proper fit and replace after use; avoid reusing disposable items)
- Plastic sheeting and painter’s tape(To seal off the work area and prevent spore spread)
- HEPA-filter vacuum(Important for capturing spores during cleanup)
- Detergent and water(Basic cleaning solution for nonporous surfaces)
- EPA-registered mold cleaner or a bleach solution (nonporous surfaces only)(Follow label directions; avoid mixing with ammonia or other cleaners)
- Scrub brushes and non-abrasive sponges(Use soft bristles to avoid scratching surfaces)
- Trash bags (heavy-duty), with sealable lids(For contaminated materials; double-bag if necessary)
- Dehumidifier or portable air conditioner with humidity control(Key to reducing moisture after cleanup)
Steps
Estimated time: 4-8 hours
- 1
Assess the extent of mold growth
Survey the affected areas and determine if growth is contained to accessible surfaces or hidden behind walls. Document visible growth with photos to guide remediation decisions and communicate with any contractor or insurer. If growth spans more than a few square feet or involves your HVAC system, plan for professional assistance.
Tip: Take photos from multiple angles and note moisture sources to track changes during remediation. - 2
Contain the work area
Close doors to the affected space and seal with plastic sheeting. Create a controlled path for waste and avoid walking through other living areas with mold-contaminated materials. If possible, establish negative pressure to minimize spore movement.
Tip: Label the containment zone clearly and restrict access to household members during cleanup. - 3
Protect yourself and the space
Put on a properly fitted N95 respirator, gloves, and eye protection. Run a fan in the containment area pointing outward to ventilate, but avoid blowing air from the mold zone to other rooms. Use a HEPA vacuum for cleanup and never dry brush mold.
Tip: Change PPE between rooms to prevent cross-contamination. - 4
Clean nonporous surfaces
Begin with nonporous surfaces using detergent and water, then apply an EPA-registered cleaner or disinfectant. Rinse away residue and dry thoroughly. For stubborn spots, repeat the cleaning cycle with a lighter touch to prevent surface damage.
Tip: Avoid mixing cleaners; always follow label directions. - 5
Address porous materials
Porous materials with visible mold, such as drywall or carpet, may need to be removed. If removal creates exposure to underlying framing, consider consulting a pro. Bag and seal contaminated materials before disposal and avoid reusing them in the living space.
Tip: If in doubt, treat with caution and seek professional assessment. - 6
Dry and monitor moisture
After cleaning, dry the space as quickly as possible. Use dehumidifiers and fans to maintain low humidity. Monitor for several days and re-check for musty odors or new mold growth after a rain event or heavy humidity period.
Tip: Consider a humidity monitor for ongoing household use. - 7
Verify remediation and plan prevention
Confirm there is no visible mold and moisture sources have been addressed. If mold returns or if growth persists, escalate to a professional. Keep records of remediation steps and moisture results for homeowners and insurers.
Tip: Retain documentation to support any future claims or inspections.
FAQ
What is the first step I should take if I find mold in my Charlotte home?
Begin by minimizing exposure: don PPE, isolate the area, and assess the extent of growth. For large areas or hidden mold behind walls, consider consulting a licensed mold remediation professional.
First, protect yourself and isolate the area, then assess the extent. For large or hidden mold, seek a licensed pro.
Can I remove mold myself, or should I hire a pro?
Small, clearly contained mold on nonporous surfaces can be addressed by a careful homeowner following safety guidelines. If mold covers a large area, involves porous materials, or recurs after cleaning, hire a professional for comprehensive remediation.
Small, contained mold can be DIY safely, but large or recurrent mold should be handled by a professional.
What supplies do I need for DIY mold cleanup?
Essential supplies include protective PPE, plastic containment, detergent, a non-porous cleaning agent, a HEPA vacuum, brushes, and heavy-duty trash bags. Porous materials in moldy areas may require removal and disposal.
You’ll need PPE, containment, cleaning agents, a HEPA vacuum, brushes, and disposal bags.
How long does mold remediation typically take?
Duration depends on extent, moisture sources, and materials involved. Small jobs may complete in a day, while larger or more complex cases could take longer, especially if drying and moisture control are ongoing.
It depends on size and moisture needs; some jobs finish in a day, others take longer.
Is mold dangerous to health, and who’s at risk in homes?
Mold exposure can trigger allergies and respiratory symptoms, particularly for children, seniors, and people with asthma or immune issues. Minimize exposure during cleanup and seek medical advice if symptoms persist.
Mold can affect health, especially for vulnerable individuals. Minimize exposure and consult a professional if concerned.
What moisture sources should I monitor in a Charlotte home?
Watch for roof leaks, plumbing leaks, high indoor humidity, and improper ventilation in kitchens and bathrooms. Regular inspections and prompt repairs help prevent mold regrowth.
Keep an eye on leaks and humidity; fix problems quickly to prevent mold.
Watch Video
The Essentials
- Act quickly when moisture is detected to limit mold growth.
- Contain the area to prevent spores from spreading.
- Dry thoroughly after cleaning to prevent recurrence.
- Know when to call a pro for large or hidden mold problems.
- Address moisture sources to maintain a mold-free home.