Mold Release Spray: A Step-by-Step Guide for Safe Cleanup
Learn how to choose, apply, and safely use mold release spray to ease cleanup, protect surfaces, and maintain indoor air quality. Expert guidance from Mold Removal Lab for homeowners and renters.

This guide explains how to choose and use mold release spray to lift stubborn residues, prepare surfaces for cleaning, and protect your indoor air quality. You’ll learn how to select the right product, apply it correctly, and avoid common mistakes that spread spores. Follow these steps to simplify remediation while keeping your home safer.
What is mold release spray and why you need it
Mold release spray is a specialized product designed to loosen the bond between mold residues and surfaces, making cleanup easier. According to Mold Removal Lab, using a dedicated mold release spray can help lift growth and prepare surfaces for subsequent cleaners, reducing the amount of scrubbing needed and the risk of dispersing spores. It is not a mold killer by itself; rather, it acts as a pretreatment that softens the bond so cleaners can work more effectively. For homeowners, this means less time scrubbing, cleaner surfaces, and improved overall safety during remediation.
Beyond simple cleaning, mold release spray supports better surface prep before painting or sealing, which can improve long-term outcomes. When chosen wisely and used correctly, it helps protect indoor air quality by minimizing the disturbance of spores during cleaning. The right product should be labeled for the surface you’re treating, compatible with your cleaning regimen, and safe for the materials involved. As you plan your remediation, remember that proper PPE and ventilation are essential to minimize exposure and keep the work area safe.
Key takeaway: Use mold release spray as a preparatory step that eases cleaning, not as a replacement for proper disinfectants or mechanical removal.
descriptionMdOnlyCommentary":null,
Tools & Materials
- Mold release spray(Choose a product labeled for the surface and mold type you’re treating; read the label for dwell time and precautions.)
- Nitrile gloves(Chemical-resistant, disposable gloves to protect skin during application.)
- Respirator or mask(NIOSH-approved respirator or P100 mask for better protection against spores and fumes.)
- Eye protection(Goggles or safety glasses to protect eyes from splashes.)
- Microfiber cloths(Use dry and damp cloths for lifting residues after treatment.)
- Plastic drop cloths or sheeting(Contain work area and protect floors and furniture.)
- Plastic bags for disposal(Seal used rags and contaminated materials securely before disposal.)
- Detergent or surface cleaner(Mild detergent for final wipe-down after residue is loosened.)
- Trash bags and a small broom/dustpan(For easy cleanup of debris and rags after treatment.)
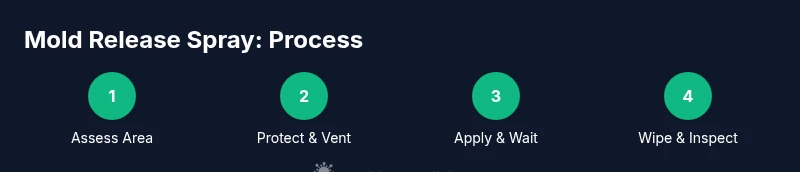
Steps
Estimated time: 60-90 minutes
- 1
Prepare the work area
Clear the space, remove or cover nearby items, and place drop cloths to catch drips. Ensure the room is well-ventilated by opening windows or turning on a fan away from your face. This reduces exposure to airborne spores during the process.
Tip: Set up a containment zone with plastic barriers to minimize cross-contamination. - 2
Don PPE and ventilate
Put on a respirator, gloves, and eye protection before handling any mold products. Improve airflow by opening exterior windows and running a low-speed fan that exhausts outdoors, not into the work area.
Tip: Check mask fit and replace filters if you feel diminished breathing comfort. - 3
Test on a hidden area
Spray a small amount on a discreet spot to ensure compatibility with the surface. Wait a few minutes and wipe with a microfiber cloth to confirm there is no discoloration or adverse reaction.
Tip: If there is any adverse reaction, discontinue use on that surface and consult product guidelines. - 4
Apply the mold release spray
Hold the spray 6–12 inches from the surface and apply an even, light mist. Do not saturate; use enough to coat the area and allow the product to dwell for the recommended time on the label.
Tip: Keep the odor outdoors by venting the space while spraying. - 5
Wait the dwell time
Allow the product to dwell for the suggested period so it can loosen the mold bonds. This often ranges from 5–15 minutes depending on the product and surface.
Tip: Avoid drying the product quickly with high heat, which can re-bond residues. - 6
Lift and clean residues
Gently wipe away loosened residues with a damp microfiber cloth, then finish with a dry cloth. For stubborn patches, repeat the spray and wipe steps rather than scrubbing hard.
Tip: Move in one direction to minimize re-aerosolizing spores. - 7
Inspect and plan next steps
Review treated areas, check for remaining residues, and decide whether to proceed with additional cleaning, deodorization, or sealing. Document any areas needing follow-up cleaning.
Tip: Take photos before and after to track progress and ensure accountability.
FAQ
What is a mold release spray and when should I use it?
A mold release spray is a pretreatment product that loosens the bond between mold residues and surfaces, making cleanup easier. Use it before cleaning or disinfection to lift growth and reduce scrubbing effort.
It’s a pretreatment that helps cleanup go more smoothly; use it before cleaning to loosen mold residues.
Is mold release spray safe around children and pets?
Most sprays are designed with safety labels and PPE requirements. Always ensure proper ventilation and keep products out of reach of children and pets during application and curing times.
Keep kids and pets away while applying and ventilate the area well.
Can I use mold release spray on porous surfaces like drywall?
Porous surfaces can be more challenging; choose a spray labeled for porous materials and follow dwell times carefully. On some materials, additional steps may be needed after pretreatment.
Check the label for porous materials and follow dwell times closely.
Do I need to wear a mask when applying mold release spray?
Yes. Wear a respirator or appropriate mask to reduce inhalation of fumes and spores, especially in poorly ventilated spaces.
A mask helps protect you from airborne particles during application.
How long should I wait after applying the spray before cleaning?
Follow the product label for exact dwell times, typically ranging from 5 to 15 minutes. Longer dwell times can improve residue loosening on tough spots.
Wait the time recommended on the label before cleaning.
Can I mix mold release spray with other cleaners?
Avoid mixing with bleach, ammonia, or other cleaners as chemical reactions can occur. Use the spray as directed and follow with approved cleaners if needed.
Don’t mix it with other cleaners to avoid dangerous reactions.
Watch Video
The Essentials
- Choose a spray labeled for your surface
- Ventilate and protect yourself during application
- Test on hidden areas before full use
- Allow dwell time for effective loosening
- Inspect after treatment and plan follow-up care