Anti Mold Spray: Safe Use, Effectiveness, and Selection
Discover how to choose an effective anti mold spray, use it safely, and maintain mold prevention in your home with practical steps and trusted guidance from Mold Removal Lab.

By the end, you will know how to choose a safe, effective anti mold spray, evaluate ingredients, and apply a proven, step-by-step routine to treat affected areas and keep mold at bay. You’ll understand safety labels, surface compatibility, and how to verify results. This snippet also introduces common myths and practical troubleshooting tips.
What is anti mold spray and how does it work?
Anti mold spray is a consumer product designed to help control mold growth on nonporous and some porous surfaces. Most formulations rely on active ingredients that kill mold spores on contact and leave a residual film intended to slow regrowth. The exact chemistry varies, but the goal is to deliver a sprayable solution that you can apply to mold-prone areas, then monitor for re-growth. According to Mold Removal Lab, the effectiveness of these products depends on surface type, proper dwell time, and consistent aftercare. For homeowners and renters, the important takeaway is that no single spray guarantees permanent mold removal; products are aids in an overall remediation approach.
When you read labels, you’ll note two key pieces: the active ingredient and the recommended dwell time. Everyday consumer sprays may use quaternary ammonium compounds, hydrogen peroxide, or enzyme blends. Each class has pros and cons: quats are often fast-acting on nonporous surfaces, peroxide can help with organic stains, and enzyme blends can help in organic debris but may require longer contact. In all cases, safety data sheets (SDS) will describe precautions and first-aid steps. The Mold Removal Lab team emphasizes testing a small area first and avoiding harsh combinations with bleach or ammonia.
This section also debunks common myths: more spray does not always equal better results, and fresh spray won’t fix a long-standing moisture problem. In practice, anti mold spray is most effective when used as part of a broader moisture-control plan—fixing leaks, improving ventilation, and cleaning regularly to reduce organic debris that feeds mold.
How to choose a safe and effective product and what you should look for
Selecting an anti mold spray requires more than picking a bottle with a bold label. Start by checking the label for the active ingredient and the product’s claimed use. Look for products that carry a recognized safety registration and that specify surface compatibility. The Mold Removal Lab analysis shows a wide range of performance across brands, with some sprays clearly labeled for mold remediation on nonporous surfaces and others aimed at general cleaning. When in doubt, choose products with clear instructions, limited odors, and a listed dwell time that fits your cleaning routine. For families, pets, and people with sensitivities, choose low-odor formulations and avoid unnecessary fragrances that can trigger irritation. Always follow the SDS and contact the manufacturer if you have questions about compatibility with painted walls, wallpaper, or fabric.
EPA guidance on mold control encourages choosing products that are specifically labeled for mold remediation and avoiding bleach mixtures unless the label allows it. In our experience at Mold Removal Lab, a well-labeled product with EPA registration and transparent safety data tends to perform better in real homes than flashy, over-promised alternatives. Finally, keep expectations realistic: sprays are an important tool, but they don’t address underlying moisture problems or structural mold growth that requires professional assessment.
Surface preparation and safety before applying
Preparation matters as much as the product itself. Before you spray, remove loose items from the area and cover nearby furniture or flooring with drop cloths. Put on PPE: nitrile gloves, eye protection, and a mask suitable for aerosols. Adequate ventilation is essential; open a window or use a fan to move air. The goal is to minimize inhalation risk while keeping airborne mold spores from circulating through the home. If you suspect hidden mold behind walls, consult a professional rather than attempting extensive spray treatments. In this article, we’ll focus on surface-ready mold and typical household scenarios. According to Mold Removal Lab, handling moisture sources first yields better results than aggressive scrubbing alone. A quick surface test on an inconspicuous spot can prevent unexpected color changes after spraying.
Once you’re ready, wipe the surface with a damp cloth to remove surface grime. This reduces organic material that can trap mold spores and interfere with treatment. Do not apply anti mold spray directly on raw wood without checking labeling; untreated wood can absorb moisture more readily and require different products. Always store sprays away from children and pets when not in use.
Application techniques by surface type
The technique you choose depends on the surface being treated. For hard, nonporous surfaces like tile, metal, and sealed countertops, hold the spray bottle about 6–12 inches from the area and apply an even mist until the surface appears damp. Wipe with a clean cloth after the dwell time specified on the label and allow to air dry. On painted walls or finished wood, test on a small area first and avoid soaking the paint; repeated applications can cause delamination or discoloration on delicate finishes. For fabrics or porous materials (like drywall or insulation), use the spray sparingly and consider applying to the surface the item is facing rather than soaking through. Enzymatic or peroxide-based formulas may be more effective on organic debris embedded in textiles, but follow label directions closely.
Dwell time varies by product and surface type; many labels recommend letting the product sit on the surface for 5–15 minutes before wiping or rinsing. If mold growth is still visible after the first pass, you may need to re-clean and reapply. Always ventilate well and stop if you notice a strong chemical odor. The goal is to disrupt the mold’s growth cycle without introducing new hazards into your living space.
Aftercare and verification
After treatment, ensure surfaces are completely dry before reoccupying the area. Mold can regrow in as little as 24–48 hours in moist conditions, so a follow-up inspection is essential. Revisit the treated sites with a flashlight or blacklight in darker rooms to look for residual staining or ghosting, and re-check hidden corners after several days if necessary. If the area remains damp, you may need to address moisture sources more aggressively (leaks, humidity control, or a dehumidifier). Documentation is helpful: take photos before and after treatment and note the spray brand, active ingredient, and dwell times used. This helps you track what works in your home and can guide future maintenance. According to Mold Removal Lab, the most durable mold control comes from combining chemical treatment with moisture management and regular cleaning schedules.
Common myths and misuses
Myth: Anti mold spray can fully eliminate all mold in a single pass. Reality: Mold remediation often requires moisture control, surface repair, and repeated treatments over time. Myth: A strong odor means better performance. Reality: Odor does not equal effectiveness; many high-performance products are low-odor and safer for indoor use. Myth: Bleach alone is enough to kill mold permanently. Reality: Bleach kills some surface mold but does not reach into porous substrates; it can also create toxic fumes when misused. The Mold Removal Lab team emphasizes that sprays are supplements to a broader remediation plan, not a replacement for fixing leaks or improving ventilation. Safety note: Do not mix anti mold sprays with bleach or ammonia unless the label explicitly says it’s safe to do so; mixing can release dangerous gases and irritants.
In real homes, the best results come from combining a well-chosen anti mold spray with moisture control. If you’re dealing with recurring mold in a bathroom, kitchen, or basement, revisit ventilation and humidity levels, inspect for leaks, and consider professional assessment for persistent problems. The myths discussed here are common, but they should not deter you from taking practical steps now.
Final verdict and best practices
Selecting an anti mold spray should be part of a broader strategy. The Mold Removal Lab team recommends choosing products with clearly labeled active ingredients, explicit surface compatibility, and safety data. Favor EPA-registered products and those with clear dwell-time guidance and minimal harsh odors. Always conduct a test on a small, inconspicuous area before full-room application, and never mix cleaners unless the label allows it. For most homes, the best results come from pairing a well-chosen anti mold spray with moisture management (addressing leaks, reducing humidity, and improving ventilation) and routine cleaning to prevent regrowth. In short, use sprays as a targeted tool within a comprehensive, preventive approach to mold.
Authoritative sources
For further details on mold control and safety, consult federal guidance and educational resources. The EPA Mold Guide explains how moisture control and proper cleaning intersect with chemical treatments. The CDC provides health-focused information about mold exposure and mitigation strategies. OSHA outlines workplace safety considerations that apply to indoor environments, including ventilation and PPE. These sources reinforce the core messages in this guide and help you make informed decisions about anti mold spray usage. You can visit:
- https://www.epa.gov/mold
- https://www.cdc.gov/mold/default.htm
- https://www.osha.gov/mold
Tools & Materials
- Anti mold spray (ready-to-use)(Choose a spray labeled for mold remediation with active ingredients listed)
- Disposable gloves(Nitrile gloves recommended)
- Safety goggles(Protect eyes from splashes)
- Face mask (N95 or better)(Prevent inhalation of aerosols)
- Microfiber cloths(For wiping and drying surfaces)
- Drop cloth or plastic sheeting(Protect floors and adjacent areas)
- Trash bags(Seal contaminated materials for disposal)
- Ventilation options (fan/open window)(Keep air moving during application)
Steps
Estimated time: 45-60 minutes
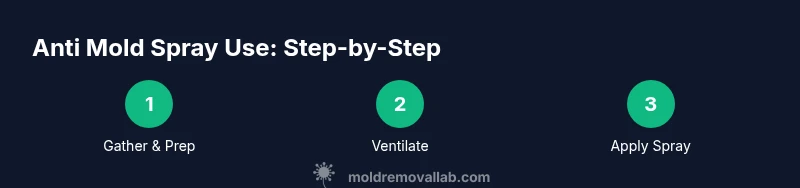
- 1
Gather materials and PPE
Collect your anti mold spray, PPE, cloths, drop cloths, and disposal bags. Have the product label handy and ensure you have a clear plan for the area you’ll treat.
Tip: Double-check the label before opening; some products require specific PPE. - 2
Ventilate and protect the area
Open windows or run a fan to move air. Remove nearby items or cover them with drop cloths to protect from overspray. Create a contained treatment zone if possible.
Tip: Keep doors to the treated area closed to prevent cross-contamination. - 3
Test on a hidden spot
Spray a small inconspicuous area and observe for color change or material damage over 24 hours. If unfavorable effects occur, switch products or consult a professional.
Tip: Testing helps avoid surface damage on delicate finishes. - 4
Apply spray to affected surfaces
Hold the bottle 6–12 inches away and apply a light, even mist to the contaminated area. Do not oversaturate porous materials.
Tip: Do not spray into electrical outlets or onto exposed wiring. - 5
Allow dwell time
Let the product sit for the label-specified dwell time (commonly 5–15 minutes) to maximize contact with mold.
Tip: Avoid touching treated areas during dwell time to maintain efficacy. - 6
Wipe and dry surfaces
Wipe excess moisture with a clean microfiber cloth and allow surfaces to dry completely. For porous substrates, repeating applications may be necessary after moisture control.
Tip: Use a fresh cloth per area to prevent cross-contamination. - 7
Re-inspect and reapply if needed
Recheck for visible mold and staining after drying. If mold returns, address moisture sources and consider another treatment.
Tip: Persistent mold may indicate hidden moisture issues or structural problems. - 8
Clean tools and dispose
Seal used cloths and dispose of them properly. Rinse reusable tools and store them away from children.
Tip: Wash hands after handling treated materials. - 9
Record results and plan prevention
Document the product used, dwell times, and outcomes. Plan ongoing moisture control to prevent future mold growth.
Tip: Set a maintenance reminder to check humidity and leaks regularly.
FAQ
Is anti mold spray safe for pets and children?
Most anti mold sprays are formulated with safety in mind, but always read the label and keep the treated area off-limits until surfaces are dry. If you have pets or children with sensitivities, opt for low-odor formulations and ensure adequate ventilation.
Most sprays are designed with safety in mind, but keep the area ventilated and dry before pets or kids enter.
Will anti mold spray remove existing mold stains?
Many sprays kill mold and help remove visible staining when used with proper dwell time and cleaning. For embedded stains in porous materials, repeated treatments and moisture control may be necessary, and some cases require professional remediation.
Yes, some sprays remove mold and stains with proper dwell time, but stubborn cases may need more treatments or a professional assessment.
Can I use anti mold spray on porous surfaces such as drywall?
Porous surfaces are more challenging. Some sprays are designed for porous materials, but labeling often cautions against soaking. For high-porosity substrates, consider patching or calling a pro if moisture problems persist.
Porous surfaces can be tricky; check the label and avoid soaking, and consider professional help for persistent moisture.
How long does the product need to dry after application?
Drying times vary by product and surface. Follow the label’s dwell time and drying instructions, and ensure the area is fully dry before reoccupying to prevent re-growth.
Dry times depend on the product—follow the label and make sure the area is completely dry before using it again.
Is anti mold spray the same as bleach?
No. Bleach can kill surface mold but may not reach into porous materials and can produce fumes when misused. Anti mold sprays vary in ingredients and may be safer for indoor use when labeled for mold remediation.
Bleach isn’t the same as anti mold spray; it often won’t reach porous material well and can release fumes.
Should I use anti mold spray as a preventive measure?
Yes, as part of a broader prevention strategy. Use sprays to treat small problem areas alongside moisture control, regular cleaning, and humidity management to reduce future mold risks.
You can use it preventively, but balance with moisture control and good ventilation.
Watch Video
The Essentials
- Choose products with clear active ingredients and label instructions.
- Test first, ventilate, and follow dwell times exactly.
- Use sprays as part of a moisture-control plan, not a sole solution.
- Dry surfaces thoroughly to prevent regrowth and recontamination.