Mold Removal Spray for Bathroom: A Practical How-To Guide
Learn how to choose, apply, and maintain a mold removal spray for bathroom surfaces to prevent regrowth and protect indoor air quality. This step-by-step guide covers prep, application, dwell time, and long-term prevention.

Goal: safely use a mold removal spray for bathroom to remove visible mold, prevent regrowth, and protect indoor air quality. This guide covers prep, surface selection, application, dwell time, and aftercare. You’ll learn how to choose the right spray, apply correctly, and monitor moisture to keep bathrooms healthier. All steps prioritize PPE and ventilation.
Understanding Bathroom Mold and Why Spray Matters
Bathroom mold is a common problem driven by persistent moisture, warm temperatures, and limited airflow. In most homes, mold thrives on grout lines, caulk seams, under sinks, and behind tiles where water can linger. A mold removal spray for bathroom is a practical tool for tackling surface mold on nonporous materials like ceramic tile, enamel, and sealed countertops. It can also help treat mold on caulk and grout, though deep-seated growth within porous materials may require additional steps. When used correctly, the right spray can kill active spores on contact and provide a surface residue that inhibits immediate regrowth. The Mold Removal Lab team emphasizes that sprays are not a substitute for moisture control; ongoing ventilation and timely cleaning are essential for lasting results.
For homeowners, the key is understanding the difference between surface mold and hidden mold. Surface mold responds well to spray treatment, scrubbing, and drying, while hidden mold behind wall material or drywall requires professional assessment. Always start with identifying all affected areas, then apply the spray to the most visible areas first to prevent cross-contamination during cleaning. This approach aligns with general best practices for mold remediation and helps protect indoor air quality over time.
In this guide, you’ll see practical steps that translate the concept of a bathroom mold spray into repeatable, safe actions you can perform on weekends. We’ll cover how to select an appropriate product, how to prepare the space, how to apply and dwell, and how to monitor for moisture as a preventive measure. The discussion uses the term mold removal spray for bathroom to emphasize the intended scope and to help you search for guidance and product labels with confidence.
According to Mold Removal Lab, having a well-chosen mold removal spray for bathroom is just part of the equation; the other essential factors are PPE, ventilation, and drying methods. The team also highlights that results improve when you combine spray treatment with moisture-reduction strategies, such as dehumidification and routine cleaning routines. This integrated approach leads to safer bathrooms and healthier homes.
Choosing the Right Mold Removal Spray for Bathroom
Selecting the right mold removal spray for bathroom depends on the surface type and the level of growth. Look for products that are specifically labeled for bathroom mold and are suitable for nonporous surfaces like tile, glass, or sealed countertops. Some sprays use quaternary ammonium compounds, hydrogen peroxide, or peracetic acid; others rely on mildly alkaline formulas. Always read the label to confirm surface compatibility, required dwell times, and safety warnings. If you’re dealing with colored grout, darker bathroom tiles, or caulk, choose a product that is color-safe and tested for use on those materials. For stone surfaces (like marble or limestone), opt for a pH-neutral formula to avoid etching.
When considering cost and value, remember that a single spray bottle may be sufficient for a medium bathroom; however, larger homes or persistent outbreaks may require a multi-pack or refill. Mold Removal Lab analysis shows that consistency in product selection—paired with proper application—reduces visible mold recurrence compared to sporadic use of unknown cleaners. Keep a simple log of locations treated and note any areas that reappear after a few days; this helps you measure effectiveness and adjust your approach accordingly.
In addition to the product itself, verify that the spray is EPA-registered for mold remediation or carries a reputable disinfectant claim. This reduces the risk of ineffective products and protects your household from potential irritants. Always keep the spray labeled for bathroom use in a clearly identified location away from children and pets. By selecting the right spray and maintaining consistent cleaning practices, you’ll achieve better results with less effort over time.
From a homeowner’s perspective, the most practical choice is a spray designed for bathroom surfaces that explicitly states mold control, ease of use, and a reasonable dwell time. If you see terms like “fogging,” “broad-spectrum disinfectant,” or “antimicrobial,” ensure these claims align with the areas you want to treat and the materials involved. The goal is to reduce mold while preserving the integrity of bathroom finishes, so you can enjoy a healthier space with minimal disruption.
Prep Before You Spray: Safety and Prep
Preparation is the quiet work that makes every spray session safer and more effective. Begin by gathering your PPE: disposable gloves, safety goggles or glasses, and a mask such as an N95 or equivalent. Ventilate the bathroom by opening windows and turning on an exhaust fan if available; if you have a ceiling fan, position it to blow air toward a door or window to facilitate airflow. Remove any items from shelves and wipe down nearby surfaces that you won’t treat to prevent cross-contamination. Place a drop cloth or old towels on the floor to catch drips and protect surrounding areas.
Before applying any product, test a small, inconspicuous area first to ensure the surface does not discolor or react negatively. If you’re spraying on grout, caulk, or ceramic tile, check the label for surface compatibility and recommended dwell time. If you notice an odor that is unusually strong or irritating, pause and re-check the ventilation. Always read the product directions thoroughly and follow recommended safety practices to minimize exposure and avoid chemical interactions with cleaners already present in the bathroom.
If moisture levels are high, consider using a dehumidifier in the bathroom for a few hours before starting. A drier environment improves product performance and reduces the risk of mold returning quickly. Finally, ensure you have a waste receptacle nearby for disposable towels or wipes and plan a follow-up cleaning session to re-check the treated areas after the initial dwell time.
Step-by-Step: How to Apply Mold Removal Spray (Detailed Guidance Without Duplication)
In this section we describe the core process in depth, while the dedicated STEP-BY-STEP block provides exact numbered actions. The purpose here is to build understanding of where, why, and how the spray interacts with bathroom surfaces, and how to prepare for a successful outcome.
First, identify the most affected areas, such as grout lines, caulk seams, and any visible mold colonies on tiles. Apply a small amount of spray to these areas and allow the product to dwell according to the label. The dwell time enables the chemical to penetrate and kill surface mold spores. While waiting, you can prepare a scrub brush and a microfiber cloth for later cleanup. When the dwell time ends, scrub the treated areas with gentle, circular motions to lift mold residues, then wipe away residue with a damp cloth. Repeat on stubborn spots as needed, but avoid excessive scrubbing that could damage caulk or grout.
After treatment, rinse or wipe surfaces with clean water if recommended by the product label. Dry thoroughly with towels, then re-check for any remaining moisture or new mold growth within 24–48 hours. If mold returns, reassess moisture sources and consider a second, lighter treatment using the same product. Throughout the process, maintain ventilation and avoid mixing cleaners, which can create hazardous fumes. This approach helps ensure you maximize the effectiveness of the mold removal spray for bathroom while maintaining safety and surface integrity.
Cleaning and Aftercare: Rinse, Dry, and Monitor
Effective aftercare is essential to prevent regrowth. After the spray has done its work and any necessary scrubbing is complete, rinse the treated surfaces with clean water if the product label permits. Dry all surfaces thoroughly—mold needs moisture to thrive, so reducing dampness is a primary preventive measure.
Inspect grout lines and caulk seams for signs of residual moisture or new mold growth after 24–48 hours. If you notice fresh growth, re-clean these areas and consider improving airflow or using a dehumidifier long-term. Keep sensitive items away from treated surfaces while they dry, and wash cloths or towels used during cleanup separately to prevent cross-contamination.
Develop a quick weekly cleaning routine that focuses on bathroom moisture hotspots: the shower stall, under the sink, and around the toilet base. Wipe down surfaces after showers, fix any leaks promptly, and ensure exhaust fans run for at least 15–20 minutes after flushing or showering. These small habits significantly reduce the likelihood of mold reappearing and help your mold removal spray work more effectively over time.
Prevention: Keeping Bathrooms Mold-Free Long-Term
Prevention is easier than remediation when it comes to bathroom mold. The foundation is consistent moisture control: fix leaks promptly, run ventilation during and after showers, and keep humidity levels low. Consider installing or improving an exhaust vent, using a humidity monitor, and ensuring bathroom surfaces dry quickly after use. Regularly clean high-moisture zones with a dedicated cleaner suitable for the material, focusing on grout lines and caulk where mold often hides.
For ongoing protection, replace old caulk or grout that shows signs of mold or decay. When replacement is necessary, choose products designed for bathrooms that resist moisture and adhere well to ceramic tile and glass. If you prefer natural options, routine cleaning with a hydrogen peroxide spray or similar mild agent can be part of your maintenance plan, but always confirm compatibility with your bathroom materials and follow label directions. By combining moisture control, targeted cleaning, and appropriate products, you’ll reduce mold risk and preserve a healthier bathroom environment.
Finally, monitor the bathroom environment. A simple moisture meter or smart hygrometer can alert you when humidity rises above a healthy range. With these proactive measures, the bathroom becomes a space where mold is less likely to take hold, even during peak moisture seasons. Mold Removal Lab’s guidance emphasizes proactive prevention alongside targeted mold removal spray use for lasting results.
Common Mistakes and Troubleshooting
Even the best mold removal spray for bathroom can fail if you fall into common traps. One mistake is using too much product, which can leave sticky residues or cause discoloration on certain surfaces. Another pitfall is skipping proper ventilation, which increases inhalation exposure and can drive spores into other rooms. Failing to dry surfaces thoroughly after treatment invites regrowth. If you notice persistent mold after the initial treatment, it may indicate hidden mold behind walls or under fixtures; in such cases, more extensive investigation or professional help may be required.
Troubleshooting tips:
- If mildew reappears within a week, re-evaluate moisture sources and improve ventilation
- For stubborn grout, consider a dedicated grout cleaning product compatible with your surface
- If the bathroom has natural stone surfaces, ensure the cleaner is pH-balanced to avoid etching or dulling
- Always perform a small test area before treating pristine finishes or colored grout
By avoiding these mistakes and following proper steps, you maximize the effectiveness of your bathroom mold remediation efforts and minimize the chance of regrowth. The Mold Removal Lab approach combines targeted spray use with moisture control for effective and lasting results.
Tools & Materials
- Mold removal spray for bathroom(Choose EPA-registered or proven bathroom-specific formula; follow label directions)
- Protective gloves (nitrile)(Non-latex if you have allergies; long sleeves preferred)
- Safety goggles(Protect eyes from splashes)
- N95 respirator or equivalent(Avoid exposure to airborne spores)
- Drop cloths or old towels(Protect floors and nearby surfaces)
- Scrub brush or non-abrasive sponge(Use soft bristles on delicate surfaces)
- Buckets and rags(For rinsing and wiping residues)
- Ventilation aid (portable fan or dehumidifier)(Reduces humidity during and after treatment)
Steps
Estimated time: 60-90 minutes
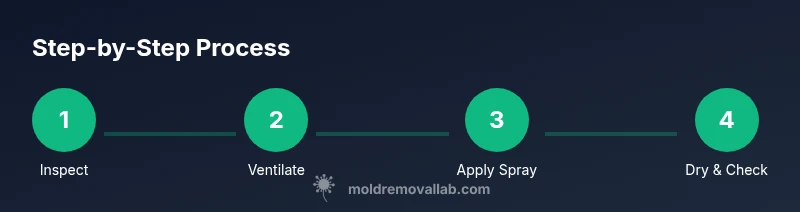
- 1
Inspect mold-affected areas
Identify all surfaces with visible mold, including grout lines, caulk seams, and any soft porous materials near water sources. Mapping helps ensure you don’t miss spots and reduces the chance of regrowth by targeting problem areas first.
Tip: Document locations with a quick note or photo to guide follow-up cleaning. - 2
Ventilate the bathroom
Open windows and run an exhaust fan to create good airflow. Adequate ventilation lowers contaminant concentration and helps the product work more effectively while protecting your breathing.
Tip: If there’s no exhaust, place a portable fan near the doorway to push air out. - 3
Apply mold spray to affected areas
Spray evenly on surfaces affected by mold, following label directions for coverage and dwell time. Avoid saturating porous materials; focus on nonporous areas first.
Tip: Keep the bottle at the recommended distance to avoid overspray on adjacent surfaces. - 4
Let the product dwell
Allow the spray to sit for the prescribed dwell time to kill mold and loosen residues. Use this wait time to clean nearby fixtures or wipe towels used for cleanup.
Tip: Do not wipe immediately; dwell time improves efficacy. - 5
Scrub and wipe away residue
Scrub treated areas gently with a brush or sponge, then wipe with a damp cloth to remove mold residues. Repeat on stubborn spots if necessary.
Tip: Use a clean cloth for each area to prevent cross-contamination. - 6
Rinse, dry, and recheck
Rinse if the product label allows and thoroughly dry surfaces. Reinspect after 24–48 hours for any new mold growth or remaining moisture.
Tip: Consider a quick moisture check in the following days to catch early regrowth.
FAQ
Is a mold removal spray safe for all bathroom surfaces?
Most bathroom sprays work on nonporous surfaces like tile and glass. Porous materials such as drywall or wood may require alternatives or professional remediation. Always test a small area first and follow the label directions.
Most bathroom sprays work on tile and glass, but porous materials may need special care or professional help. Test first and follow the label.
Should I use bleach instead of a mold spray?
Bleach can be effective on some mold in nonporous areas, but it can damage certain surfaces and fumes can be strong. Many bathroom sprays are formulated to be safer on typical bathroom finishes; choose based on surface compatibility and label guidance.
Bleach can work on some surfaces, but many sprays are safer for typical bathroom finishes. Check the label and surface compatibility.
How long should the spray dwell before wiping?
Dwell time varies by product, usually between a few minutes to 10 minutes. Do not wipe earlier than recommended and avoid letting residues dry on surfaces.
Let the product sit for the recommended dwell time, typically a few to about ten minutes, then wipe.
Can I use mold spray on fabric or caulk?
Some sprays are safe on fabrics or caulk; check the label for material compatibility. For fabric, wash any treated textiles separately after application.
Check label compatibility for fabrics or caulk. If in doubt, test a hidden spot first.
Is it safe to use around children and pets?
Follow label warnings, use PPE, and keep rooms well-ventilated during and after application. Store products out of reach of children and pets.
Use PPE, ventilate well, and store cleaners safely away from kids and pets.
Watch Video
The Essentials
- Identify all mold-affected areas before treatment
- Choose a bathroom-specific spray compatible with surfaces
- Ventilate well and wear PPE during application
- Allow dwell time, then scrub and wipe residues
- Prevent regrowth with moisture control and routine cleaning